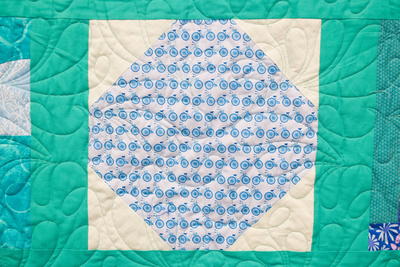
How to Make a Snowball Quilt Block
This beautiful quilt block pattern is easy to follow and great for featuring fussy cut fabrics!

Here at FaveQuilts, we love to use snowball quilt blocks when we're teaching beginners how to quilt. It's a pretty simple style of block, and the shapes are straightforward, which makes this a great one for folks who have never quilted.
This wonderful quilt block design is super easy to recreate and incorporate into your next pattern. Plus, you can mix and match tons of different colors with this pattern and still get a stunning result. If you're a fan of fussy cutting your fabrics as well, a snowball quilt block is a great way to incorporate and frame your fussy cut.
Watch the video tutorial below from our block of the month challenge to learn how to do this stunning beginner quilt block!
Watch and Learn
Materials List
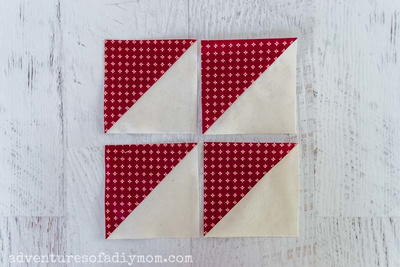
- Four 5-inch squares for your corner pieces
- One 12.5-inch square of fabric for the main square
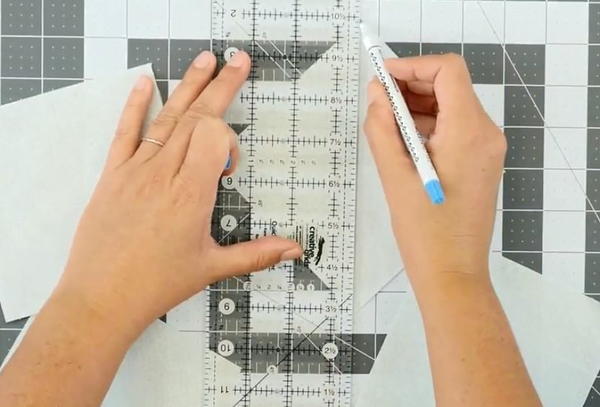
Step 1
With a ruler and a marking pen, draw a line from one corner to the opposite corner on your corner pieces.
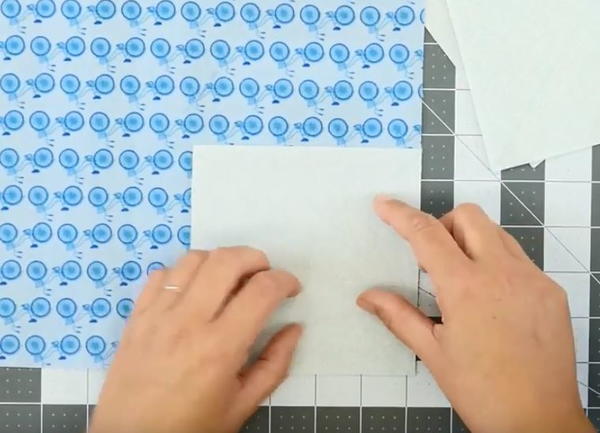
Step 2
Place your four corner squares on their corresponding corners of your larger square.
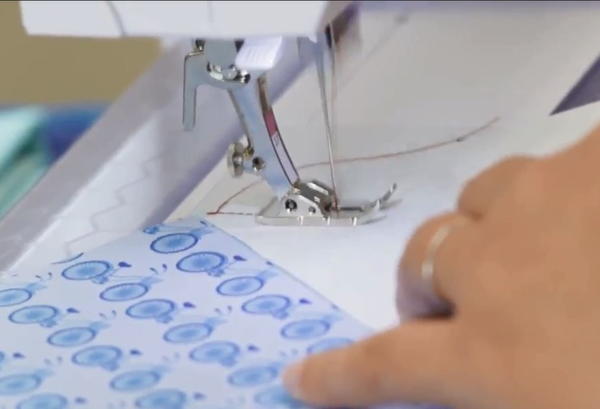
Step 3
Sew directly on the diagonal line that you drew.
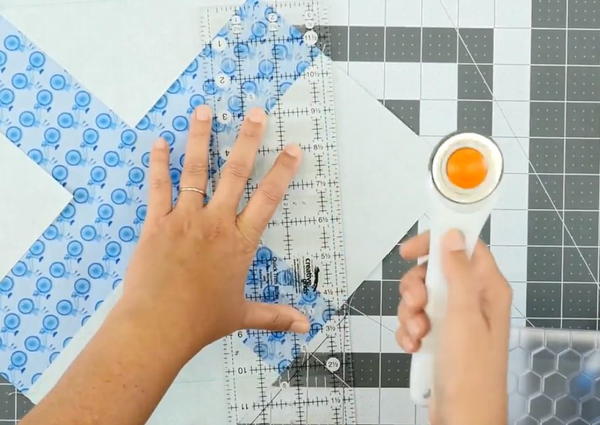
Step 4
Measure a quarter inch allowance with a ruler and, using a rotary cutter, cut away the excess fabric from the corners.
Step 5
Press your seams, and you're done!
This quilt block is a part of our 2017 Quilt Block of the Month project! Check out the other block video patterns here: