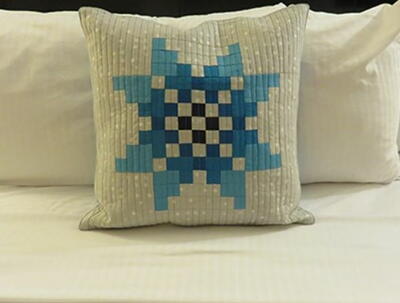
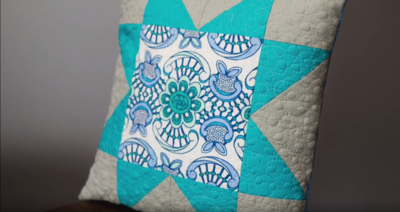
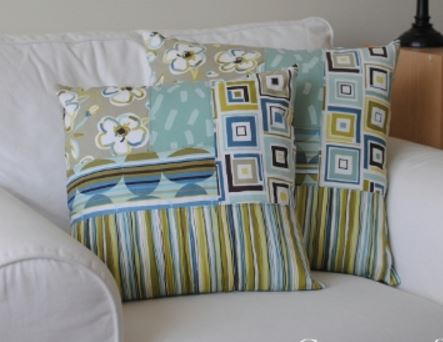
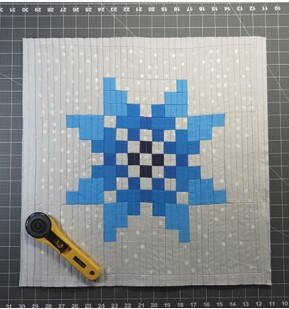
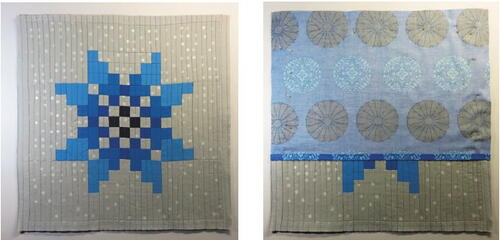
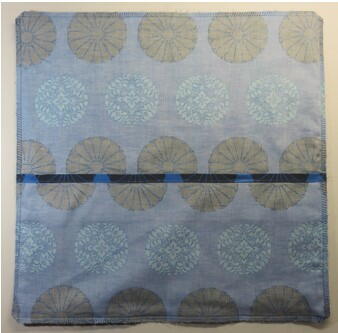
Blue December Quilted Pillow Pattern

From the Designer: "Capture the magic of a snow-filled December with this delightful quilted pillow project. Crafted with love and adorned with wintry charm, this cozy accent piece adds a touch of seasonal enchantment to your home. Let your imagination run wild as you create a quilted pillow made out of a charming snowflake quilt block. This pattern will truly embody your snowy dreams. Transform your space into a winter wonderland and make this December one to remember with this enchanting quilted pillow pattern."
SeasonWinter
Materials List
-
Janome Supplies Needed:
• Horizon Memory Craft 8900QCP Special Edition
• 1/4” Seam Foot O
• Convertible Free Motion Quilting Foot QB-S
• Dual Feed Foot Holder
• Dual Feed Foot AD
• Blue Tip Needle
• Pre-wound Bobbin
• Empty Bobbin -
Fabric/Notions Required:
• One 18” pillow form
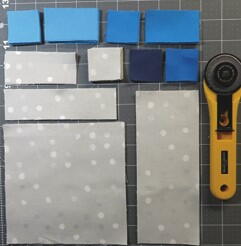
• One charm square Kona Storm (A) sub cut into (4) 1 1/2”x1 1/2” squares
• One fat quarter Kona Malibu (B) sub cut into (12) 1 1/2”x1 1/2” squares
• One fat quarter Kona Peacock (C) sub cut into (8) 1 1/2”x2 1/2” and (8) 1 1/2”x1 1/2” squares
• One fat quarter Kona Alegria (D) sub cut into (16) 1 1/2”x2 1/2” and (8) 1 1/2”x1 1/2” squares
• 1/3 yard of Low Volume Neutral (Cotton + Steel “Paper Bandana” in Paint Dot Cloud used in sample) (E) sub cut into:
- 21 1 1/2”x1 1/2” squares
- Four 1 1/2”x3 1/2”
- Four 1 1/2” x5 1/2”
- Four 3”x7 1/2”
- Four 6”x6” squares
- Two 1 1/2”x18 1/2”
- Two 1 1/2”x21”
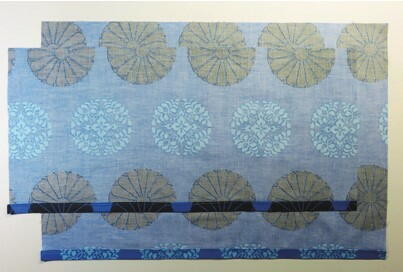
• One 1/4 yards of coordinating print/solid for envelope closure (and backing of quilted piece)
• Used Amy Butler Cameo in Pressed Flowers for sample-sub cut into:
- One 24”x24” square (this fabric will be on the interior of the pillow and will not show)
- One 19”x10”
- One 19”x14”
• One 24”x24” piece of batting-low to mid loft
• Coordinating all-purpose sewing thread for piecing, quilting and top-stitching -
Student Supplies Required:
• Iron
• Rotary cutter/ruler/mat
• Safety pins
• Spray baste (optional)
• Erasable marking pen
INSTRUCTIONS
Piecing the Pillow Top:
-
Cut fabric pieces as listed above in the supplies section. All seam allowances are a 1/4”, unless otherwise stated.
-
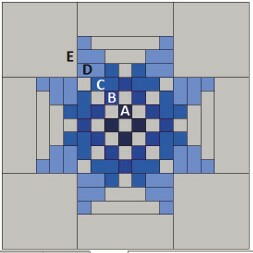
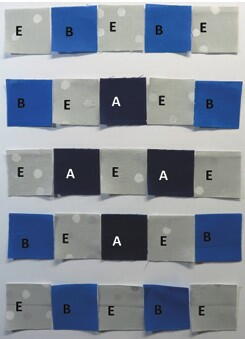
From the 1 1/2”x1 1/2” squares cut, set out 13 (E) low volumes, all 4 (A) squares and 8 of the (B) squares.
-
Place the squares in the positions below to prepare for piecing the center of the block.
-
Sew the 5 squares in each row with a 1/4” seam allowance. Prior to pressing the seams, decide if you want to press to the side or press your seams open. If you press to the side, you will need to be sure to alternate your seams so they lay flat and don’t accumulate a bulky seam. The example below has seams pressed to the side, alternating directions.
-
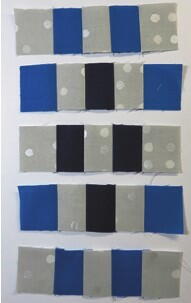
Sew the rows together with a 1/4” seam allowance.
-
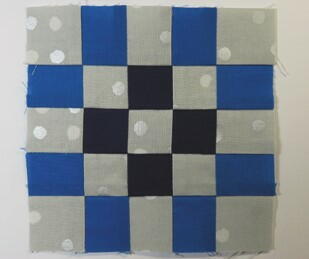
Add the side columns to your center piece. To make each side piece, sew a 2 1/2”x 1 1/2” fabric C (Peacock) to a 1 1/2”x1 1/2” fabric B (Malibu), then another 2 1/2”x1 1/2” fabric C (Peacock). Press seams, then sew to the sides of the center piece.
-
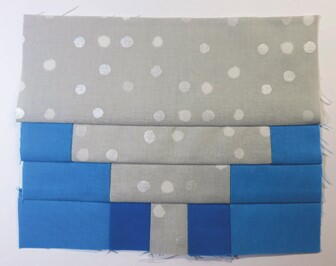
Make the top and bottom of the center piece by repeating step 6. On each end of the Malibu Peacock pieces, sew a 1 1/2”x1 1/2” square. Press seams, then attach each on to the top and bottom of the center piece. Set this aside for now.
-
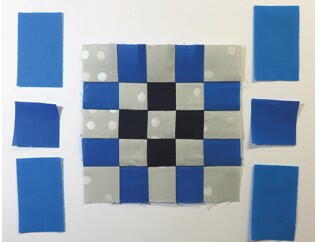
Make the middle outer pieces with the following fabrics:
- Top row: Low volume 3”x7 1/2”
- Row 2: 1 1/2”x1 1/2” fabric D (Alegria), 1 1/2”x5 1/2” Low Volume, 1 1/2”x1 1/2” fabric D (Alegria)
- Row 3: 1 1/2”x2 1/2” fabric D (Alegria), 1 1/2”x3 1/2” Low Volume, 1 1/2”x2 1/2” fabric D (Alegria)
- Row 4: 1 1/2”x2 1/2” fabric D (Alegria), 1 1/2”x1 1/2” fabric C (Peacock), 1 1/2”x1 1/2” Low Volume, 1 1/2”x1 1/2” fabric C (Peacock), 1 1/2”x2 1/2” fabric D (Alegria)
-
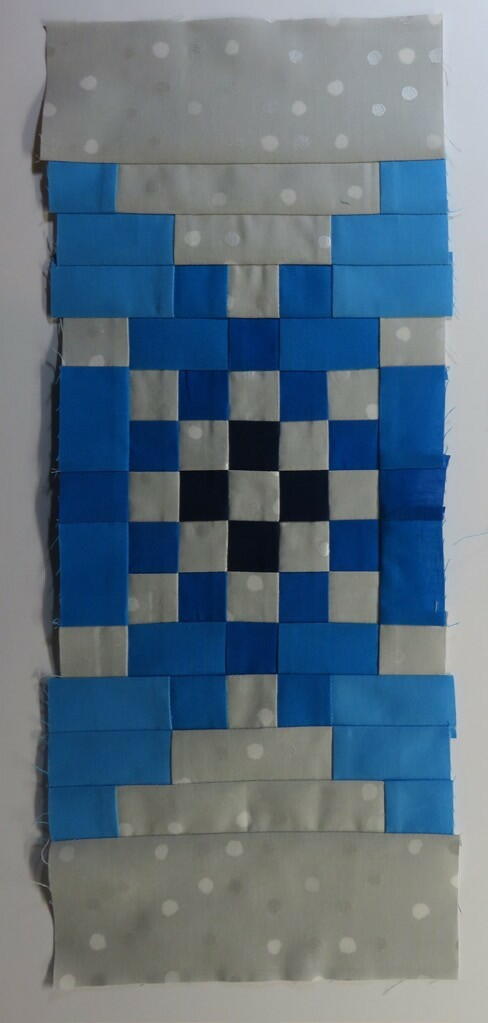
Once these rows have been pieced together, press seams and sew each row to the next, following the layout. Repeat this step 4 times to complete all of these blocks.
-
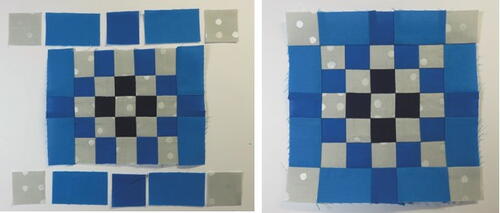
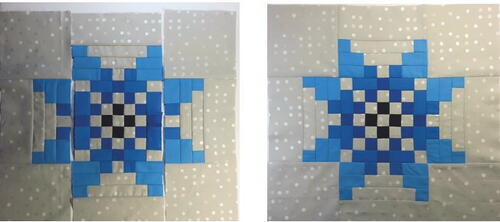
Take 2 of the blocks completed in step 8 and your center piece completed in step 7. Arrange as shown in the layout picture and sew with a 1/4” seam allowance. Press seams and set aside.
-
In order to make the side pieces of the pillow top, repeat this step to make your two finished sides.
-
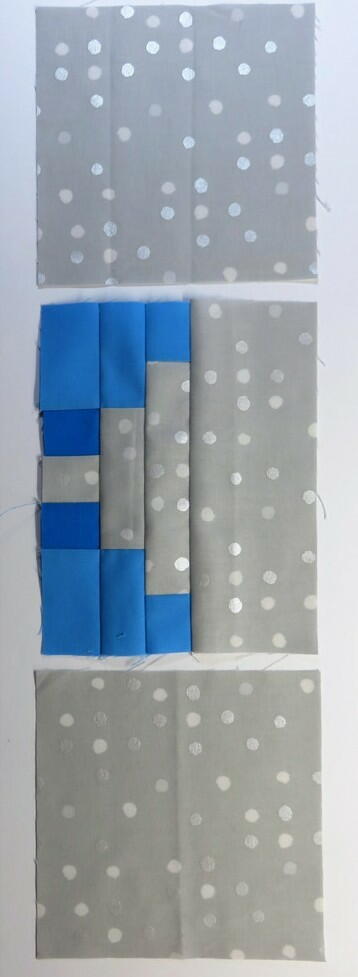
Take one 6”x6” Low Volume, then one block completed in step 8 and one 6”x6” Low Volume.
-
Sew together as shown in the layout and press seams.
-
Place the completed pieces from step 10 on both sides of the middle of your pillow form step 9. Sew together with a 1/4” seam allowance. Press the seams.
-
Now add a small border to the pillow top. On the left and right sides of the block, sew one 1 1/2”x18 1/2” Low Volume strip to each side. Press the seams.
-
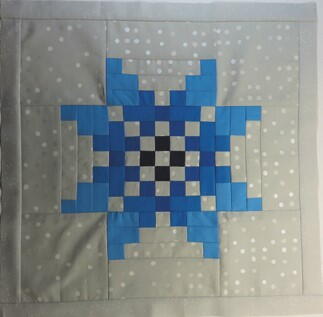
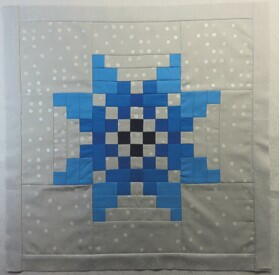
On the top and bottom edges of the block, sew 1 1/2”x21” strips to each edge. Press the seams. This will be your completed pillow top.
Quilting:
-
Place the 24”x24” square of backing fabric, wrong side up, on a flat surface. (Remember, this fabric won’t show when the pillow is complete. It will be on the lining side.) Smooth your 24”x24” piece of batting on top of this. Lay your finished pillow top right side up on top of the smoothed batting.
-
Smooth out any wrinkles or lumps and baste in place with safety pins or spray baste.
-
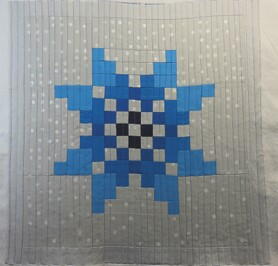
Quilt as desired. This is quilted in 1/2” straight lines with the Janome Dual feet foot. If you choose to free motion quilt, you will need the Janome Convertible Free Motion Quilting Foot.
-
Trim and square up from the center of the block so the quilted piece measures 19”x19”.
Assembling the Pillow:
-
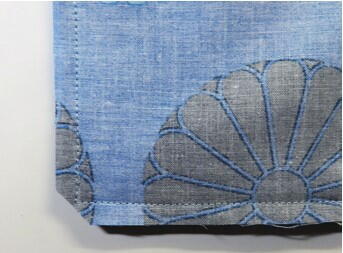
Assemble your cut envelope pieces for the back of the pillow, one 19”x10” and one 19”x14”. On one 19” long edge of each of the envelope pieces, press 1/2” up, then press 1/2” up again to make a 1/2” hem. Topstitch the edges.
-
Place the quilted pillow front right side up on a flat surface. Take the hemmed 19”x14” envelope piece and place the 19” raw edge even with the top of the quilted piece. Align the side raw edges as well. The 19” hemmed edge will be parallel to the top and bottom of the quilted piece, a little past the middle of the pillow top. Pin in place.
-
Take the hemmed 19”x10” envelope piece and place the 19” raw edge even with the bottom raw edge of the quilted piece. Align the side raw edges as well. The hems of the envelope pieces will overlap. Pin in place.
-
Sew with a 1/4” seam allowance all the way around the pillow edges, being careful not to sew through pins. Clip the corners, being careful not to clip your stitches.
-
Serge the raw edges or use a zig zag stitch (stitch #11).
-
Turn your pillow case right side out, carefully pushing the corners out so they have a crisp point. Press flat and topstitch the outer edge all the way around.
-
Carefully put the pillow form inside the pillow case and enjoy.
-
Your project is finished! If you love this tutorial, be sure to check out Janome.com for even more inspiration.

Read NextHow to Make a Quilted Pillow Cover