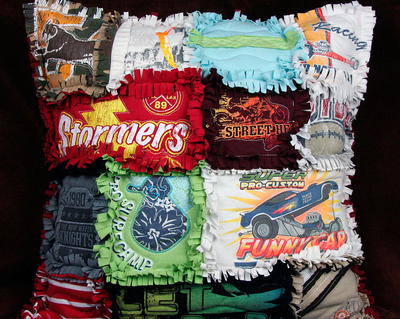
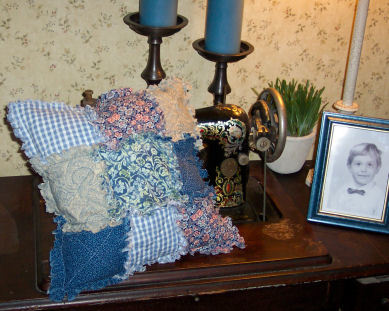
Upcycled Rag Quilt DIY Pillow

Are you a beginner quilter looking for an easy quilting project? Are you searching for a way to refashion all of your old t-shirts? Look no further! Try making this Upcycled Rag Quilt DIY Pillow. This tutorial is a fun and original way to spruce up your home decor. Try sewing this unique DIY dorm decor project for the college-bound student in your life as a gift that they will love!
Project TypeMake a Project
Time to CompleteIn an evening
Primary TechniqueQuilting

Materials List
- Coastal Colors Acrylic Ruler (3" x 18")
- Cutting Mat (24" x 36")
- Non-stick Scissors (8")
- Non-stick Detail Scissors (No. 5)
- Pillow form (20 inches square)
- Quilt Batting
- Several t-shirts
If you loved this quilted pillow project, then you will love these 15+ more pillow patterns!
Instructions:
-
Choose a pillow form (20 inches square) and draw a grid on paper to plan out the design. You can do a basic 9 piece grid or you can design different sized patches for a more unique arrangement – this one has 13 patches of various sizes arranged in 4 rows.
-
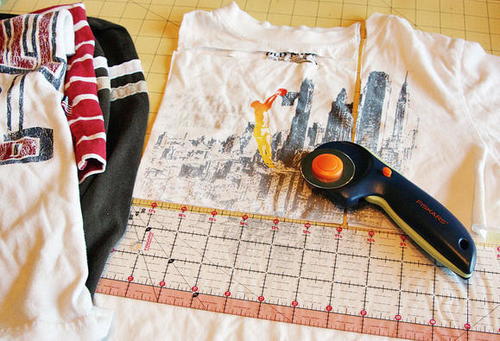
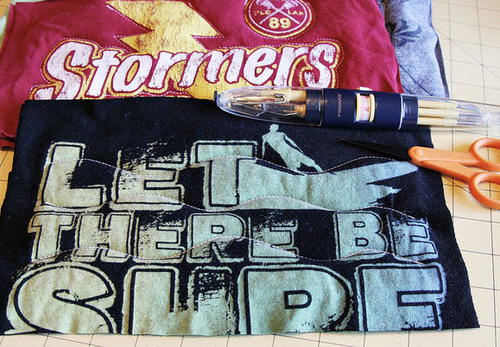
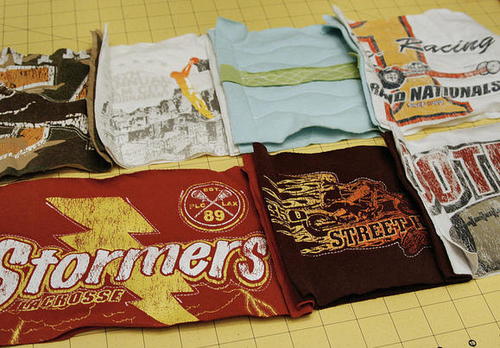
Choose 12-14 t-shirts that you would repurpose to create a fun pillow.
-
Once you determine the size of the patches for your pillow, add 2 inches to each fabric patch. For example, for the 5 inch squares, cut the fabric into 7 inch squares (front and back pieces). This will give a 1 inch border to fringe on each side of each patch.
-
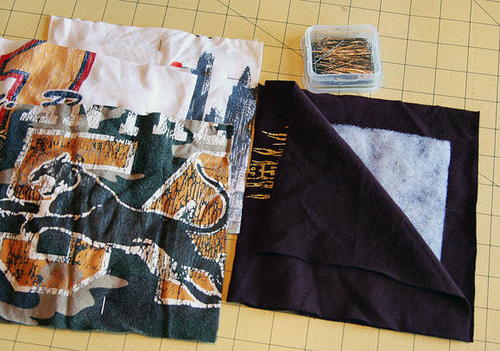
Now cut each piece of batting to the original patch size in your design– 5 inch square batting for the 7 inch fabric squares. Sandwich the batting in the center of the 2 fabric pieces for each patch. Pin the squares and batting in place.
-
Next, quilt each patch as you wish. You can do a simple X in the center of each patch or outline designs on the fabric or stitch waves and other designs. Be sure that the quilt stitching stays within 1 inch from the border on all sides. Thread loose thread ends to the back of the patches and trim off excess.
-
Once all the patches are sandwiched and quilted, start joining them to create rows. Place back sides together and pin edges to prepare for a 1 inch seam. Stitch along the edge leaving a 1 inch space at each end. Remember, the seams will show on the top side so that it can later be fringed for that rag quilt effect. Build the row by adding each patch one at a time.
-
When you’ve completed each row for your pillow, start joining the rows together. Again, position them with back sides together, pin and stitch across—this stitching will meet with the seam stitching you did earlier when creating rows.
-
From other fabric cut a back for the pillow to the same size as the front piece. Or if you want both sides of the pillow to be rag quilted, then you can repeat the process for the back as well.
-
Next, pin them together (right sides out) and stitch a 1 inch seam around the outside, leaving an opening on one side (the bottom) that will be large enough to fit the pillow form.
-
Put the pillow form inside the quilted pillow and pin the opening closed. Stitch this closed.
-
To give the pillow the “rag” effect, use a sharp pair of scissors/shears and fringe the seams around each patch as well as the outside edge. Take your time and avoid getting too close to the seam stitching.
-
When you’re done fringing the seams, shake out any excess lint, fluff up the fringes and the pillow is ready to enjoy!

Read NextQuarter Log Cabin Pillow Covers