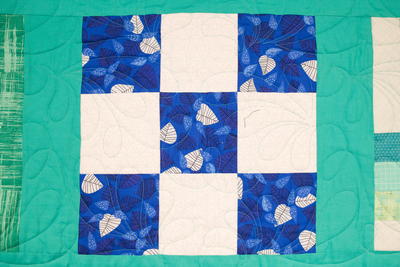
Celtic Square Block Pattern

Finally! You have made it to the final quilt block pattern in this 12-month quilt along series. This Celtic Square Block Pattern is the perfect way to finish up creating your quilt.
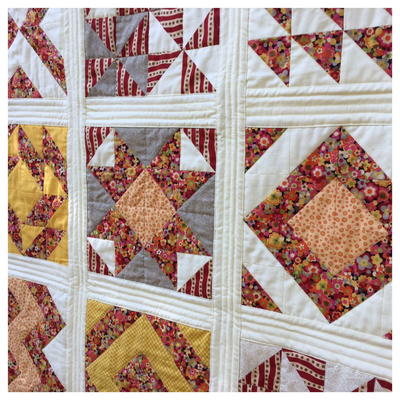
This is the perfect 12th block to add a stunning and special touch to your quilt. Now, you can arrange and rearrange all the different blocks in all different orders until your quilt is exactly how you would like it. Plus, this is a great quilt block pattern to learn how to make because it can be used in so many different quilts you make in the future!
Time to CompleteIn an evening

Pattern
Cutting Instructions:
Fabric A
2 - 1 ½" x 9"
1 - 1 ½" x 22"
Fabric B
1 - 1 ½" x 9"
1 - 1 ½" x 20"
1 - 1 ½" x 6"
2 - 1 ½" x 2 ½"
Background
1 - 2" x 9"
1 - 2" x 15"
1 - 4 ½" x 9"
1 - 3" x 6"
1 - 2" x 6"
1 - 2 ½" x 7 ½"
2 - 2" x 2 ½"
Pattern
-
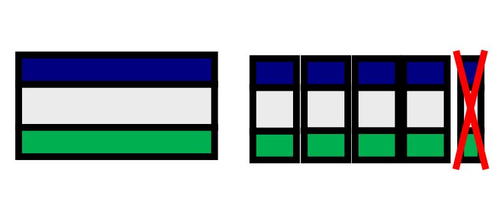
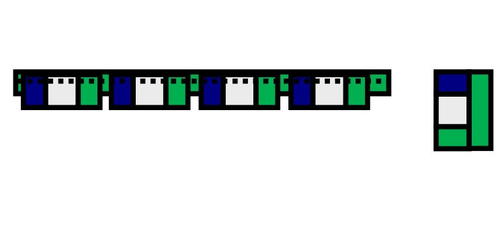
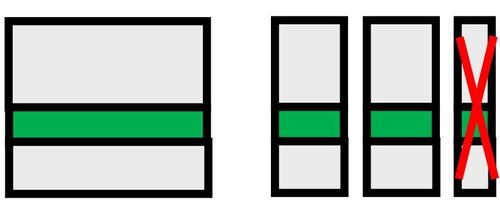
Collect a 1 ½" x 9" strip of Fabric A and Fabric B, and a 2"x9" strip of Background. Stitch together as shown, using a ¼" seam allowance. Press open. Cut into strips, you'll need 4 strips, each 2" wide. You will have about 1" of remnant. Throw this away.
-
Chain-stitch the segments to a 1 ½" x 20" strip of Fabric B as shown. Trim and press. You will have 4 units.
-
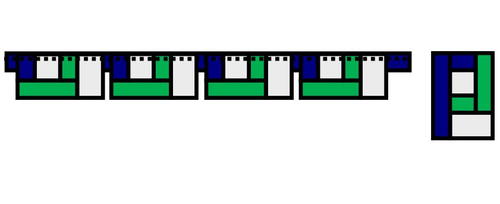
Chain-stitch the segments to a 2" strip of Background as shown. Trim and press. You will have 4 units.
-
Chain-stitch the segments to a 1 ½" x 22" strip of Fabric A, as shown. Trim and press. Set aside.
-
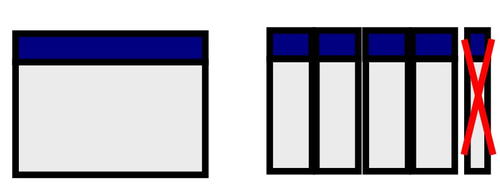
Collect a 1 ½" x 9" strip of Fabric A and a 4 ½" x 9" strip of Background. Stitch together as shown. Cut into strips, you'll need 4 strips, each 2" wide. You will have about 1" of remnant. Throw this away.
-
Stitch the units you just made to the units you set aside as shown. These are the four corner units.
-
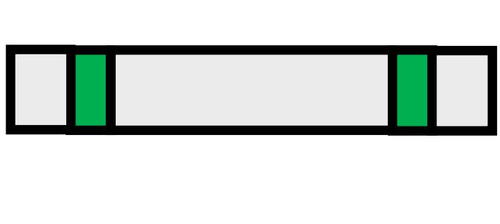
Collect a 1 ½" x 6" strip of Fabric B, 3" x 6" strip of Background, and 2"x6" strip of Background. Stitch together as shown. Cut into strips, you'll need 2 strips, each 2 ½" wide. You will have about 1" of remnant. Throw this away.
-
Stitch one corner unit on either side of these strips, as shown. These are the sides.
-
Stitch together the 2 ½" x 7 ½" Background strip, the 2—2 ½" x 1 ½" Fabric B pieces, and 2—2" x 2 ½" Background pieces, as shown. This is the center.
-
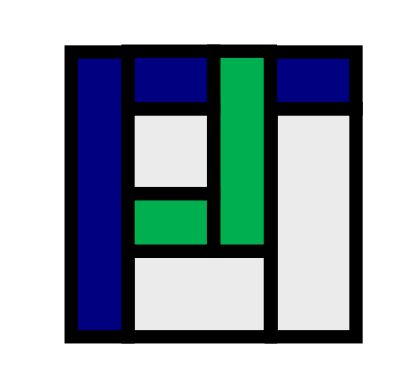
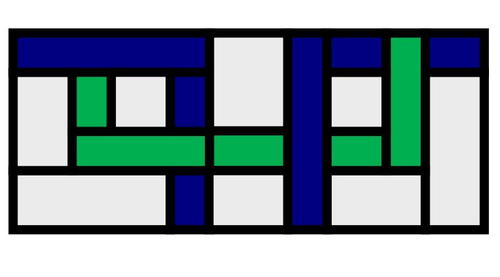
Stitch one side to each side of the center. Your block is complete!

Up Next:
Read NextPurple Jam Quilt
Your Recently Viewed Projects

Thanks for your comment. Don't forget to share!
debi
Jul 29, 2018
Love your video. you are great keep making tutorials. you are easy to understand and follow! thank you.
Report Inappropriate Comment
Are you sure you would like to report this comment? It will be flagged for our moderators to take action.
Thank you for taking the time to improve the content on our site.