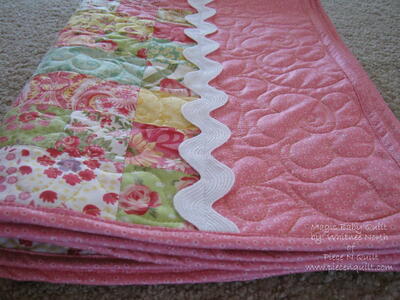
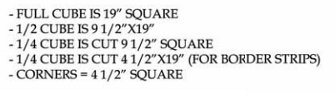
Baby Steps Cuddle Quilt
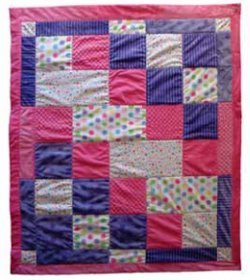
You'll love to make this snuggly baby quilt pattern for the little ones in your life. The Baby Steps Cuddle Quilt is constructed with a few simple squares and rectangles of plush fabric, but has an adorable stair step pattern. The best part is that you can put it together in just a few days!
Project TypeMake a Project
Quilt Size60 inches wide x 72 inches long
Time to CompleteWeekend project
Primary TechniquePieced

MATERIALS:
- 1 Cuddle Cube from Shannon Fabrics -- (12) 19”x 19” squares of Cuddle fabric
- 60”x 72” piece of batting (Warm Bond is preferred -- it is lightweight, easy to quilt, and fills in the piecing effectively. Warm and Natural and Hobbs 80/20 will be heavier and stiffer but will also work).
- 2 yards of Cuddle fabric from Shannon Fabrics for backing
- Thread
- #90/14 needle
-
Walking foot
-
Rotary cutter with fresh blade
-
24” ruler and 12” square will make cutting and trimming easier
-
straight pins for pin basting
-
Hand vacuum for cleaning up “cuddle dust”
INSTRUCTIONS:
General Tips:
- Use a consistent 3/8” to 1/2” seam allowance. **move needle position over two places and use the outside of walking foot for a guide so feed dogs can work efficiently.
- Cuddle fabric is a knit. You will be piecing different textures and fiber lengths together. If you cut your pieces carefully and pin often, your seams will match. (Be sure to remove pins as you come to them, do not sew over pins.) All seams need to be open to prevent bulky and distorted corners and seam allowances.
- You WILL NOT be pressing any seams on this quilt.
- Check seams occasionally to be sure they are not gathering or stretching
- Lengthen your stitch slightly. Do not stretch or force the fabric through, let your feed dogs do the work.
- Do not expect the top to lay perfectly flat. Warm Bond fills in the excess and is lightweight and easy to quilt. If you pin your quilt to a design wall, the bottom will not hang straight. This is corrected when you pin the layers together so don’t be concerned.
- Be consistent with your seam allowances. You will have to trim to fit any time you sew a piece without a seam to a set with a seam. I have tried to keep it very simple and easy to do. All of your trimming can be done at the same time once you have determined your seam size.
- Different fiber lengths, direction of nap, and textures will affect sewing precision. If you need to ease pieces together, remember big goes on the bottom so the feed dogs can evenly ease the fullness.
Sewing Directions:
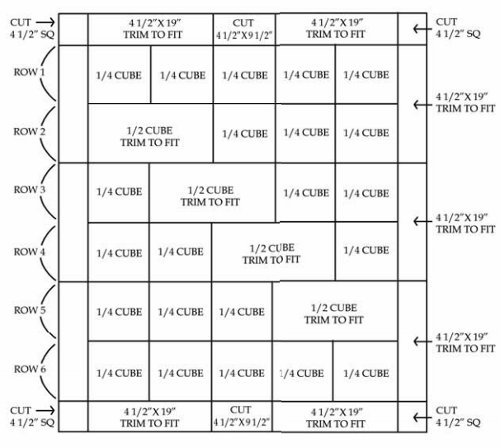
-
Sew row 1 block one and two together and measure. This is the size to trim all 1/2 cube trim to fit pieces.
-
Sew row 1 (5) blocks together left to right.
-
Sew row 2 (4) blocks together left to right.
-
Sew row 1 to row 2 from left to right.
-
Sew row 3 (4) blocks together from left to right.
-
Sew row 4 (4) blocks together from left to right.
-
Sew row 3 to row 4 from left to right.
-
Sew row 5 (4) blocks together from left to right.
-
Sew row 6 (5) blocks together from left to right.
-
Sew row 5 to row 6 together from left to right.
-
Sew row set 1-2 to row set 3-4 from right to left (reversing the order will keep the quilt square).
-
Sew row set 5-6 to row set 3-4 from right to left.
-
Sew side border strips together from right to left after trimming to fit.
-
Sew corner squares and top border strips together after trimming to fit.
- Sew top and bottom borders to finish quilt top.
Pin Basting:
- Backing and batting will be larger than your top. Center backing wrong side up on table. Do not stretch but clamp or tape in place. Layer batting on top. Center quilt top on top of layers.
- Yes, it needs to be squared up! Starting with the first long seam line stretch it out so it is square with the edge of the table. You can check this with a ruler or t-square.
- Keep measuring and straightening the seams, using quilting straight pins across the seam line to hold layers together. Flower topped long straight pins work best -- the flower tops will not get lost in the nap, so you won't accidentally sew over them. I pin next to each corner and two or three pins between. This is the only time I pin where I am going to be quilting. Safety pins do not work for this basting process.
Quilting:
Use an elongated serpentine stitch or a large zigzag stitch. Remember, the quilt is knit, so it will stretch, and straight lines of quilting may pop. Free motion quilting an easy wavy line over the seams is another option.
Binding Options:
Make use of the 60” wide backing. Measure the width of the sides of the backing after quilting. Trim the sides to the same width. The bottom can match the sides or be larger. You may also choose to have a larger binding at the top. Trim the batting and backing to the same size. Decide if you want to fold the batting in half and bring the backing over the top, pinning to the top of the quilt 1/2 “ in from the edge. This will make a thicker binding. Or you can trim to half the depth of your backing and fold the backing over and topstitch. The batting will fill in the backing you fold over and your quilt can be larger than the finished top without having to add an additional border. Miter corners and topstitch backing in place.
-
You can use a pinking or wave blade to cut the backing and stitch in place without turning the edges under. The edge will not fray and the nap covers the edge.
-
If you are using a longer fiber for the backing, it works best to use a raw edge for a stitching guide -- you may only catch the fibers and have to go back and stitch again.
-
Or fold a 1/2” edge under, use the straight edge as your stitching guide, and use the serpentine stitch -- binding will be smaller and thicker.
- If you choose to do a traditional binding, cut your strips 2” wide and use as a single layer to allow for bulk of nap. Apply to back or front of quilt, bring around to opposite side, and use serpentine stitch to topstitch.
Find more projects and tutorials from Shannon Fabrics.
This project is on our list of the 12 Most Popular Free Quilt Patterns of April 2012!
Why You'll Love This Quilt
Hello fellow quilters! We are so excited to introduce you to the Baby Steps Cuddle Quilt pattern. This adorable quilt is perfect for the little ones in your life, and we have compiled a list of the top three reasons why you should make this project:
1. Quick and Easy Construction: The Baby Steps Cuddle Quilt is constructed with just a few simple squares and rectangles of plush fabric. This means that even beginner quilters can tackle this project with ease. Plus, because of its simple design, you can put this quilt together in just a few days. It's the perfect project for when you need a quick and satisfying finish.
2. Adorable Stair Step Pattern: The stair step pattern of the Baby Steps Cuddle Quilt adds an extra dose of cuteness to this project. The pattern creates a fun and playful aesthetic that is sure to catch the eye of both kids and adults alike. This quilt is not only functional but also a charming addition to any nursery or playroom.
3. Snuggly and Soft: One of the best things about the Baby Steps Cuddle Quilt is the plush fabric used to create it. This quilt is designed to be snuggly and soft, making it the perfect blanket for a little one to cuddle up with. The cozy fabric will keep them warm and comfortable, making it a go-to quilt for nap time or bedtime.
So there you have it, three compelling reasons why you should make the Baby Steps Cuddle Quilt. With its quick construction, adorable pattern, and cozy fabric, this project is a must-try for any quilter looking to create something special for a little one. Happy quilting!
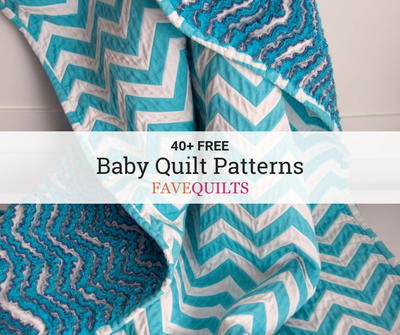
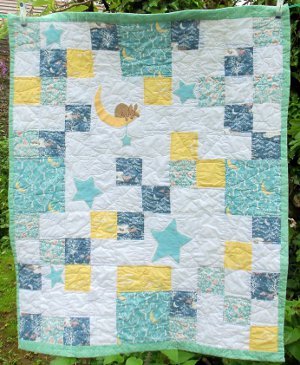
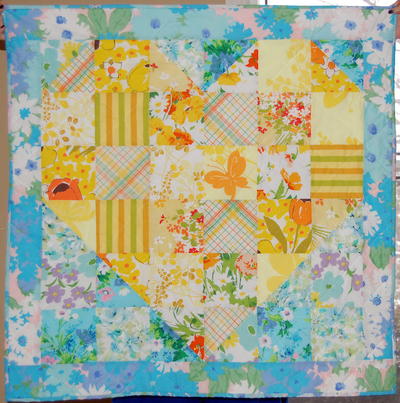
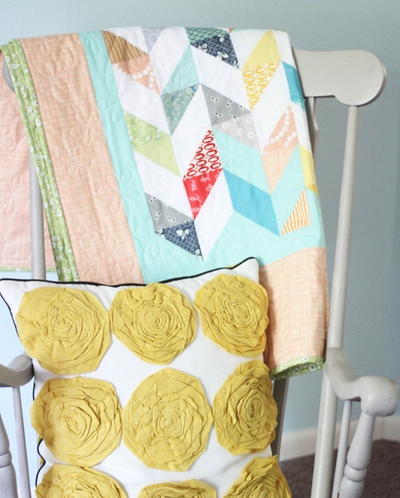
Read Next40+ Free Baby Quilt Patterns
Your Recently Viewed Projects
Thanks for your comment. Don't forget to share!
Cat Sultan
Jan 09, 2013
This is really poorly done in my opinion. The quilting is bad and the blocks are all baggy. It uses barely any variety of prints or colors. Not much to look at here.
Report Inappropriate Comment
Are you sure you would like to report this comment? It will be flagged for our moderators to take action.
Thank you for taking the time to improve the content on our site.