Easy Stroller Quilt Pattern
Looking for a foolproof way to keep your kiddo warm during winter walks? This stroller quilt pattern is a genius idea that ensures your little is cozy and warm without the trouble of falling blankets or muddy boots!
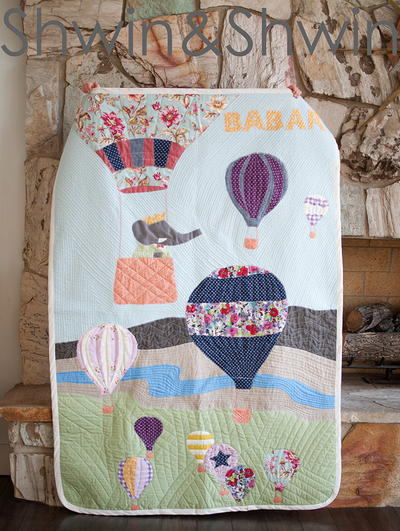
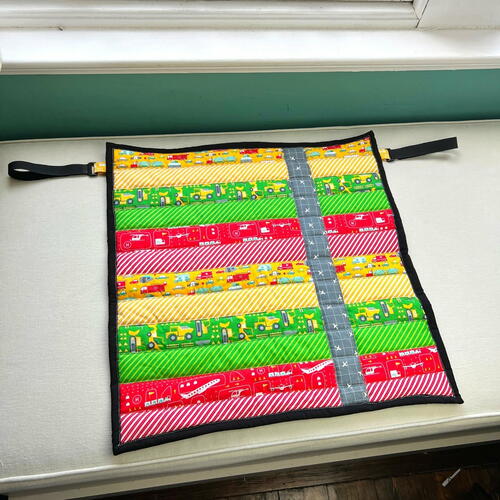
From the Designer: "This pattern will show you how to make a quick and easy Stroller Quilt. This is a very small quilt that I made for my son who is 3, but still too young to reliably walk everywhere. He gets cold so I wanted something I could attach to the stroller, but I didn’t want a cozy toes type thing (the fleece sleeping back looking things that you attach to a stroller over the seat that covers their feet). He is always getting his boots and shoes mucky so I wanted a quilt that would cover him from roughly mid-chest to ankle and not drape down over his shoes! I made my stroller quilt using 7 jelly roll strips and some fleece for the backing. This was a super quick and easy to make project and he loves it!"
Find more pretty patterns from our friend Kristen over at her blog, ScrapFabricLove.com!
Click Here to Download the PDF Pattern!
Join Our 100,000+ Fans And Sign Up to Receive Your FREE eNewsletter!
Fabric Requirements
- 7 Jelly Roll Strips (or 7 2.5” fabric strips)
- 3-4 Extra jelly roll strips for binding
- 24” square High loft batting (min amount)
- 24” square Fleece fabric for backing (min amount)
- Coordinating thread
Note: Fabric strips should be at a standard width of fabric (WOF) – 44”

Quilting Directions
Step 1: Sew your first 6 Strips

Once you have picked your fabric (I used 7 strips from the Moda Fabrics ‘On the Go’ range – I got them in a Moda Scrap Bag for Christmas!) arrange them in the order you want them on your quilt from top to bottom.
If you are using directional fabric make sure to pay attention to which end is the top and which is the bottom of your quilt.
Sew the top strip to the second strip right sides together along the long edge.
Repeat sewing the second strip to the third and so on until all 6 of your strips are sewn together.

Iron your seams open at the back.
Once pressed your strip set should be 12” high.
Step 2: Slice your Strips!

Fold your strip set piece together short ends to short ends and cut down the middle.
One piece will be the bottom half of your quilt and the other piece will be the top.
Decide which is which and take both pieces to the machine and sew the top of the bottom half to the bottom of the top half right sides to right sides as if you were adding another strip to the set you made earlier.
Step 3: Slice your Strips Again!

When you have this base piece of strips assembled you are going to cut it in to two pieces vertically.
Before you do this trim off any selvedge ends on your strip set. You may have done this before you started but I left it until this stage! So, if you haven’t done it – do it now.
Then cut yours trip set in two 6.5” from the right-hand side.
I cut mine at the xx mark – so approximately ¾ of the way across.
Step 4: Sew in the Accent Strip

I picked a grey and white jelly roll strip with planes on it as an accent strip for the brighter red, green and blue transport design strips in the main part of the quilt top.
Sew your accent strip right sides to right sides to the largest piece of your quilt top so that the strip crosses each of your previously sewn seams.
Press seams to one side or open as desired.

Next you will need to line up the shorter piece right sides to rights ides on top of the accent strip and pin to ensure that you are lining up with the larger piece on the other side.
The shorter piece should still be long enough that it will lay on top of your other strips so use them as a guide so that it looks like the accent strip was sewn on top of your main strips instead of in between.
Press as desired.
Your finished quilt top should be 22”wide and 22” long.
A little smaller in width is also fine depending on the age and size of the child you are making it for as you will have the added adjustment capabilities of the velcro (see below) but you wouldn’t want to go much bigger for a standard stroller.
Step 5: Baste & Quilt
I used a high loft polyester batting for this because I like puffy quilts – especially for my son.
I pieced together some batting leftovers to form a piece that was big enough. You need a minimum of 2” bigger than your quilt top as things can sometimes shift when you quilt and you don’t want to be cut short at the edges.
So in this case you want your batting to be 24” square at a minimum. Mine was a bit bigger which is fine too as you will trim it down after quilting.
I backed my stroller quilt with grey fleece – again pieced from leftovers from another project – in fact this is a great quilt for leftovers in general because it is so small!
If you aren’t sure about quilting with fleece check out my post all about my first adventures quilting with fleece backings (which I now love to do!).
Again I cut my backing larger than my quilt top – at a minimum you need that 2” extra on every side but a little more is never a bad idea just in case!
I quilted straight lines either side of the ditch along each strip to keep the quilt super soft and puffy.
Step 6: Attach the Velcro Straps
Once your quilt is quilted as desired, trim all your sides down to your finished size.
You should be able to trim it to 22” x 22”.
Take a 8”length of jelly roll strip and sew it in half at the raw edges – wrong sides to wrong sides.


Press the seam open so that you have a back side and a good side to your strip (where you can see the jelly roll fabric design and not the seam!).
Cut this in half so you have two 4“ strips. (Approximately – no big deal if it’s a little less or a little more!).
I used these velcro straps (that are usually used as cable tidies) for my stroller attachments.
Put the 4” strip through the plastic loop with the seam side against the fabric loop (so you are essentially folding the 4” strip in half to make a fabric loop). This will attach your velcro strap to your quilt.

Pin with the raw edge of your fabric loop to the raw edge of your quilt on either side roughly 2” from the top.
Step 7: Bind your quilt to attach your Velcro Straps
I used plain black 2.5” binding to finish it off.
I bound my quilt by machine. I sewed my binding on to the back first which secured the fabric loops that held the velcro straps.

When I then also machine sewed the binding to the front there is a second line of stitching that went over the fabric loop again making it extra secure.
If you prefer to finish your binding by hand, consider also adding another line of stitching to your loops on the back as well.
Step 8: Attach to your Stroller
To attach the Stroller Quilt simply open the velcro loop and feed it around the side bars of the stroller. I found it was at the best height when I fed it through slightly above the join for the stroller hood, but you can adjust it to the height of your child.

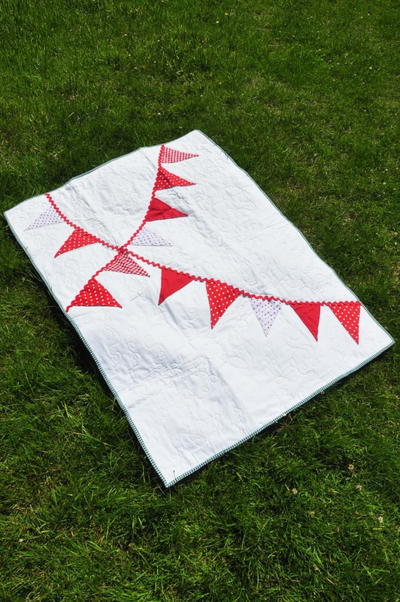
My finished quilt was 22” square not counting the Velcro straps.
I loved making this cute little quilt and it is one of the most often used and most frequently admired quilts I’ve made as it goes out and about with us.
I think these would make great quick and easy gift ideas for grand children who have grown out of their baby quilts or even a great newborn gift that can transition from pram to stroller with the child.
I would love to see your finished Stroller Quilts – feel free to tag me on Instagram @scrapfabriclove or send me an email at hello@scrapfabriclove.com
Happy Quilting!


Have you ever made a stroller quilt before?
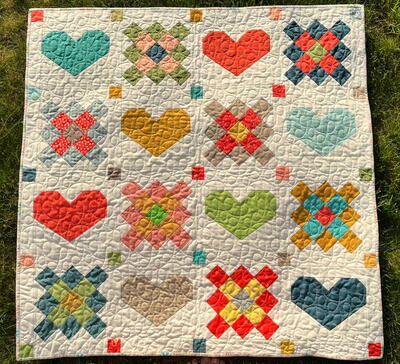
Read NextGranny Love Quilt Pattern