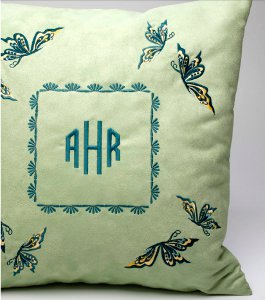
Emerald Embroidery Pillow
Use the Janome MC9900 to add the most elegant of all designs for pillows you'll find in the Emerald Embroidery Pillow. Discover how easy it can be to use machine embroidery patterns while sewing pillows for your home. If you've ever thought about adding embroidery machine quilt designs to your own patterns, there's no better tutorial to start practicing with. These pillow designs are absolutely perfect for spring or for any room in your home needing a little touch of beauty.
Janome Supplies:
- MC9900
- A foot (9mm)
- P foot
- Janome Embroidery Thread
- Janome pre-wound bobbins
- Janome Blue Tip needle
- Clothsette (optional accessory)
Fabric and Notions:
- 5/8 yd decorator weight microfiber
- 18" down filled pillow form
- All purpose thread to match fabric
- Tear away stabilizer (such as Jenny Haskins Tearaway Magic)
- Hand sewing needle
- Quilter's chalk pencil
- Clear template plastic
Instructions:
-
Cut two 18 1/2" squares for the pillow front and back. Mark the center of the pillow.
-
Set up the MC9900 for professional style embroidery with embroidery thread on top and with bobbin thread in the bobbin.
-
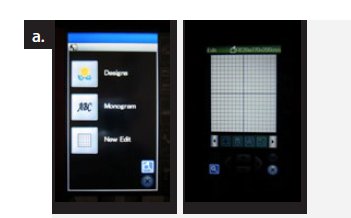
Select New Edit. [fig. a]
-
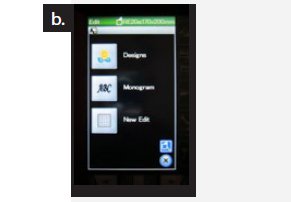
Select Home. Select Monogram. [fig. b]
-
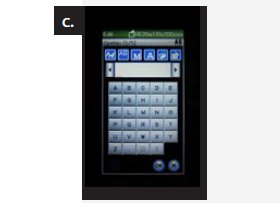
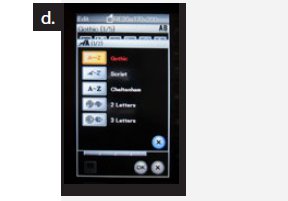
Press Font. [fig. c] Select 3 Letter Monogram. [fig. d]
-
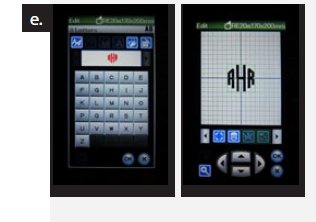
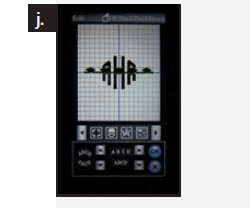
Using the key pad, type in the desired monogram. Press OK. [fig. e]
-
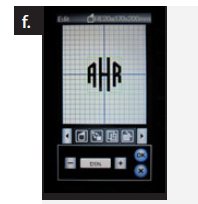
From the Edit bar, locate Resize. Adjust the size to 120%. [fig. f]
-
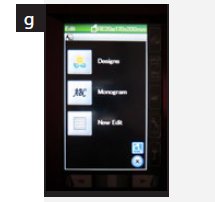
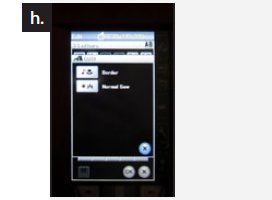
Select Home. Select Monogram. [fig. g] Press Font. Page forward and select Normal Sew. [fig. h]
-
Page forward and select Stitch #5, Row 1. Press the stitch 5 times. Press Ok. [fig. I]

-
The design will appear on the Edit Screen. Locate the Monogram Edit button on the edit bar. Press the button. There are two sets of arrows on the screen. The first set of arrows creates arcs and circles, and the second set of arrows is used to adjust the spacing. Press the up arrow once to adjust the spacing.
-
From the Edit bar, locate Duplicate.
-
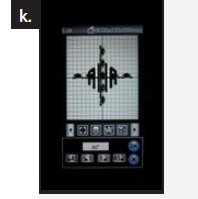
Locate Rotate, and rotate the design 90°. Press OK. [fig. k]
-
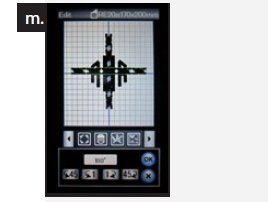
Duplicate, and rotate 90°, counterclockwise. [fig. m]
-
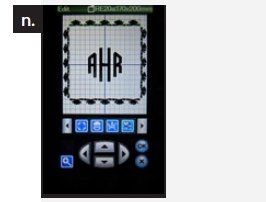
All of the designs are clustered at the middle of the edit screen. One at a time, move the rows to form a frame around the monogram. [fig. n]
-
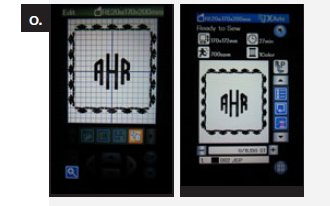
The final step is to set the order of stitching. This button looks like three pages, numbered 1,2,3. Press the button to activate. Touch the monogram and then each of the Normal Sew rows one at a time going clockwise. Press the Order button again to deactivate. Press OK. [fig. o]
-
Microfiber fabrics should not be hooped with the stabilizer, since this might make hoop marks that cannot be removed. Instead, hoop the stabilizer and secure the hoop to the machine. Mark the center of the pillow front, and place it over the hoop with the center mark centered under the needle. Press Baste and press the second button to baste the fabric to the stabilizer in the hoop.
-
Complete the embroidery, and them remove the hoop from the machine. Snip the basting threads and then tear away the excess stabilizer. Press the finished embroidery from the wrong side.
-
The CD included with the MC9900 has a collection of templates for perfect placement. The sample pillow uses a design from Favorite Designs SQ14A, #2. Print the matching template. The template can be printed on transparency film or on vellum for easier placement.
-
Position the template so that the crosshair is 1 1/2" from corner of the monogram frame. Mark the position of the crosshairs. Repeat for each corner.
-
Hoop the stabilizer and place the hoop secured to the clothsetter. Position the pillow front over the hoop so that the crosshairs of the clothsetter match the crosshairs of the first corner. Pin the fabric in place with a pin or two to hold it in position. Secure the hoop to the MC9900.

-
Baste the layers. Remove the pins. Embroider the butterflies (Colours 1 through 9), omitting the flowers. When the embroidery is complete, remove the hoop from the machine and remove the fabric from the hoop. Repeat the embroidery for each corner. Remove excess stabilzer and press the embroidery from the wrong side.
- To complete the pillow, sew the pillow front and back together with a 1/2" seam, leaving a 6" opening on one side for turning. Trim the corners of the pillow form into the corners of the pillow. Fold under the opening and pin in place with the folded edges matching. Hand sew the opening closed.