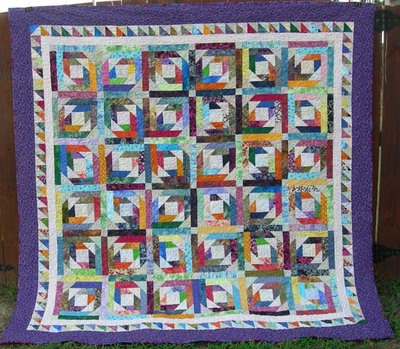
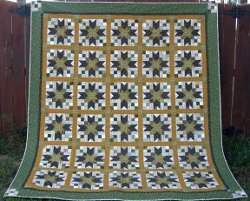
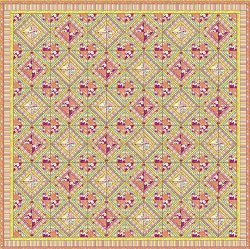
Dreamy Lattice Quilt

The Dreamy Lattice Quilt is a string quilt pattern made with fabrics from the Sugar collection by Art Gallery Fabrics. The diagonal string blocks create a beautiful lattice pattern when they are pieced together for the quilt top. Learn the secret behind making a quilting classic with one of the most popular free bed quilt patterns. All of your quilt block patterns will look so elegant, giving any room you put this in a prim, traditional feel.
Project TypeMake a Project
Quilt Size80 inches wide x 80 inches long
Time to CompleteA month or more
Primary TechniquePieced

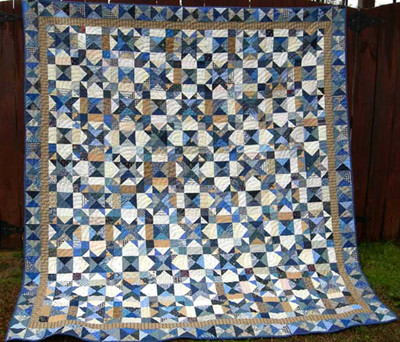
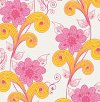
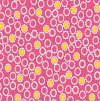
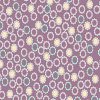
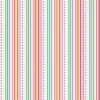
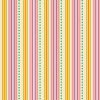
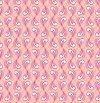
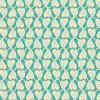
Note: This pattern was designed using fabrics from the Sugar collection from Art Gallery Fabrics. Fabrics are coded in materials list for either color combination 1 or color combination 2. All fabrics for color combination 1 are from the SU-900 series and all fabrics for color combination 2 are from the SU-800 series.
Color Combination 2:
MATERIALS:
-
Fabric A SU-906 or SU-806 3/4 yd.


-
Fabric B SU-900 or SU-800 1-1/8 yd.


-
Fabric C SU-904 or SU 804 1-1/8 yd.

-
Fabric D SU-901 or SU 801 2-1/4 yd.


-
Fabric E SU-908 or SU 808 1/4 yd.


-
Fabric F SU-903 or SU-803 1-7/8 yd.


-
Fabric G SU-905 or SU-805 2 yd.
-
Fabric H SU-902 or SU-802 7/8 yd.
-
Fabric I SU-907 or SU-807 1/4 yd.
-
Backing SU-903 or SU-803 5-1/2 yd. (suggested)
-
Binding fabric included SU-905 or SU-805 (FABRIC G)
INSTRUCTIONS:
Note: This quilt was made from blocks composed of four units of strips cut in 45° angle and set forming diamonds. It was made in two color combinations. 1/4" seam allowances are included. Sew all fabrics right sides together.
Cutting Directions:
For Block Combination 1, Cut (18 Blocks Total):
- Eighteen (18) 4-1/4" squares from fabric A, cut them once diagonally to get 36 triangles.
- Eighteen (18) 4-1/4" squares from fabric I, cut them once diagonally to get 36 triangles.
- Eighteen (18) 4-1/4" squares from fabric C, cut them once diagonally to get 36 triangles.
- Eighteen (18) 4-1/4" squares from fabric E, cut them once diagonally to get 36 triangles.
- Seventy-two 8-1/2" by 1-1/2" strips from fabric F
- Seventy-two 9-1/2" by 1" strips from fabric B
- Seventy-two 10-3/4" by 1" strips from fabric G
- Seventy-two 10-3/4" by 1" strips from fabric H
- Seventy-two 9-1/2" by 1-1/2" strips from fabric D
- Seventy-two 7-1/2" by 1" strips from fabric G
For Blocks Combination 2, Cut (18 Blocks Total):
- Thirty-six (36) 4-1/4" squares from fabric A, cut them once diagonally to get 72 triangles.
- Thirty-six (36) 4-1/4” squares from fabric C, cut them once diagonally to get 72 triangles.
- Seventy-two 8-1/2” by 1-1/2” strips from fabric F
- Seventy-two 9-1/2” by 1” strips from fabric B
- Seventy-two 10-3/4” by 1” strips from fabric G
- Seventy-two 10-3/4” by 1” strips from fabric F
- Seventy-two 9-1/2” by 1-1/2” strips from fabric D
- Seventy-two 7-1/2” by 1” strips from fabric H
For Inner Border
- Two (2) 72-1/2" by 1-1/2" strips from fabric G*
- Two (2) 74-1/2" by 1-1/2" strips from fabric G*
For Middle Border
- Two (2) 74-1/2" by 2-1/2" strips from fabric D*
- Two (2) 78-1/2" by 2-1/2" strips from fabric D*
For Outer Border
- Two (2) 78-1/2" by 1-1/2" strips from fabric C*
- Two (2) 80-1/2" by 1-1/2" strips from fabric C*
* (in order to get these long strips you need to join two Width Of Fabric strips together)
Block Construction:
Note: sew fabrics right sides together and with a 1/4" seam allowance. All 36 blocks are constructed the same way.
For Block Combination 1 (18 Blocks Total):
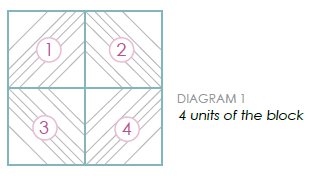
Note: This block is made from 4 units of strips set in a 45° angle, shown in DIAGRAM 1
-
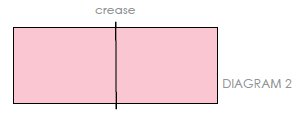
For units 1 and 4, fold one strip each from fabrics F-B-G-H-D-G and one triangle each from fabrics F-I in half and press with an iron to mark a crease to all of them. DIAGRAM 1
-
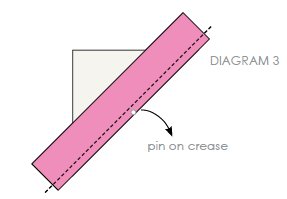
Position one fabric F strip over one fabric A triangle. Pin where the creases match. Sew on the entire edge (DIAGRAM 3). Open and press.
-
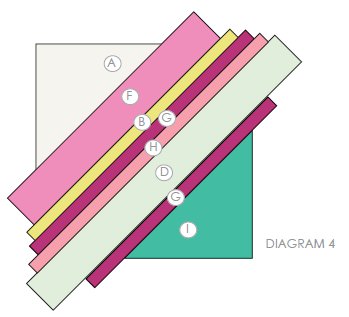
Position one fabric B strip over one fabric F strip. Pin again where the creases match. Sew on the entire edge. Open and press. Keep adding fabric strips G, H, D, G in the same way (as shown below).
-
Position one fabric I triangle over the last fabric G strip. Pin again where the creases match. Sew on the entire edge. Open and press. DIAGRAM 4
-
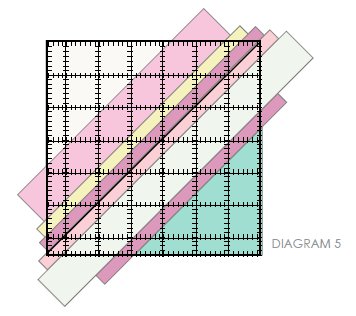
Put a ruler over the unfinished unit, and center it, matching one seam with the 45° guide (provided in the ruler). Trim all four sides of the block to a 6-1/2" size. DIAGRAM 5
-
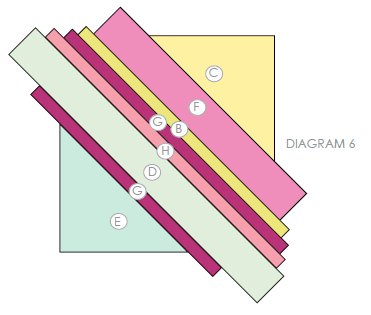
For units 2 and 3, follow the same steps, but replace corner triangles with fabrics C-E (DIAGRAM 6)
Fabric Combinations Layout for Units:
- Make a total of 36 units 1 and 4
- Make a total of 36 units 2 and 3
For Blocks Combination 2 (18 Blocks Total):
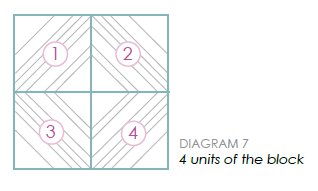
Note: This block is made from 4 units of strips set in a 45° angle, shown in DIAGRAM 7
-
For units 1 and 4, fold one strip each from fabrics F-B-G-F-D-H and two triangles from fabric A in half and press with an iron to mark a crease to all of them. DIAGRAM 8

-
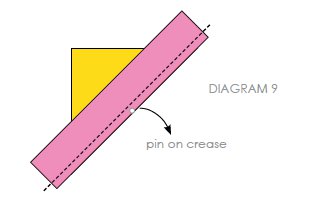
Position one fabric F strip over one fabric A triangle. Pin where the creases match. Sew on the entire edge (DIAGRAM 9). Open and press.
-
Position one fabric B strip over one fabric F strip. Pin again where the creases match. Sew on the entire edge. Open and press. keep adding fabric strips G, F, D, H in the same way. DIAGRAM 10
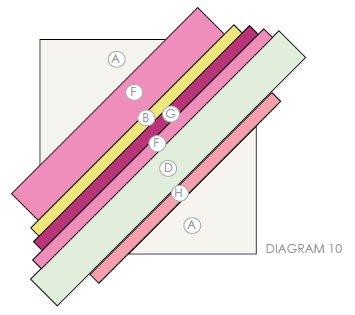
-
Position one fabric A triangle over the last fabric H strip. Pin again where the creases match. Sew on the entire edge. Open and press. DIAGRAM 10
-
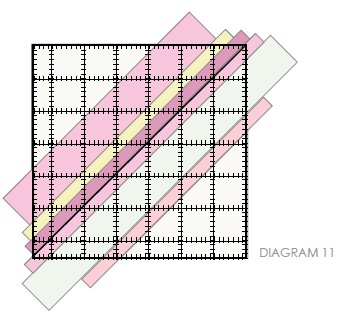
Put a ruler over the unfinished unit, and center it, matching one seam with the 45° guide (provided in the ruler). Trim all four sides of the block to a 6-1/2” size. DIAGRAM 11
-
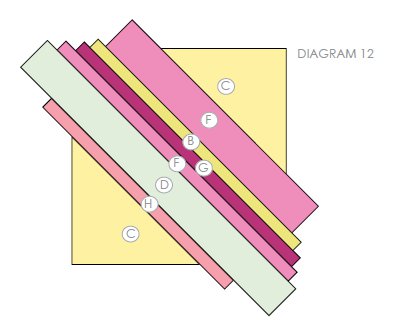
For units 2 and 3, follow the same steps, but replace corner triangles with fabric’s C. DIAGRAM 12
Fabric Combinations Layout for Units:
- Make a total of 36 units 1 and 4
- Make a total of 36 units 2 and 3
Units Assembly:
For Blocks Combination 1 (18 Blocks Total):
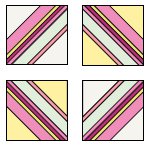
To make block with combination 1, position one unit 2 on top of a unit 1 and match the intersections with pins. Sew along the edge with a 1/4” seam. Repeat the process with unit 4 on top of unit 3. Open both units and press. Position the lower unit on top of the upper unit and locking intersections with pins, sew over the entire edge. Open and press. You now finished your Block Combination 1. Make a total of 18 Blocks.

For Blocks Combination 2 (18 Blocks Total):
To make block with combination 2, position one unit 2 on top of a unit 1 and match the intersections with pins. Sew along the edge with a 1/4” seam. Repeat the process with unit 4 on top of unit 3. Open both units and press. Position the lower unit on top of the upper unit and locking intersections with pins, sew over the entire edge. Open and press. You now finished your Block Combination 2. Make a total of 18 Blocks.
Quilt Top Assembly:
-
Start piecing the first row of six blocks alternating blocks 1 and 2, one block each (Follow the front cover picture for block placement). Press seams open.
-
After you finish, sew the remaining rows being careful of opposing the combinations (Follow the front cover picture for block placement).
-
After you finish, sew the rows together (Follow the front cover picture for block placement). Take much care to match block seam’s intersections between each row (lock them with pins if necessary). Press all seams toward the same direction.
- Press the WHOLE TOP with a hot steam iron.
Borders Assembly:
For the Inner Border:
-
Sew two 72-1/2" by 1-1/2" fabric G strips along the opposite sides (left & right) of the top with a 1/4" seam allowance. Press open.
- Sew the other two 74-1/2" by 1-1/2" fabric G strips along the top and bottom sides of the top with a 1/4" seam allowance. Press open.
For the Middle Border:
-
Sew two 74-1/2” by 2-1/2” fabric D strips along the opposite sides (left & right) of the top with a 1/4” seam allowance. Press open.
- Sew the other two 78-1/2” by 2-1/2” fabric D strips along the top and bottom sides of the top with a 1/4” seam allowance. Press open.
For the Outer Border:
-
Sew two 78-1/2" by 1-1/2" fabric C strips along the opposite sides (left & right) of the top with a 1/4 " seam allowance. Press open.
- Sew the other two 80-1/2" by 1-1/2" fabric C strips along the top and bottom sides of the top with a 1/4" seam allowance. Press open.
Quilt Assembly:
-
Place BACKING FABRIC on a large surface wrong side up. Stretch it with masking tape against that surface
. -
Place BATTING on top of backing fabric.
-
Place TOP on top of the batting with right side facing up. Smooth away wrinkles using your hands.
-
Pin all layers together and baste with basting thread, using long stitches. You can also use safety pins to join the layers.
-
Machine or hand quilt starting at the center and working towards the corners. Remember that quilting motives are a matter of personal preference. Have fun choosing yours!
- After you finished, trim excess of any fabric or batting, squaring the quilt to proceed to bind it.
Binding:
-
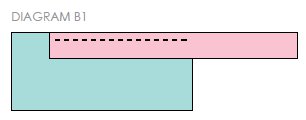
Cut enough strips 1-1/2" wide by the width of the fabric G to make a final strip 332" long. Start sewing the binding strip in the middle of one of the sides of the quilt, placing the strip right side down and leaving an approximated 5" tail. Sew with 1/4" seam allowance (using straight stitch), aligning the strip’s raw edge with the quilt top’s raw edge.
-
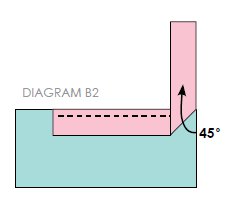
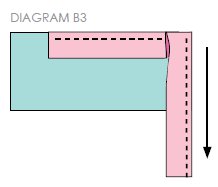
Stop stitching 1/4" before the end of the quilt (DIAGRAM B1). Clip the threads. Remove the quilt from under the machine presser foot. Fold the strip in a motion of 45° and upward, pressing with your fingers (DIAGRAM B2). Hold this fold with your finger, bring the strip down in line with the next edge, making a horizontal fold that aligns with the top edge of the quilt (DIAGRAM B3). Start sewing at 1/4" of the border, stitching all the layers. Do the same in the four corners of the quilt.
-
Stop stitching before you reach the last 5 or 6 inches. Cut the threads and remove the quilt from under the machine presser foot. Lay the loose ends of the binding flat along the quilt edge, folding the ends back on themselves where they meet. Press them together to form a crease. Using this crease as the stitching line, sew the two open ends of the binding with right sides together (you can help yourself marking with a pencil if the crease is difficult to see).
- Trim seam to 1/4" and press open. Complete the sewing. Turn binding to back of the quilt, turn raw edge inside and stitch by hand using blind stitch.
For more cozy quilts like this, take a look at our collection of 17 Free Bed Quilt Patterns to Warm Up With.
Read NextJared Takes a Wife
Your Recently Viewed Projects
Thanks for your comment. Don't forget to share!
Report Inappropriate Comment
Are you sure you would like to report this comment? It will be flagged for our moderators to take action.
Thank you for taking the time to improve the content on our site.