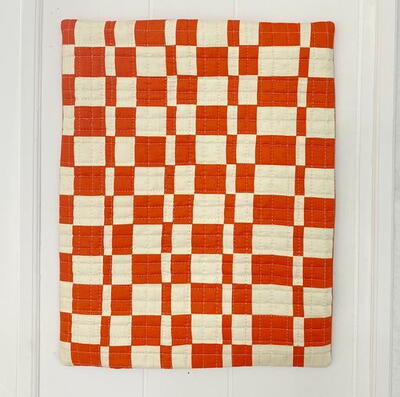
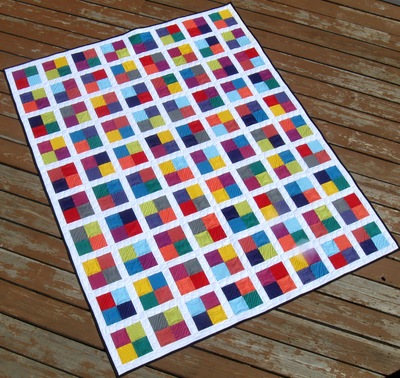
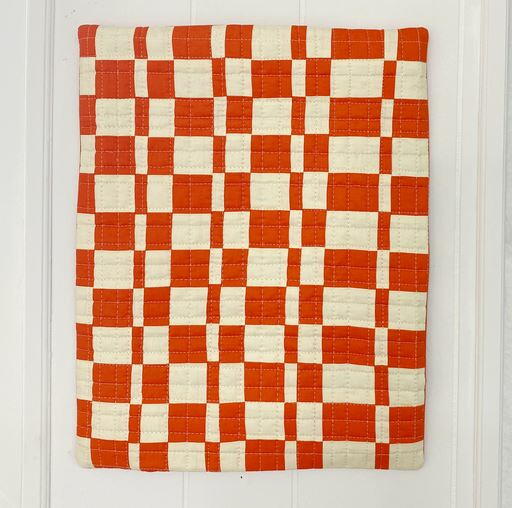
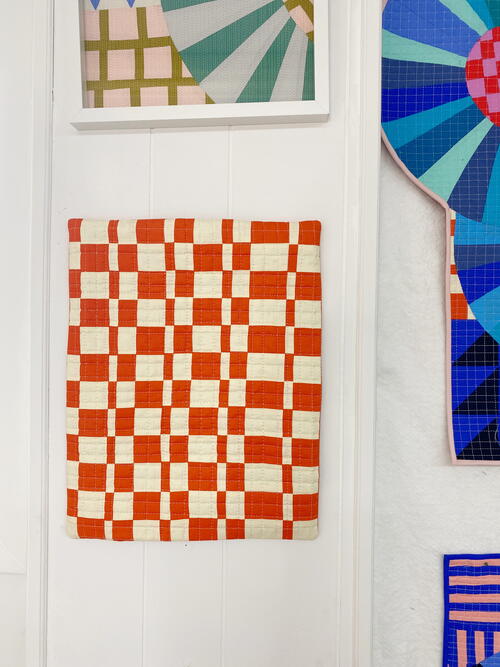
Checkered Mini Wall Quilt
From the Designer: "I love the idea of creating small pieced and quilted pieces to hang on the wall. They make the greatest gifts and are perfect to make as the days grow a little colder and the holidays loom. This little wall quilt is a fun and simple weekend project that will show you how to make a simple and modern design and also create a facing for a different look. The facing also creates the perfect little pocket for a dowel to use for hanging."

Materials List
- Wood dowel – I like to use a ½ inch round dowel, they are super easy to find at home improvement stores and craft store
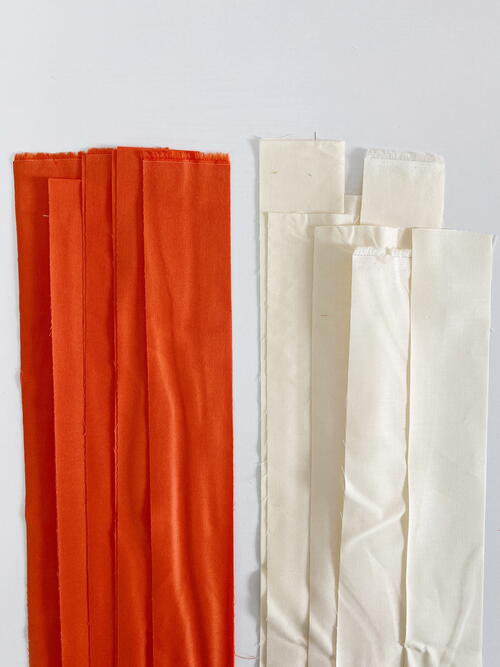
- For the strips - 6”of fabric in 2 colors. I have used Ruby and Bee Mandarin and Vanilla Custard
- For the facing – 12” of fabric, I used mandarin
- 15” x 18” piece of Batting
- 15 x 18” piece of fabric for the backing
- Basic sewing supplies
Instructions
Prepare the pieces
-
Cut (3) 2” x WOF strips of Orange.
-
Cut (3) 2” x WOF strips of white.
-
Cut (2) 6” x WOF strips of orange for the facing.
-
Cut each strip in half.
-
For the facing strips, iron each strip lengthways to measure 3” wide.
Let’s make the wall quilt.
-
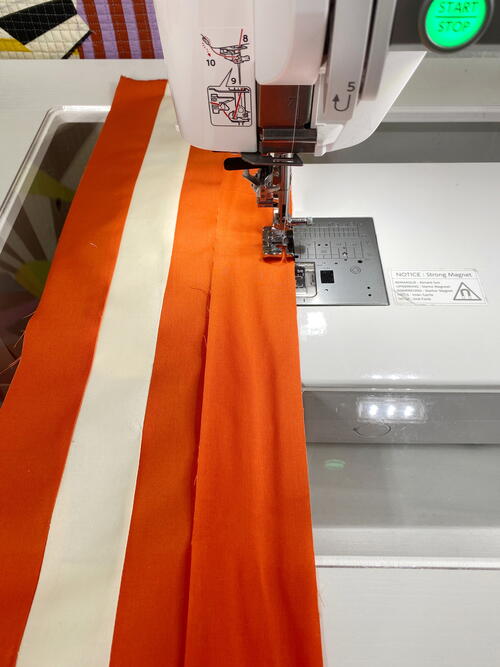
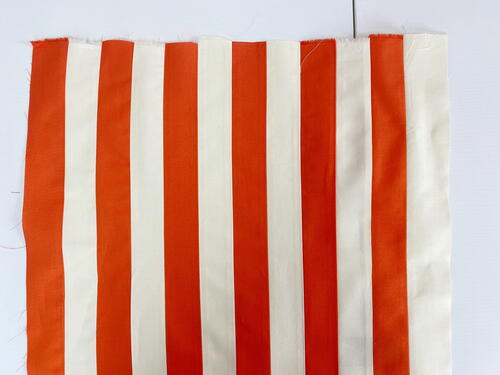
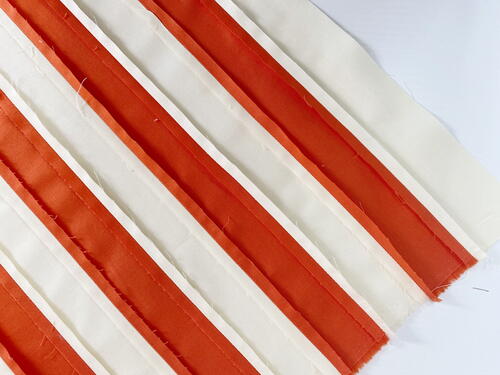
Sew all of the strips together alternating colors and using a ¼ “ seam allowance. I use my ¼ “ foot for this, it makes things so much easier!
Your finished panel will start with one color and end with the other. This is really important when it comes to sewing the checkerboard pattern. -
Iron all the finished seams open.
-
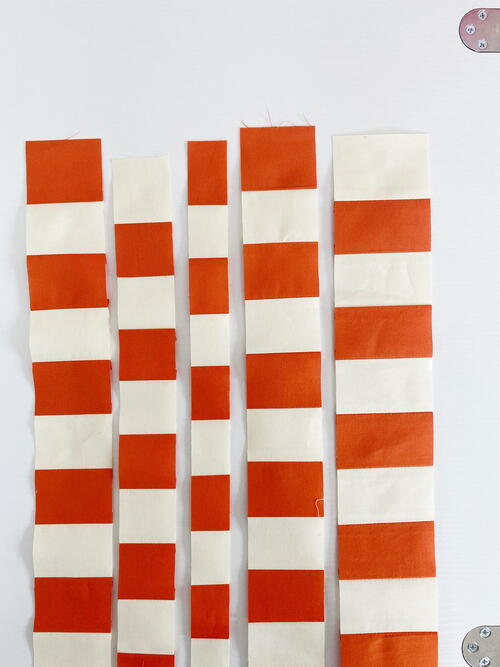
Turn the panel around and start cutting strips across. You can alternate widths for a quilt that looks like the one pictured, or you may just want an even checkerboard. I cut my strips 2”, 1”, 2 ½” and 1 ½”.
-
Lay out your strips into a design that you like and start sewing the strips together. The flat open seams make this step much easier and make for a less bulky back side.
-
Give the entire piece a good press.
-
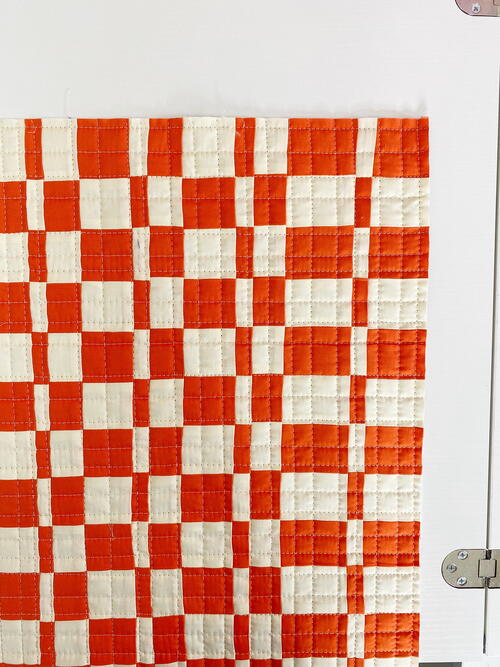
Make a quilt sandwich and quilt the piece to your liking. I used a cross-hatch design to mimic the piecing.

The Facing
-
Decide on the orientation of your wall quilt. We will be attaching the facing to the sides first. This will ensure that we have some little rod pockets for hanging.
-
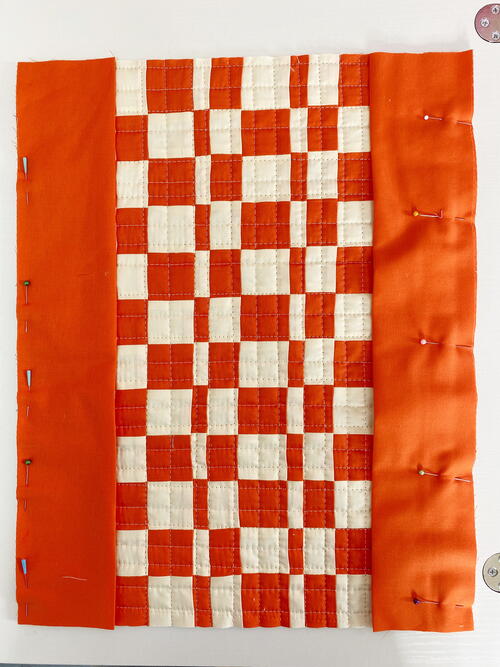
With the wall quilt facing you, Cut the side facing pieces to the exact length of the quilt.
-
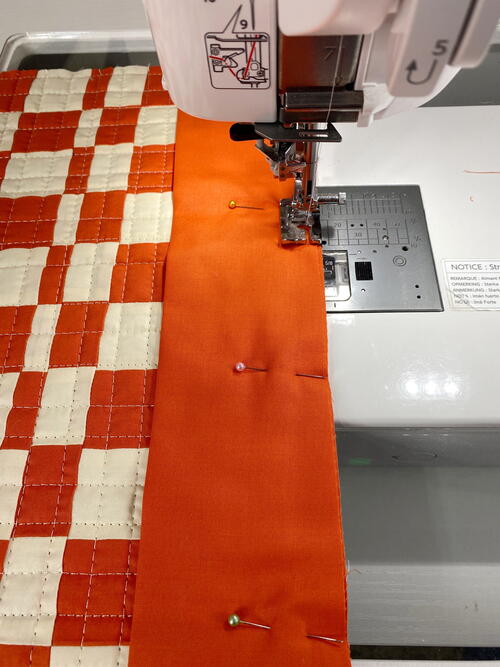
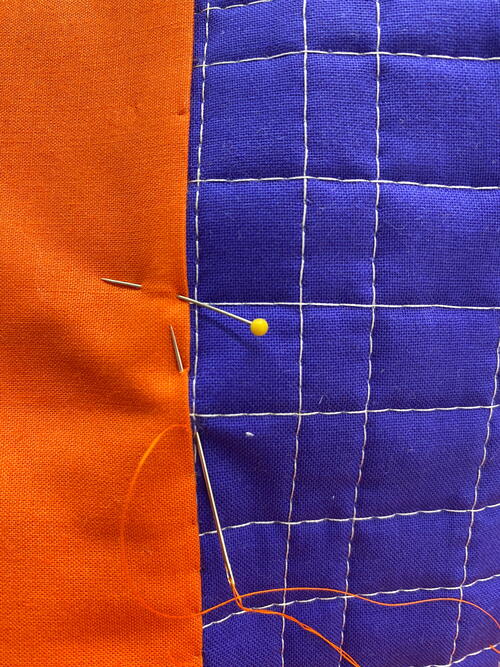
Pin the facing pieces with the raw edges lines up with the quilt edge. Pin and sew down both sides with a ¼” seam allowance.
-
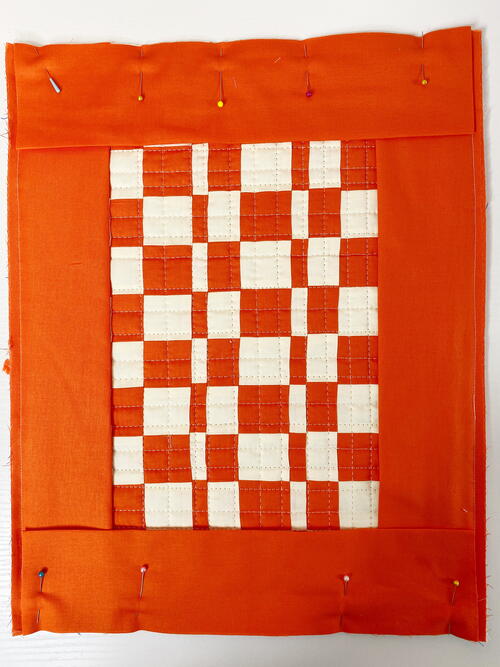
Now do the same with the top and bottom facing pieces except cut the facing ½” shorter than the width of the quilt.
-
Starting ¼” in from the edge of the quilt, pin and sew the top and bottom facing pieces to the quilt. The facing should stop ¼” before the other edge of the quilt.
-
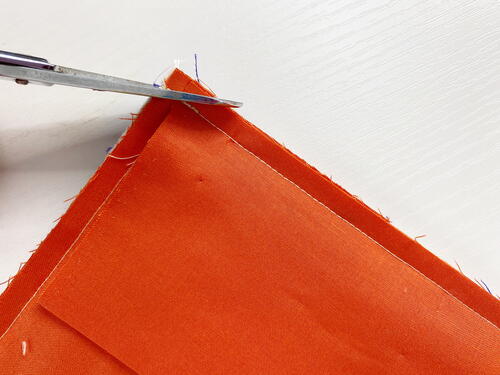
Carefully trim off the corners.
-
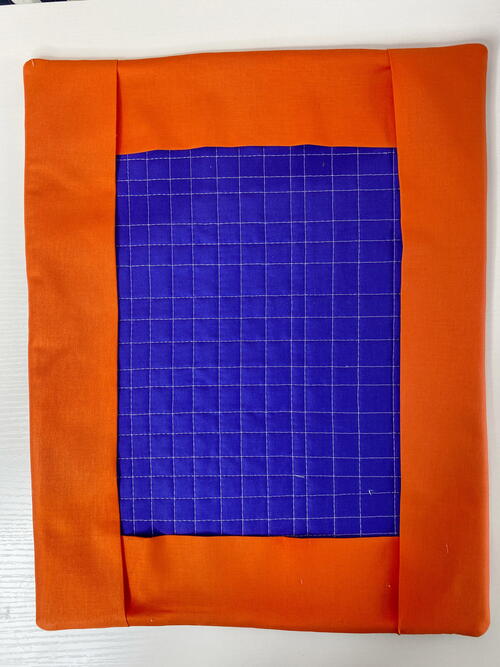
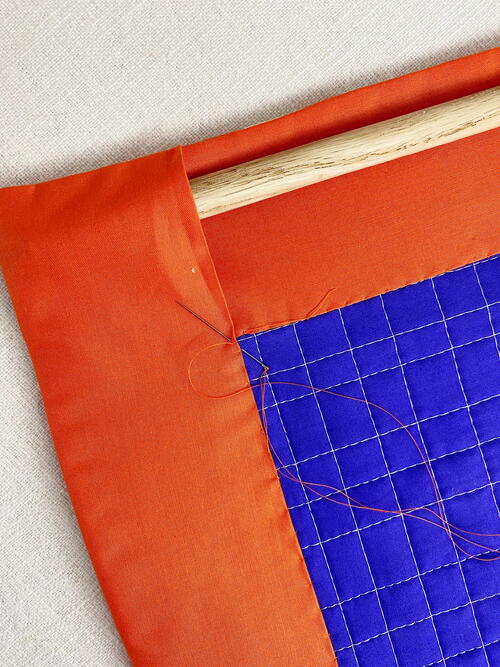
Flip the entire facing over to the backside of the quilt. Tuck in the upper and lower facing pieces under the side facing.
-
Give the backside a really good press, its important that the edges are really well pressed to look neat and straight.
-
Pin the folded edges down.
-
Hand sew the facing down to the back of the wall quilt, leaving the little pockets open. Before you get to the end of the sewing, pop in your cut dowel (it’s difficult to add the dowel after).
-
Finish hand sewing the facing and Voila! You have a ready-to-hang piece of wall art!
-
Your project is finished! If you love this tutorial, be sure to check out Janome.com for even more inspiration.
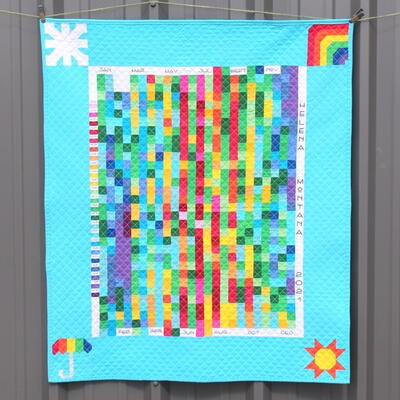
Read NextTemperature Quilt