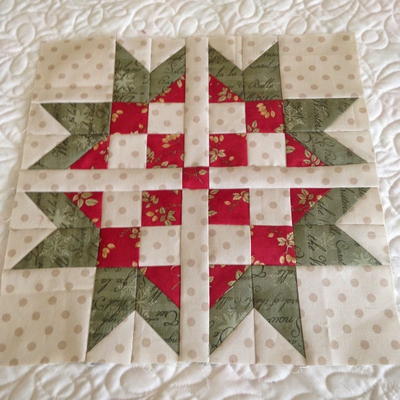
Modern Quilted Christmas Pillows

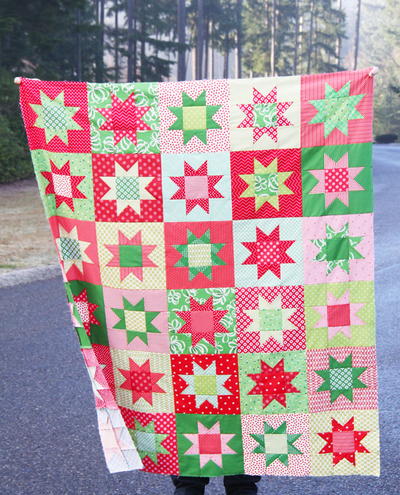
Looking for something quick and festive to make this December? The Modern Quilted Christmas Pillow Pattern is a great way to add a set of adorable holiday pillows to your home. These pillows also make a wonderful holiday gift! Take a look at the exclusive pattern made for Janome.com from designer Lindsey of Pen and Paper Patterns. The simple tutorial will help you finish this set in no time at all. Creating your own quilted Christmas pillows is a delightful way to infuse the festive spirit into your home decor. Begin by selecting cheerful holiday-themed fabrics--think classic reds and greens or cute and whimsical patterns. Picking out your fabric will be the hardest part!
Materials List
-
SNOWMAN PILLOW (20" square):
- FAT 1/16 OF CANDY GREEN
- FAT 1/16 OF DUSTY PEACH
- FAT 1/16 OF CORAL
- 1/3 YARD OF SNOW
- FAT 1/16 OF GUMDROP
- FAT 1/16 OF GRAPHITE
- 24" SQUARE PIECE FOR BACKING AND BATTING
- 1/2 YARD FOR ENVELOPE CLOSURE
- 1/4 YARD OF BINDING
-
FALALA PILLOW (12" x 21"):
- FAT 1/16 OF CANDY GREEN
- 1/3 YARD DUSTY PEACH
- FAT 1/16 OF GUMDROP
- FAT 1/16 OF CORAL
- 16" x 24" PIECE FOR BACKING AND BATTING
- 1/2 YARD FOR ENVELOPE CLOSURE
- 1/4 YARD FOR BINDING
BASIC INSTRUCTIONS:
Please read through all instructions before beginning
- RST = Right Sides Together
- WOF = Width of Fabric
- Seam allowances are 1/4”
- Pattern assumes WOF is 42”
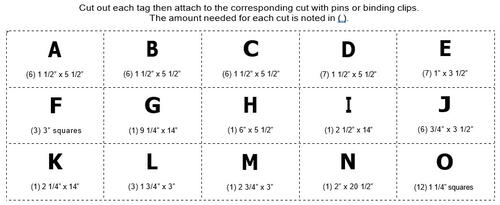
- Tags for labeling the cuts of fabric are on Page 4
- The following Kona Solids were used: Dusty Peach, Coral, Gumdrop, Candy Green, Graphite, and Snow
- Share your progress on social media using the hashtag #SnowmanPillow
CUTTING INSTRUCTIONS:
-
FROM THE DUSTY PEACH FABRIC, CUT:
(6) 1 1/2” x 5 1/2” -
FROM THE CORAL FABRIC, CUT:
(6) 1 1/2” x 5 1/2” -
FROM THE GUMDROP FABRIC, CUT:
(6) 1 1/2” x 5 1/2” -
FROM THE CANDY GREEN FABRIC, CUT:
(7) 1 1/2” x 5 1/2”
(7) 1 x 3 1/2” -
FROM THE GRAPHITE FABRIC, CUT:
(3) 3"squares -
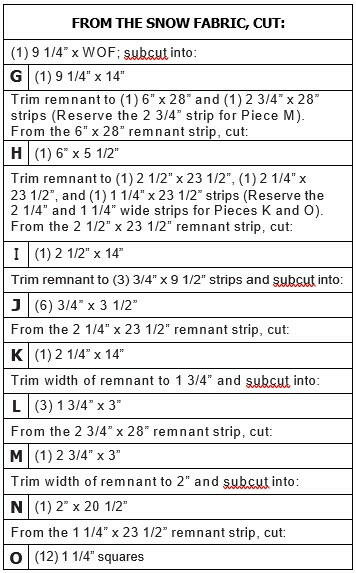
FROM THE SNOW FABRIC, CUT:
ASSEMBLY INSTRUCTIONS:
-
Draw a diagonal line from one corner to the opposite corner on the backside of the O pieces.
-
Place an O piece in all four corners of an F piece, RST. Sew along the marked lines then trim 1/4” away from the sewn lines. Press the seams toward Piece F. Repeat this step until you have three units total.
-
Sew an L piece to the top of a unit from Step 2, RST. Press the seam toward the L piece. Repeat this step until you have three units total.
-
Sew Piece M to the bottom of a unit from Step 3, RST. Press the seam toward Piece M.
-
Sew two units from Step 3, RST. Press the seam toward Piece L.
-
Sew the unit from Step 5 to the top of the unit from Step 4, RST. Press the seam toward the Step 4 unit.
-
Sew Piece K to the left side of the unit from Step 6, RST. Press the seam toward Piece K.
-
Sew Piece G to the right side of the unit from Step 7, RST. Press the seam toward Piece G.
-
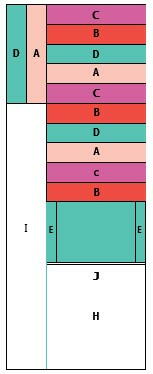
Sew Pieces A, B, C, D, RST, in D, B, C, A order until you have 13 pieces sewn together total. Press the seams open.
-
Sew the unit from Step 9 to the top of the unit from Step 8, RST. Press the seam toward the Step 8 unit.
-
Sew Pieces A, B, C, D, RST, in C, B, D, A order until you have 10 pieces sewn together total. Press the seams open.
-
Sew Pieces E and J, RST, in alternating order starting with Piece E until you have 13 pieces sewn together total . Press the seams toward the E pieces.
-
Sew the unit from Step 11 to the top of the unit from Step 12, RST. Press the seam toward the Step 11 unit.
-
Sew Piece H to the bottom of the unit from Step 13, RST. Press the seam toward Piece H.
-
Sew a Piece D to the left side of a Piece A, RST. Press the seam open.
-
Sew Piece I to the bottom of the unit from Step 15, RST. Press the seam toward Piece I.
-
Sew the unit from Step 16 to the left side of the unit from Step 14, RST. Press the seam toward the Step 16 unit.
-
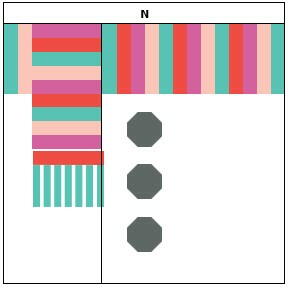
Sew the unit from Step 17 to the left side of the unit from Step 10, RST. Press the seam toward the Step 10 unit.
-
Sew Piece N to the top of the unit from Step 18, RST. Press the seam toward Piece N.

FINISHING THE PILLOW:
-
Make a quilt sandwich by placing the backing fabric right side down, the batting on top, then the pillow top centered right side up. Baste the layers together using your preferred method. Quilt as desired.
-
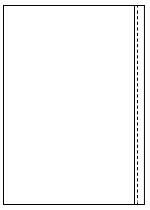
Cut two panels for the envelope closure for the backside of the pillow. The left and right side panels will measure 20 1/2” x 14 1/2”. Hem one 20 1/2” side on the left side panel by pressing the 20 1/2” edge over to the wrong side of the panel by 1/4”. Press the folded edge over another 1/4”. Top stitch the hem in place by sewing 1/8” away from the folded edge of the hem. Repeat this step with the right side panel.
-
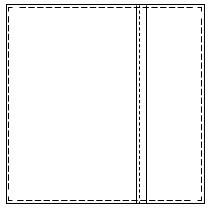
Overlap the two panels on the backside of the pillow cover and baste the panels in place be sewing around the perimeter of the pillow 1/8” away from the edge.
-
Cut (3) 2 1/4” x WOF strips for the binding. Sew the binding strips, RST, with a diagonal seam. Trim 1/4” away from the sewn line and press the seam open. Fold the joined binding strips in half lengthwise, wrong sides together, and press. Attach binding to the front side of the pillow with a 1/4” seam allowance. Fold the binding over to the backside of the pillow and machine or hand stitch in place.
-
Hem one 20 1/2” edge on both left and right side panels.
-
Layer panels on backside of pillow cover so the hems overlap. Baste 1/8” away from edge by sewing around perimeter pillow.
-
TAGS FOR ORGANIZING THE CUTS OF FABRIC:
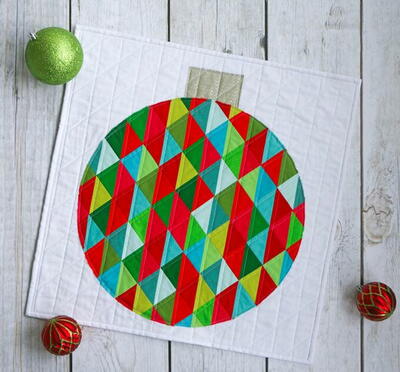
Read NextQuilted DIY Christmas Ornaments