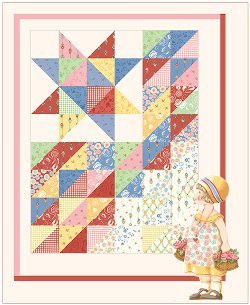
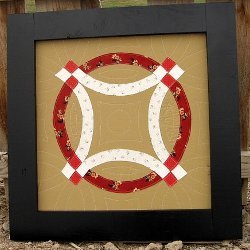
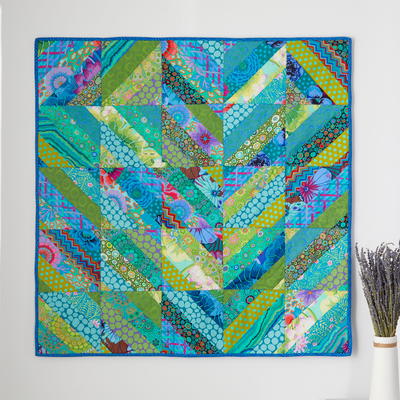
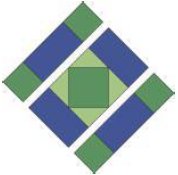
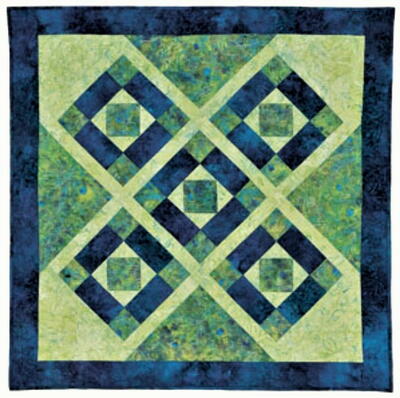
Diagonal Diamonds Quilt

Challenge your quilting skills with the intricate geometric shaped created in this Diagonal Diamonds Quilt. You can create a standout shape within your next quilt with the techniques here that include working with quilt block patterns. There are so many shapes within this free quilt pattern, which makes this even more of a fun challenge for quilters who like to be bold and different with their color choices. A design like this can attract attention in any location.
Project TypeMake a Project
Quilt Size41 inches wide x 41 inches long

Quilt Size: 41" x 41"
Block Size: 10
Sashing: 1-1/2"
Border: 3"
Technique: Framing and diagonal set
MATERIALS:
INSTRUCTIONS:
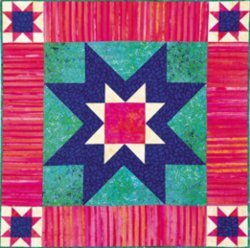
Center square-in-a-square:
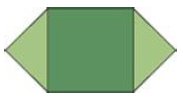
1. Place a lime green 3-3/8" triangle, right sides together, with a 4" green paint center square. The tips of the triangle should hang over the edge of the square equally on both ends. Sew, using a 1/4" seam allowance. Sew another triangle on the opposite edge.
2. Repeat for the other two sides of the square.
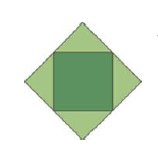
3. Sew this center square-in-a-square unit for all five blocks.
Framing:
4. To make the frames for the square-in-a-square units, sew the following strips together to make a strip set:
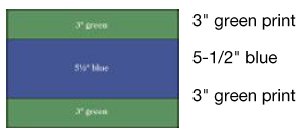
To keep the strips as straight as possible, sew the first strip together with the blue fabric on top, then sew the second strip in the opposite direction, with the green print on top. If your machine has a tendency to slightly pull up the fabric, this will help keep the strips straight. Before unfolding the fabric to press the seams, run the iron along the seam line to set the seam. This also helps press out any irregularities in the tension of the stitches.

5. Sew one 3" x 5-1/2" blue rectangle to two opposite sides of the square-in-a-square units.
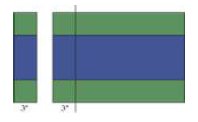
6. From the strip set, cut 20 sections 3" wide.
7. Lay out the blocks with a strip set as the top row, the square-in-a-square unit in the center, and another strip set as the bottom row.
8. Press each row in opposite directions. Align and pin the top row to the center row; sew. Add the bottom row. Press the block.
9. Repeat this process to complete all five blocks.
Side and corner triangles:
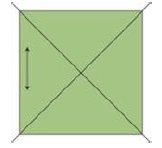
10. Cut the 17-1/4" square diagonally in both directions to make four triangles for the sides of the quilt.
11. By cutting the square in an X, the fabric on the outside edges of the quilt will be on the straight of grain, making it more stable and less prone to stretching.

12. Cut the two 10" squares in half diagonally to make four triangles for the corners of the quilt.
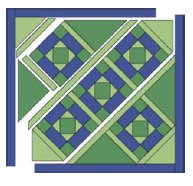
Assemble the quilt:
Lay out the quilt, placing the triangles in the corners and on the sides. Place the sashing strips between the triangles and blocks, following the quilt assembly diagram. The blocks are set on point and sewn together in diagonal rows.
13. Sew the longest row together first. Add the longest sashing strips to each side of that row. Press the seams.
14. Before adding the rows on either side, make sure the blocks line up across the sashing strips. On the wrong side of the sashing, extend the seam line across the sashing with a chalk marker or pencil. Then, as you pin the next row, pin the corner of the next block to the mark you made on the sashing.
15. Continue sewing the rows together. Add the two remaining triangles to the corners and trim the edges of the quilt.
Borders:
16. Fold a blue border in half and mark the center with a straight pin. Mark the center of the top quilt edge with a straight pin as well. Match the pins and continue pinning the top border to the quilt. Attach the top border. Add the bottom border in the same manner. Press the seam allowances towards the border. Mark, pin, and sew the two side borders to the quilt.
Assemble the quilt:
17. Layer the quilt top, batting, and backing.
Quilting:
The quilting design repeats elements of the quilt. The feathery design in the green print fabric is outlined.
18. A continuous leaf design is quilted in the sashing strips. The blocks are quilted in the ditch to give them a puffier look.
Binding:
19. Bind the quilt with double binding:
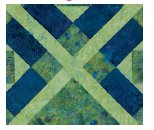
1. Use dark fabrics in the background of this quilt to create a totally different look.
2. Create a plaid effect by changing the background fabric of the blocks and the corners.
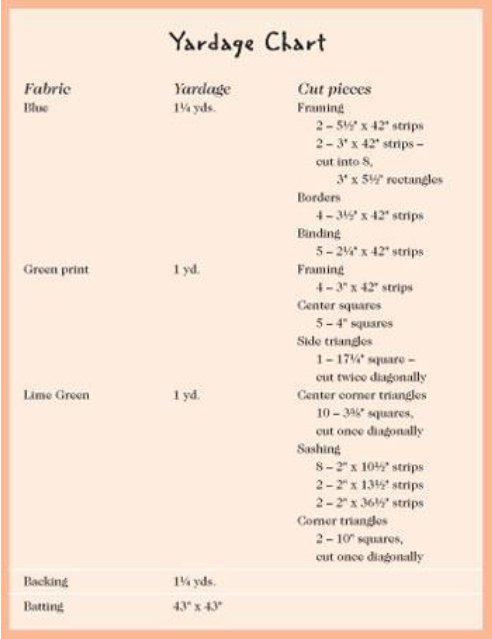
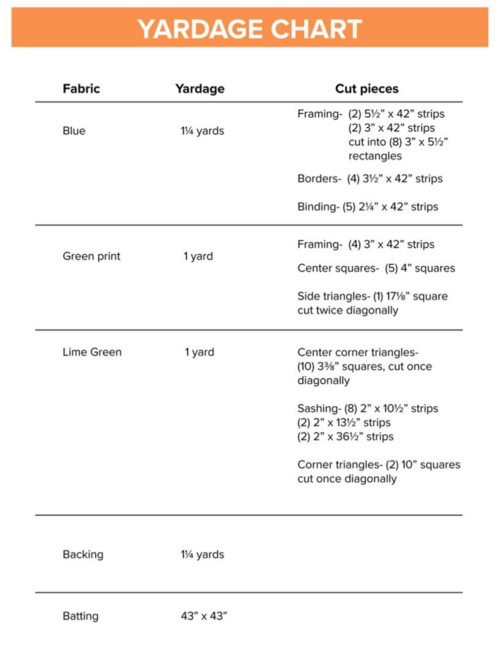
Yardage Chart:
Why You'll Love This Quilt
Here are the top 3 reasons why you should consider making the Diagonal Diamonds Quilt:
1. Challenge your quilting skills: If you're looking to push yourself and try something new, the Diagonal Diamonds Quilt is the perfect project for you. The intricate geometric shapes and quilt block patterns will test your quilting abilities and help you improve your technique. It's a great way to expand your quilting knowledge and grow as a quilter.
2. Stand out with a unique design: The Diagonal Diamonds Quilt features bold and eye-catching shapes that will make your quilt stand out from the rest. By using different color choices and playing with the design elements, you can create a one-of-a-kind quilt that will attract attention wherever it's displayed. It's a great way to showcase your creativity and make a statement with your quilting.
3. Fun and rewarding project: Making the Diagonal Diamonds Quilt is not only a challenge, but it's also a fun and rewarding project. As you see the geometric shapes come together and the quilt start to take shape, you'll feel a sense of accomplishment and pride in your work. Quilting is a great way to relax and unwind, and this project is sure to bring you joy as you work on it.
Overall, the Diagonal Diamonds Quilt is a fantastic project for quilters who are looking for a challenge, want to create a unique design, and enjoy the process of quilting. Give it a try and see the amazing results you can achieve with this fun and exciting quilt project!
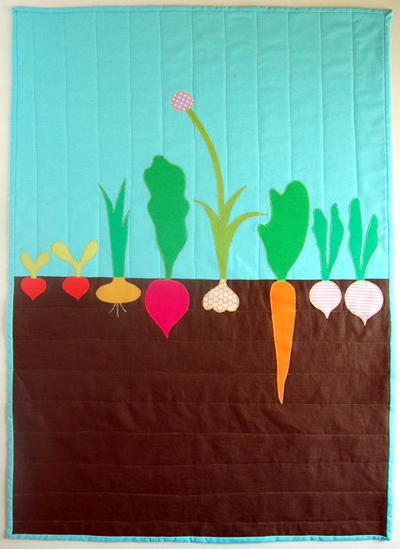
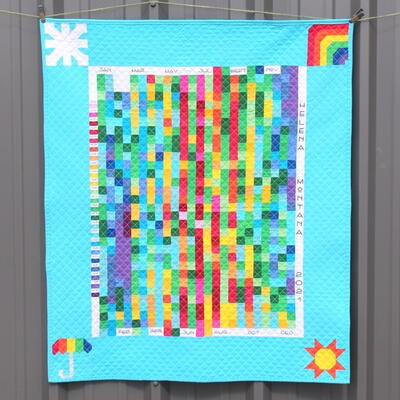
Read NextTemperature Quilt
Your Recently Viewed Projects
Thanks for your comment. Don't forget to share!
KLC
Sep 27, 2019
Hello everyone - We have requested a new yardage chart that has better readability. We will add it to this page as soon as possible. Thank you for your patience and understanding. - Krista at FaveQuilts
1invisiblemom 3426 038
Sep 19, 2019
I can't read the yardage. It's so blurry, I don't really understand it.
swasklewicz 419982 4
Sep 14, 2013
Can someone clarify the dimensions to cut the lime fabric. The numbers are blurry and I can't make them out, nor can I figure it out on my own, I'm still pretty new at this. Thank you!!
karens 0578919
Jun 10, 2013
I think "You'll can create" in the second sentence doesn't sound right.
Report Inappropriate Comment
Are you sure you would like to report this comment? It will be flagged for our moderators to take action.
Thank you for taking the time to improve the content on our site.