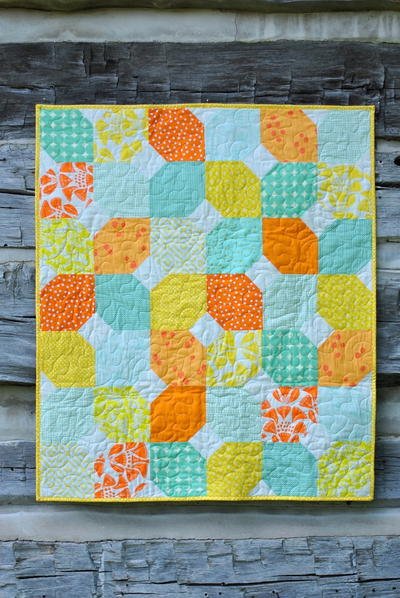
Floral Diamond Lattice Baby Quilt
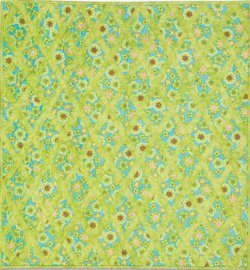
As soon as you find out that a baby is going to be a little girl, get started on this Floral Diamond Lattice Baby Quilt. The ultra-feminine diamond flower garden quilt is quick and easy way to welcome a new baby. You could also make this as a pretty lap quilt!
Project TypeMake a Project
Quilt Size37 inches wide x 38 inches long
Time to CompleteWeekend project
Primary TechniquePieced

MATERIALS:
- Fabric 1—2 yards
- Fabric 2—1-1/4 yards (includes binding)
- Backing—1-1⁄3 yards
- Batting—43" x 44"
- Accuquilt Go! fabric cutter
- Accuquilt Go! diamonds 4" x 4" (55040)
- Accuquilt Go! 6" x 12" mat (55112)
- Accuquilt Go! strip cutter 1-1/2" (55024)
- Accuquilt Go! strip cutter 2-1/2" (55017)

CUTTING DIRECTIONS:
Fabric 1:
- Cut 94—diamonds
Fabric 2:
- Cut 4—2-1/2" strips across the width of fabric (WOF) for binding
- Cut 25—1-1/2" strips across WOF
- Sub cut 12—1-1/2" strips into 75, 1-1/2" x 6" rectangles
SEWING DIRECTIONS:
- Quilt is sewn in diagonal rows.
- Pin and sew one, 1-1/2" x 6" Fabric #2 rectangle to the side of one diamond.

- Press all seam allowances toward Fabric #2 strips throughout quilt.
- Trim strip even with edges of diamond as shown.

- Continue to add diamonds and strips to complete diagonal rows. Note: there are no strips on the end of the diagonal rows.

- Starting on the upper right corner of diagrams, make one diagonal row with one diamond. Then make one row each with 3, 5, 7, and 9 diamonds; four rows with 11 diamonds; one row each with 9, 7, 5, 3, and 1 diamonds.

- Layout pieced diamond rows.
- Pin and sew one, 1-1/2" Fabric #2 strip between rows, piecing strip where necessary.
- Continue to pin and sew rows and strips to complete quilt top.
QUILTING AND FINISHING:
- Layer batting between quilt top and backing.
- Pin or baste layers together.
- Machine quilt with an all-over design.
- With large ruler mark straight lines through centers of outermost diamonds as shown.
- Add binding, mitering corners.
- Trim excess edges of shapes.
Why You'll Love This Quilt
Hello fellow quilting enthusiasts! If you're looking for a sweet and charming project to work on, look no further than the Floral Diamond Lattice Baby Quilt. Here are the top 3 reasons why you should consider making this adorable quilt:
1. Perfect for a little girl: The diamond flower garden design of this quilt is ultra-feminine and perfect for welcoming a new baby girl into the world. The combination of floral patterns and lattice work creates a delicate and pretty quilt that any little girl (or her parents) will surely love.
2. Quick and easy to make: Despite its intricate appearance, the Floral Diamond Lattice Baby Quilt is actually a relatively simple project to tackle. The pattern lends itself to easy construction, making it a great option for quilters of all skill levels. Whether you're a seasoned pro or just starting out, this quilt is a fun and rewarding project to work on.
3. Versatile design: While this quilt is designed with a baby girl in mind, it can easily be adapted for other purposes. The pretty floral motif and lattice pattern would make a lovely lap quilt for an adult, or even a wall hanging for a nursery or bedroom. The possibilities are endless with this versatile and charming quilt design.
So there you have it, fellow quilters! The Floral Diamond Lattice Baby Quilt is a delightful project that offers beauty, simplicity, and versatility. Whether you're making it for a new baby, yourself, or as a gift for someone special, this quilt is sure to bring joy and warmth to whoever receives it. Happy quilting!
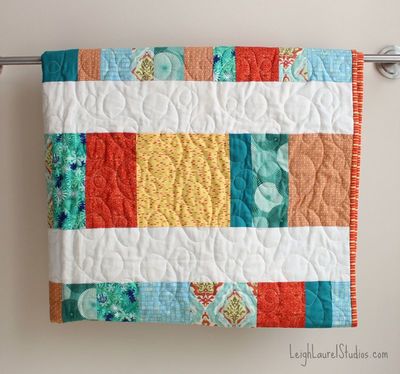
Read NextFast Filmstrip Quilt