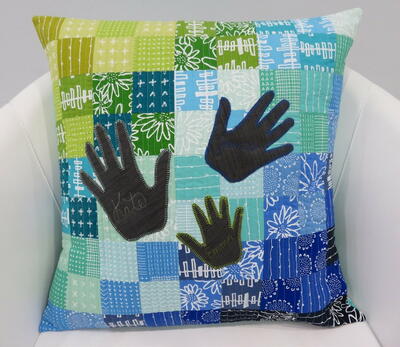
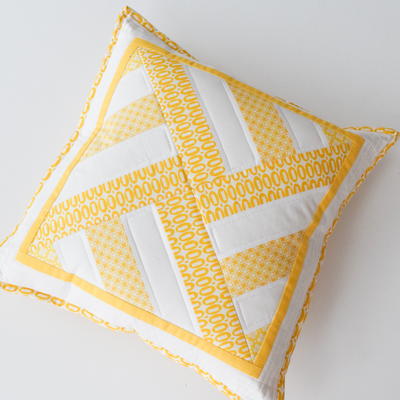
Applique Handprints Quilted Pillow Pattern
Applique your way to a happy Mother's Day!

From the Designer: "This Mother’s Day, deliver a handmade gift to the mom in your life that is personal and unique. This project is packed with techniques that will help build your skills, while creating something beautiful and heart felt for the special mother or grandmother in your life. Whether using kids’ hands, or adult hands for this project, the finished pillow will be one that will be cherished with many personalized touches, made easy by the Horizon Memory Craft 8900QCP Special Edition. All seam allowances are a 1/4”, unless otherwise specified."
Project Time: 8 hours
Finished Size: 18” x 8”
HolidayMothers' Day
Materials List
-
Janome Supplies Required:
• Horizon Memory Craft 8900QCP Special Edition
• 1/4” Seam Foot O
• Convertible Free Motion Quilting Foot QB-S
• Foot F for applique
• Blue Tip Needle
• Pre-wound bobbin
• Empty bobbin
-
Fabrics/Notions Required:
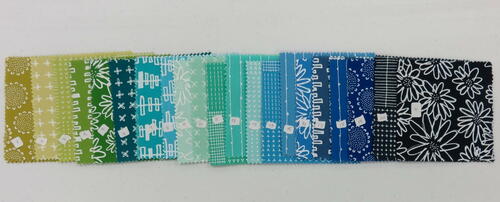
• 1 charm pack (can use a mini-charm pack to save time) sub cut into: (81) 2 1/2” squares
• 1 yard of fabric for interior pillow top (won’t be visible from exterior) sub cut into: (1) 24” square
• 1 yard of fabric for envelope closure of the pillow sub cut into: One 18” x 10” rectangle and (1) 18” x 14” rectangle.
• 1 FQ fabric that contrasts with charm pack (a light or dark solid) for applique
• (1) 18” pillow form
• 1 yard of Pellon 805 Wonder Under
• 24” square piece of batting (loft is up to you)
• Coordinating all-purpose sewing thread
• 3 spools of thread for quilting and applique in colors that coordinate with fabric
-
Student Supplies Required:
• Marking pen/tailors chalk
• Garage sale stickers (optional)
• Rotary cutter/ruler/mat
• Safety pins
• Spray baste (optional)
• Supreme Slider quilting mat
• Iron
• Pressing cloth
• Fabric scissors
• Supreme Slider by Pat LaPierre (smaller size)
• Pencil
INSTRUCTIONS:
Piecing the Patchwork Pillow Top:
-
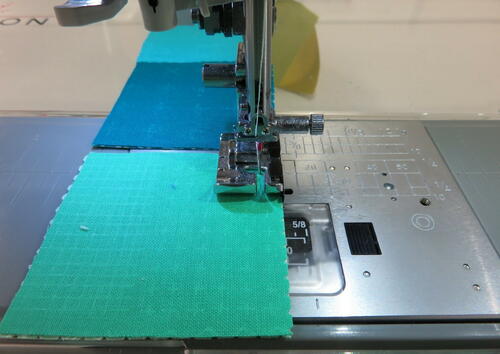
Attach a 1/4” Seam Foot O.
-
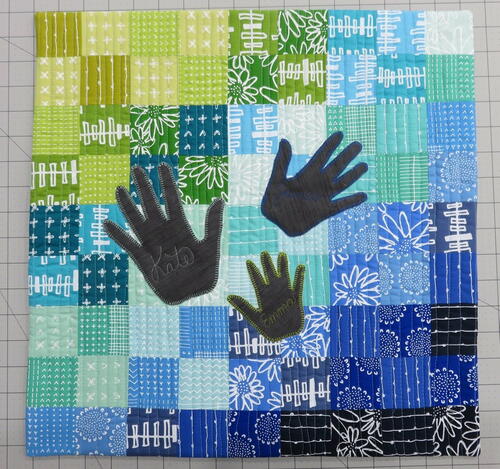
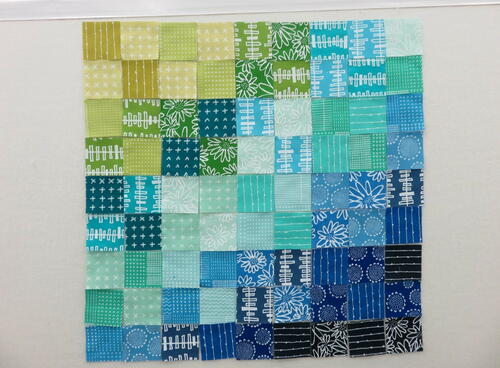
Arrange the (81) 2 1/2” squares from the charm pack into a square - 9 rows wide by 9 rows long.
Tip: Joanna had a specific color arrangement that she wanted, so she used small garage sale stickers to mark her fabrics for placement. It is much quicker than drawing on graph paper and coloring all of the different fabrics. If your fabrics are not so similar in color, you could also take a photo of your layout with your smartphone prior to piecing instead of using the garage sale tickets. -
Piece each of the 9 rows by sewing the squares together with a 1/4” seam allowance.
-
Press seams open to reduce bulk.
-
Once all 9 rows are pieced together, sew each row to the next. Be sure to line up the seam intersections and pin in place.
Tip: For more precise piecing, you can use Elmer’s school glue and apply a thin line of glue within the 1/4” seam allowance prior to sewing the rows together. After you have applied the thin line of glue, carefully position the next row right side down on top of the glue line, matching the seam lines of the first row to the second. Press for a couple of seconds with the iron to set. The glue will wash out and won’t affect the quilting. -
Continue piecing all 9 rows together until you have a completed pillow top, measuring 18 1/2”.
Preparing the Applique:
-
Place the right side of Pellon 805 Wonder Under against the wrong side of the fabric you selected for the applique pieces. Press for 5-8 seconds with a hot and dry-iron. Let the Wonder Under cool.
-
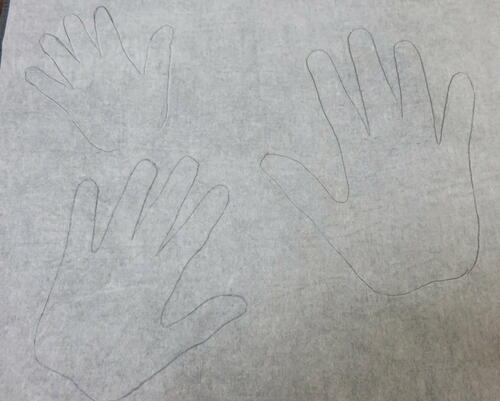
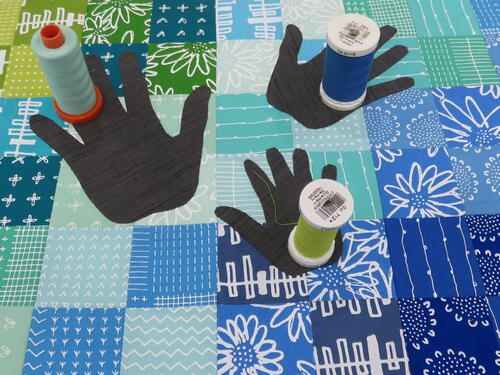
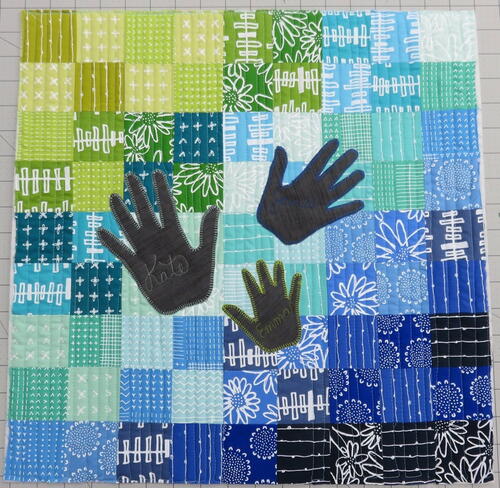
Have the people whose hand prints you want on the pillow place their hand onto the paper backing of the Wonder Under. Trace around the hand with a pencil.
-
Repeat step 2 with as many hands as desired.
-
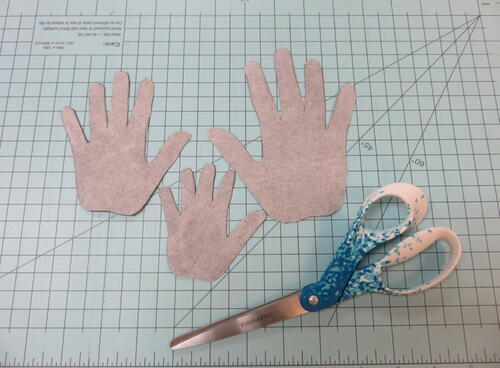
Cut the hands out with fabric scissors.
-
Gently peel off the paper backing from the hands you cut out.
-
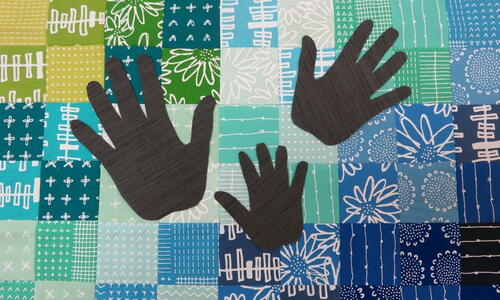
Position the fusible fabric web side down on the patchwork pillow top you pieced in the last section.
Tip: Position the hands well within 1-1/2” of all raw edges of the pieced pillow top so you don’t lose any of them in the seam allowance of the finished pillow. -
Cover the applique fabric with a damp pressing cloth and set the iron to the wool setting. Press firmly for 10-15 seconds. Repeat, lifting and overlapping the iron until all fabric is fused.
-
Remove the pressing cloth and iron the fabric to eliminate excess moisture.
-
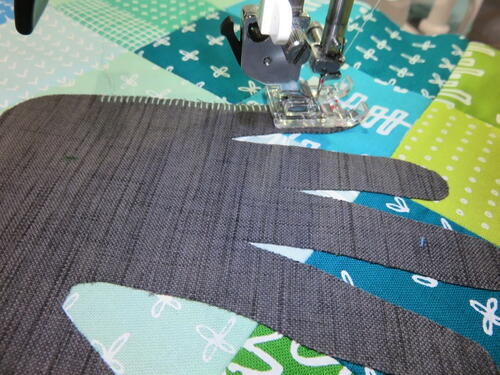
Remove the 1/4” foot and replace it with Foot F for applique. Select and applique the stitch of your choice on the MC8900 or select stitch 41. Adjust the foot pressure to be 4 and leave the thread tension at auto. If needed, adjust the width of the applique stitch.
-
Line up the outer edge of the hand cut-outs with the line on Foot F and applique around the perimeter of the hand print. Slow down on the curves and stop often if needed to adjust the position of the fabric. Stay close to the outer edge of the hand and lock the stitches when you have gone all the way around the hand.
-
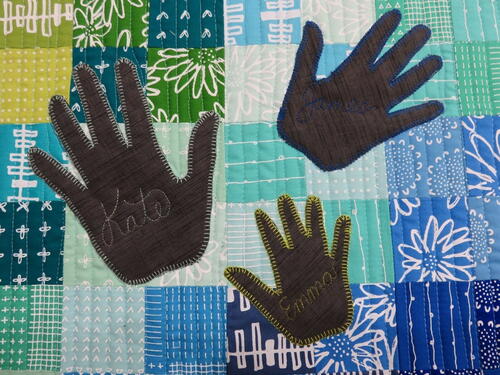
Repeat step 10 with each hand cut-out on your pillow top. Change the thread color on each hand for an added personalized touch.
Quilting the Pillow Top:
-
Place a 24” piece of fabric (this is the one that won’t be visible when the pillow is finished) wrong side up with the 24” layer of batting on top of it. Place the pillow top with the applique centered right side up on top of the batting.
-
Use basting spray to secure the layers in place or safety pins to baste.
-
Remove Foot F and replace it with the Convertible Foot QB-S for quilting. Change the pattern setting to D4S, foot pressure to 5 and lower the feed dogs. Leave the thread tension setting on auto.
-
If desired, place the Supreme Slider on the table top of the MC8900. This will make free motion quilting a little smoother by decreasing the draw when quilting.
-
Change your thread to the quilting thread you desire to quilt the pillow top.
-
Quilt as desired. Joanna chose to quilt organic straight lines on the pillow top. If you choose, you can quilt on top of the hands, but Joanna went around them with the quilting.
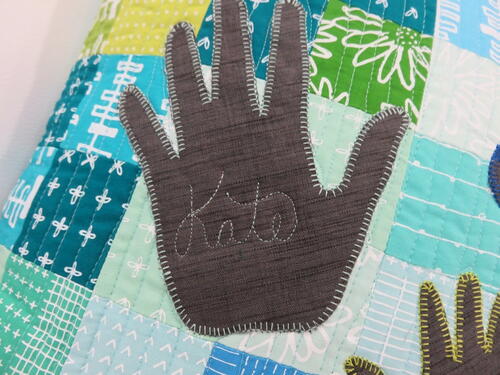
Tip: For extra personalization, try free motion quilting the names of the people on their hands. You could also add their age or the current year. -
When quilting is completed, square up the pillow top, trimming away excess batting and fabric. The quilted pillow top should be 18” when squared up.
Assembling the Pillow:
-
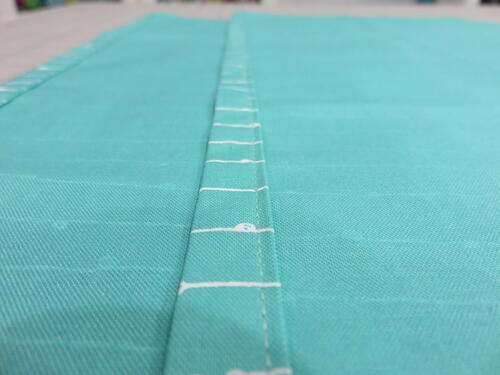
Take your cut envelope pieces for the back of the pillow, (1) 18” x 10” and (1) 18” x 14”. On one 18” long edge of each of the envelope pieces, press 1/2” up and then press 1/2” up again to make a 1/2” hem. Topstitch the edges.
-
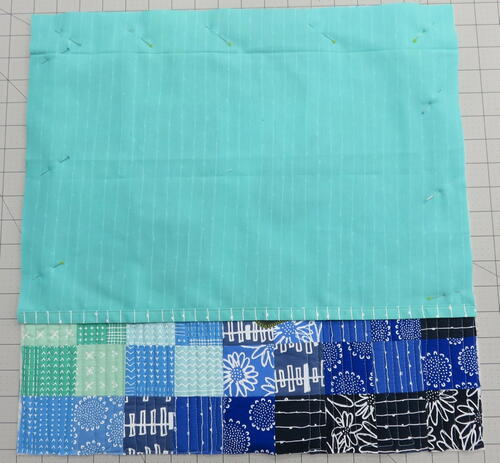
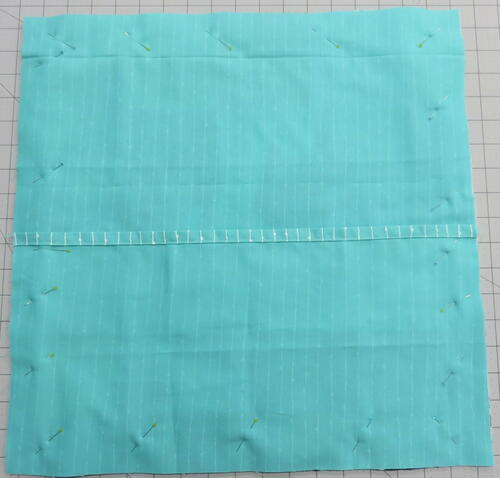
Place the quilted pillow top right side up on a flat surface. Take the hemmed 18” x 14” envelope piece and place the 18” raw edge even with the top of the quilted piece. Align the side raw edges as well. The 18” hemmed edge will be parallel to the top and bottom of the quilted piece, a little past the middle of the pillow top. Pin in place.
-
Take the hemmed 18” x 10” envelope piece and place the 18” raw edge even with the bottom raw edge of the quilted piece. Align the side raw edges as well. The hems of the envelope pieces will overlap. Pin in place.
-
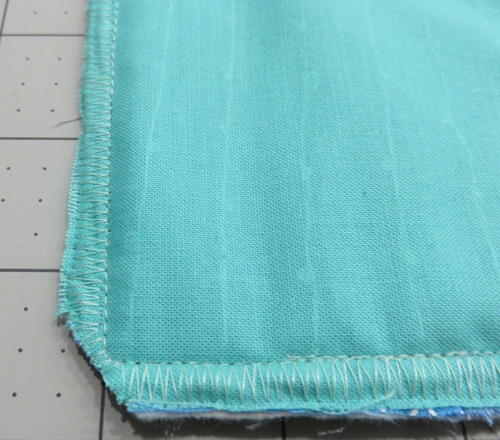
Sew with a 1/4” seam allowance all the way around the pillow edges, being careful not to sew through the pins. Clip the corners, being careful not to clip your stitches.
-
Serge the raw edges or use a zig zag stitch (stitch 10 on the MC8900). If using stitch 10 on the MC8900, change the stitch width to 6.5 and the space between the stitches to 1.0.
-
Turn your pillow case right side out, carefully pushing the corners out so they have a crisp point and then press flat.
-
Your project is finished! If you love this tutorial, be sure to check out Janome.com for even more inspiration.