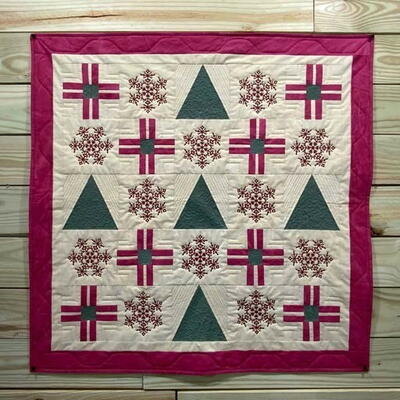
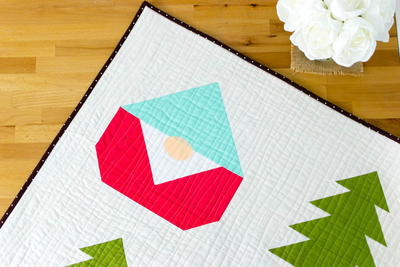
Vintage Christmas Wall Hanging

Capture the nostalgia of a vintage Christmas with this charming and free wall-hanging pattern. Crafted from timeless, muted fabrics, this simple yet elegant holiday design will fit within any home decor style. The Vintage Christmas Wall Hanging is a simple project that uses easy templates and blocks, enhanced with delicate embroidery that adds a touch of elegance. Elevate your Christmas decor with a piece that exudes the timeless charm of a truly vintage holiday. Perfect for festive enthusiasts, this project provides a delightful blend of simplicity and sophistication for a cozy seasonal ambiance in your home.
Time to CompleteWeekend project
Primary TechniqueQuilting

HolidayChristmas
Materials List
-
Janome Supplies Required:
• Janome Quilt Maker Memory Craft 15000 (other embroidery machine could be substituted, but snowflake design may not be available)
• Blue Tip Needle (200346007)
• Clear View Foot ¼” Seam for 9mm (202216003)
• ASQ22 Embroidery Hoop
• P Embroidery Foot
• Janome 60wt Pre-Wound Bobbin (PREWW72)
-
Fabric and Notions Required:
• 1 yard cream-colored cotton quilt fabric
• 1 yard red-colored cotton quilt fabric
• ¼ yard green-colored cotton quilt fabric
• 1 ½ yards cotton quilt fabric for backing
• Quilt Batting sized 45” x 45”
• Cotton quilting thread
• Embroidery thread for snowflake
• 6 ½” x 6 ½” square cutting ruler
• Rotary Cutter/Mat/Ruler
• Iron and Ironing Board
• Basic Sewing Supplies
Cutting Instructions:
From the cream fabric, cut:
Twelve squares at 6 ½” x 6 ½” (Snowflake block)
Five triangles from Template A (Tree block)
Five triangles from Template C (Tree block)
Thirty-two squares at 2 ¾” x 2 ¾” (Present block)
Thirty-two rectangles at 2 ¾” x ¾” (Present block)
4 strips at 1 ½” x width of fabric (inside border)
From the green fabric, cut:
Five triangles from Template B (Tree block)
Eight squares at 2” x 2 “ (Present block)
From the red fabric, cut:
Sixty-four rectangles at 2 ¾” x 1 1/8” (Present block)
4 strips at 2 ½ x width of fabric (outside border)
-
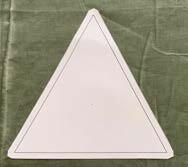
Tree Templates: Included are templates for the Tree Block. Cut out template on dotted line. Pin or spray baste templates onto indicated fabric color and cut out.
Sewing Instructions:
Sewing Machine Setup:
-
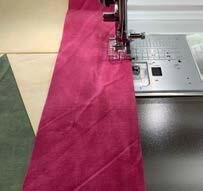
Attach Clear View ¼” Seam for 9mm foot.
-
Change needle to a new Blue Tip Needle for piecing.
-
For piecing blocks, set machine to ¼” stitching position by choosing the Home Tab, Quilting (Q), Stitch #2.
Piecing the Tree Block:
-
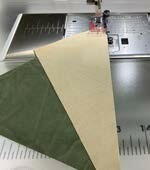
With wrong sides together, match Triangle A on Triangle B.
-
Using the ¼” edge guide of the Clear View Foot, and stitch down length of pieces to sew right sides together. Complete with all 5 pieces of Triangle A to Triangle B. Press fabric to Triangle A side with an iron.
-
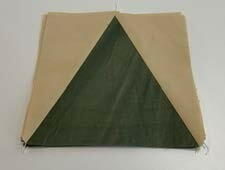
Finish block by attaching remaining Triangle C pieces to other side of Triangle B using same directions as above. Press again to Triangle C side to complete the block.
-
Set all 5 blocks aside until later.
Piecing the Present Block:
-
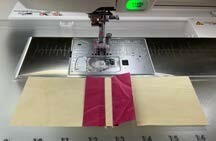
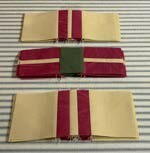
Stitch one cream 2 ¾” x ¾” strip to one red 2 ¾” x 1 1/8” strip using Clear View Foot edge guide to make a ¼” seam allowance. Press to the red fabric.
-
Stitch second red strip to opposite side of cream fabric. Press again to the red fabric. Square should then be a red/cream/red piece.
-
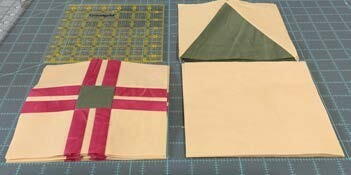
Stitch the following pieces in order to create the top and bottom rows of each Present blocks: cream (2 ¾” x 2 ¾” ) to red/cream/red piece to cream (2 ¾” x 2 ¾”) piece. After stitching there should be a total of 16 strips to be separated for the top and bottom rows of the Present blocks.
-
Attach remaining red/cream/red strips on each side of the green square (2” x 2”) to form middle row of Present blocks.
-
Finally, sew Present block rows together, also using the ¼” seam allowance. Press seams to one side to flatten.
Stitching the Rows and Borders:
-
Prior to putting the rows together. Check size and trim (if necessary) all blocks to 6 ½” x 6 ½” squares.
-
Using a ¼” seam allowance, and the Clear View Foot ¼” Seam, stitch blocks together using layout as follows:
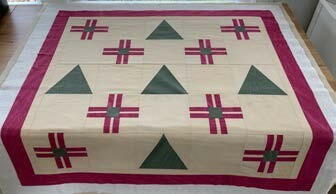
Row 1: Present, Blank, Tree, Blank, Present
Row 2: Blank, Present, Blank, Present, Blank
Row 3: Tree, Blank, Tree, Blank, Tree
Row 4: Blank, Present, Blank, Present, Blank
Row 5: Present, Blank, Tree, Blank, Present -
Press all seams on rows to one side to help flatten quilt blocks.
-
Once pressed measure top and bottom quilt rows to cut down border strips. First border will be the inner cream border.
-
Stitch top and bottom borders onto quilt. Press towards the border fabric.
-
Measure each side of the quilt, cut down additional 2 cream strips to fit sides. Stitch into place.
-
Complete same technique for red outer border as the same cream border, but measure and attach side borders before measuring, cutting, and attaching top and bottom borders. Press seams toward outside red border.
Preparing Blocks for Embroidery:
-
Layer fabrics together to prepare for embroidery work and quilting. Embroidery stabilizer will not be used since the multiple layers of the quilt will support the embroidery design. Layers should be as follows: Quilt Backing (right side facing down), quilt batting, quilt top (right side facing up). Layers can be pinned together (avoid pinning in blank blocks) or temporarily adhere using a quilt basting spray.
-
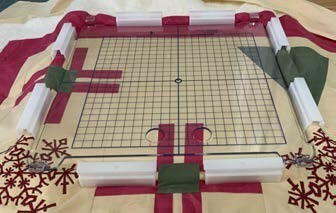
On blank blocks, find center of block and mark with a fabric marking pencil or pen. Center marked spot in the middle of hoop, using plastic template to find center location. Once placement has been found, secure fabric in hoop using magnetic clips as shown. Remove plastic template before transferring to the machine.
Snowflake Embroidery Design:
-
Power off the sewing machine. Attach embroidery unit onto the back of the Quilt Maker Memory Craft 15000. Change presser foot to P Embroidery Foot. Replace bobbin case with the yellow dot bobbin case and bobbin wth a Janome prewound bobbin for embroidery. Open Embroidery Unit and then power on machine. When prompted, choose OK to switch to embroidery mode. Thread the machine with embroidery thread.
-
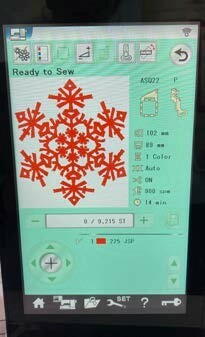
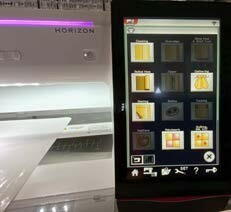
Select the Built-in design key, then the Design Category key. From the Design Category choose Redwork Designs by Y.GANAHA. Select the 4th option of the larger snowflake.
-
To customize hoop option to fit the ASQ22 hoop, choose the home option, then the Editing Mode Key to open up editing options.
-
Next, choose the Hoop selection key, scroll to page 2 and select the ASQ22. Select OK at the bottom of the screen to move back into stitch mode. Screen should now reflect hoop as the ASQ22. Attach hoop into embroidery unit, select the green Start/Stop button to begin stitching. Once done, remove hoop, re-hoop into another blank cream block and stitch again until all blocks are completed.
Finishing the Quilt:
-
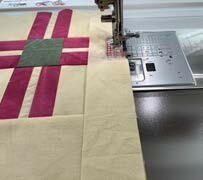
To finish the quilt after all embroidery is complete, switch machine back to sewing mode. Select the “home” at the bottom of the screen, then touch the “t-shirt” to enter into techniques. At the bottom of the techniques screen choose the “Quilting, RW, VZZ” option, then Ruler Work, Free Motion, or Straight stitch depending on desired method for finishing. Finished photos of quilt reflect a combination of Free Motion and Ruler Work to Complete.
-
After quilting is finished, trim excess batting and backing from the edges of the quilt top. Bind quilt and hang to enjoy.
-
Your project is finished! If you love this tutorial, be sure to check out Janome.com for even more inspiration.
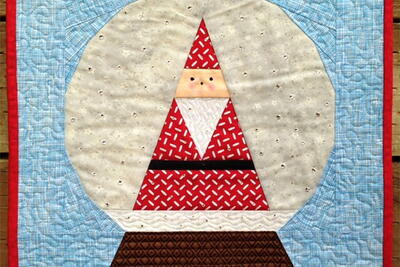
Read NextSanta's Belt Quilt Block Pattern