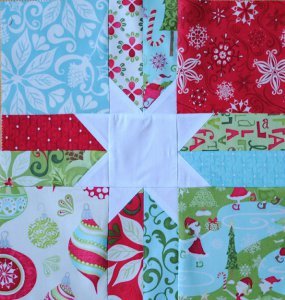
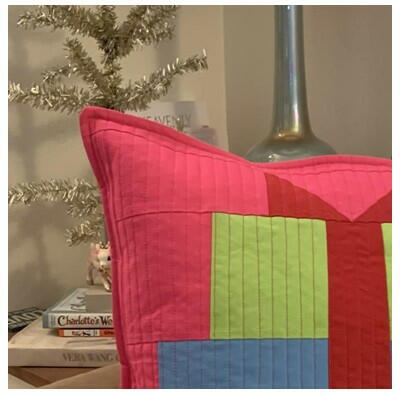
Christmas Wrapping Pillow

Elevate your holiday home decor with a touch of brightness and cheer! Introducing the vibrant pillow by Michelle from Little Dog Designs. Dive into a delightful tutorial crafted just for you, and transform your space with this festive addition. Let the holiday spirit shine through every corner of your home with this easy-to-follow guide. Get ready to make your space merry and bright with a pop of color and a dash of creativity!
HolidayChristmas
Materials List
- Fabric A – Kona bright pink – one yard
- Fabric B – Kona cardinal – fat quarter
- Fabric C – Kona chartruese – fat eighth
- Fabric D – Kona stratosphere – fat eighth
- Fabric E – Kona crocus – fat eighth
- 24” x 24” piece of batting
- 24” x 24” piece of fabric for quilting backing
- 20” zipper
-
Machines used:
- Memory Craft 6700P
- Airthread 2000D
INSTRUCTIONS
Cutting/Preparing:
-
Fabric A
• Cut 3 – 3 ½: x 6 ½”rectangles
• Cut 2 – 4 ½” x 4 ½” squares
• Cut 2 – 2 ½” x 6 ½” rectanges
• Cut 2 – 1 ½” x 20 ½” strips
• Cut 2 – 1 ½” x 18 ½“ strips
• Cut 2 – 10 ½” x 20 ½” rectangles -
Fabric B
• Cut 2 – 3 ½” x 3 ½” squares
• Cut 1 - 2 ½” x 15 ½” rectangle
• Cut 1 – 4” x 20 ½” rectangle -
Fabric C
• Cut 2 - 4 ½” x 4 ½” squares -
Fabric D
• Cut 2 – 6 ½ x 6 ½” squares -
Fabric E
• Cut 2 – 5 ½” x 5 ½” squares
Piercing:
-
Sew with a ¼” seam allowance.
Create the flying geese unit by drawing a diagonal line down each of the fabric B 3 ½” x 3 ½” squares. Place one square onto one of the fabric A 3 ½” x 6 ½” rectangles. Stitch along the marked line. Press and trim away excess leaving a ¼” seam allowance. -
Place the other fabric B squares onto the flying geese unit and stitch along the marked line. Press and trim away exess leaving a ¼” seam allowance.
-
Sew a 3 ½” x 6 ½” rectangle to either side of the flying geese unit.
-
Add the borders by sewing the sides (1 ½” x 18 ½” strip) and then the top (1 ½”x 20 ½” strip).


Making the pillow:
-
Fold 4” x 20 ½” strip in half lengthwise and press. Pin or glue to the right side of one 10 ½” x 20 ½” rectangle. I use a washable glue stick and heat set it to speed the drying process. Any residue will wash out and it won’t make your needle gummy.
-
Place the zipper along the raw edge of the red strip with the left side of the zipper face down, pin or glue in place.
-
Using the zipper foot stitch in place with a 3/8” seam allowance. Press the zipper flap over the zipper.
-
Place the other 10 ½” x 20 ½” rectangle right side down on top of the right side of the zipper tape, pin or glue in place, keeping the zipper flap out of the seam allowance.
-
Using the zipper foot stitch in place with a 3/8” seam allowance. Press.
-
Baste the zipper flap in place.
-
Open the zipper about 6” and pin the pillow front and back RST.
-
Stitch or serge with a ¼” seam around the pillow.
-
Turn right side out and press.
-
Top stitch ½” from the edge to create a flange.
-
Your project is finished! If you love this tutorial, be sure to check out Janome.com for even more inspiration.
Read NextQuilted DIY Christmas Ornaments