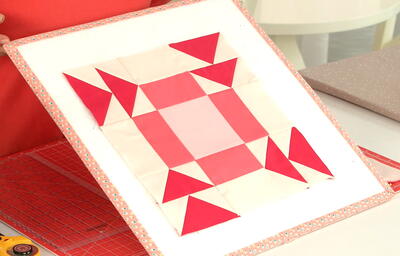
Stacked Squares Quilt Block Pattern

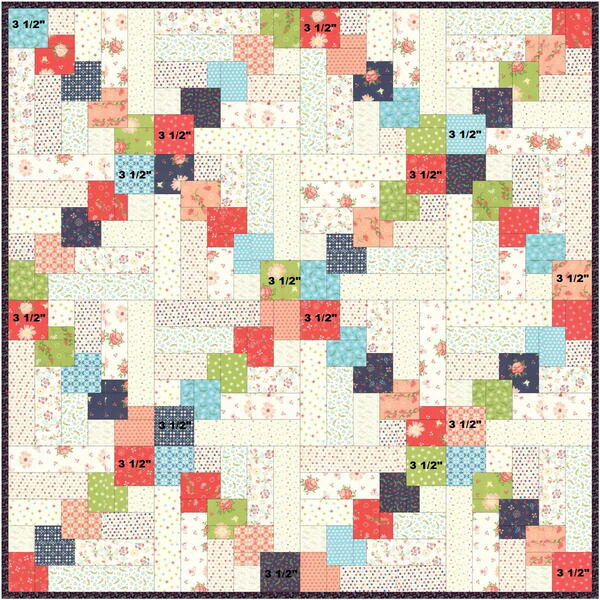
From the Designer: "Hi, FaveQuilters, It's me, Melissa Corry from Happy Quilting and I am super excited to be sharing a fun, new quilt block tutorial with you. I love making log cabin blocks as well as Irish chain quilts, so today I have combined the two to make this super fun Stacked Squares Block! It is built like a quarter log cabin block but when the blocks are put together it makes a chain--so great! So, let's get to making this Stacked Squares Block."
Find more pretty patterns from our friend Melissa over at her blog, Happy Quilting.
Click Here to Download the PDF Pattern!
Join Our 100,000+ Fans And Sign Up to Receive Your FREE eNewsletter!
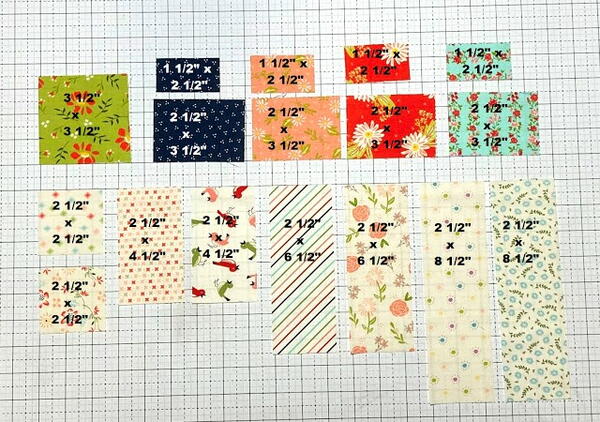
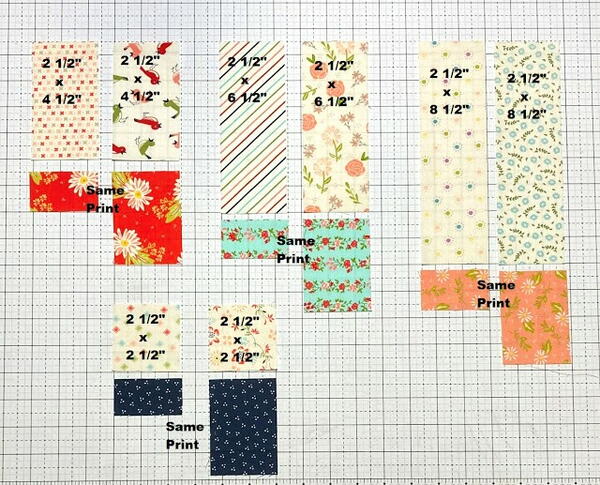
Cutting Requirements
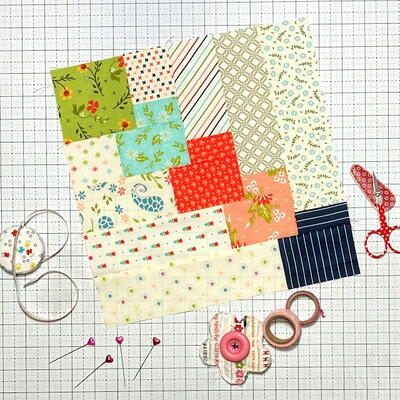
From your Print Scraps cut:
(1) 3 1/2" x 3 1/2" square from one Print Scrap
(4) 1 1/2" x 2 1/2" rectangles and (4) 2 1/2" x 3 1/2" rectangles
(cutting 1 size from each of the 4 Print Scraps as shown)
From your Low Volume Scraps cut:
(2) 2 1/2" x 2 1/2" squares
(2) 2 1/2" x 4 1/2" rectangles
(2) 2 1/2" x 6 1/2" rectangles
(2) 2 1/2" x 8 1/2" rectangles
Block Construction
1. Pair your Print rectangles to matching size Low Volume squares/rectangles. It doesn't matter which color you pair what size to, as long as the same color prints rectangles are paired with the same size Low Volume square/rectangle as shown.
2. Place your Print rectangles onto the Low Volume square/rectangles with right sides together. Sew a 1/4" seam along the edge of all 8 pairs.
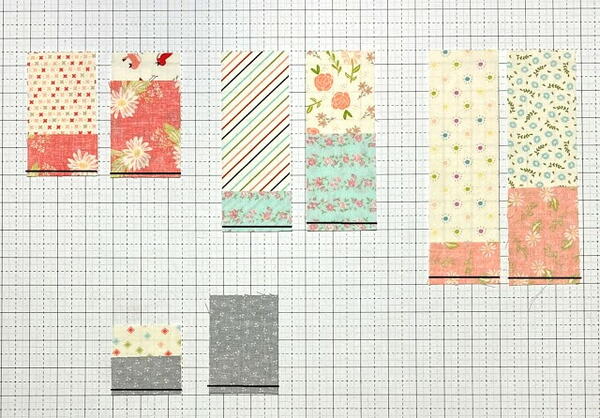
3. Press the seam allowances towards the Print rectangles. Now all of your Low Volume Strip Sets are prepared and ready to be sewn into the Stacked Squares Blocks.
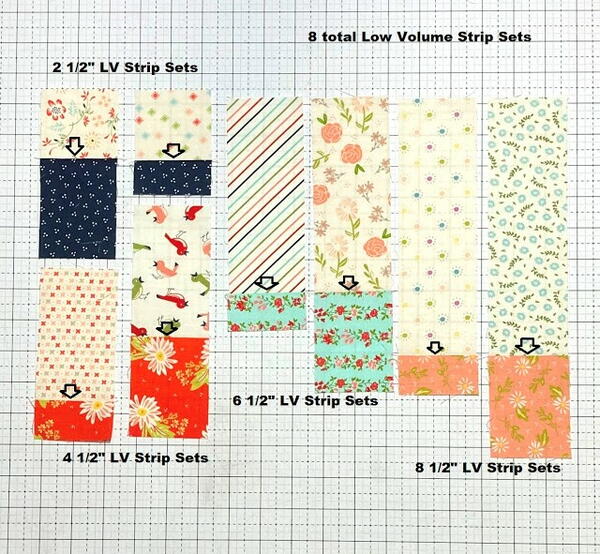
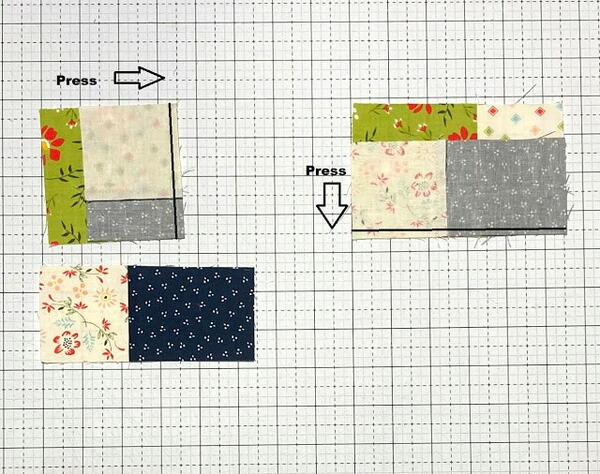
4. Layout the 3 1/2" x 3 1/2" Print Square and the (2) 2 1/2" Low Volume Strip Sets as shown.
5. Place the shorter 2 1/2" Low Volume Strip Set onto the Print 3 1/2" square with right sides together. Sew a 1/4" seam along the edge. Press out towards the Low Volume Strip Set. Then, place the longer 2 1/2" Low Volume Strip Set onto the Partially Pieced Block with right sides together. Sew a 1/4" seam along the edge. Press out towards the longer 2 1/2" Low Volume Strip Set.
6. Now we will just repeat the same process 3 more times to create the block. Layout the Partially Pieced Block and the (2) 4 1/2" Low Volume Strip Sets as shown.
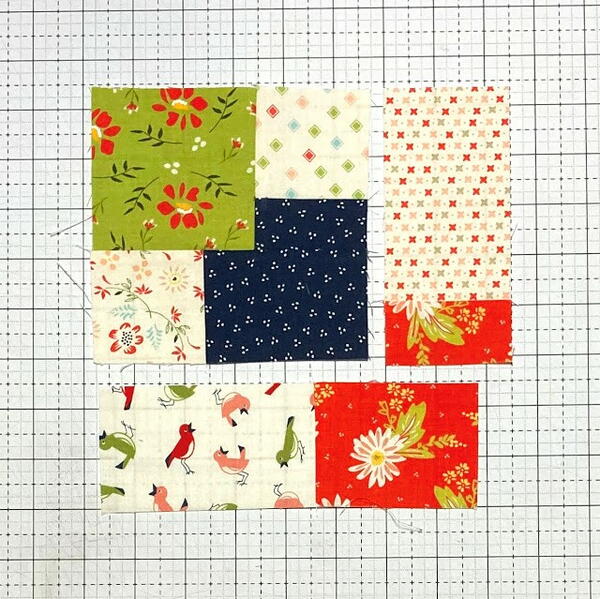
7 . Place the shorter 4 1/2" Low Volume Strip Set onto the Partially Pieced Block with right sides together. Sew a 1/4" seam along the edge. Press outwards. Then, place the longer 4 1/2" Low Volume Strip Set onto the Partially Pieced Block with right sides together. Sew a 1/4" seam along the edge. Press outwards.
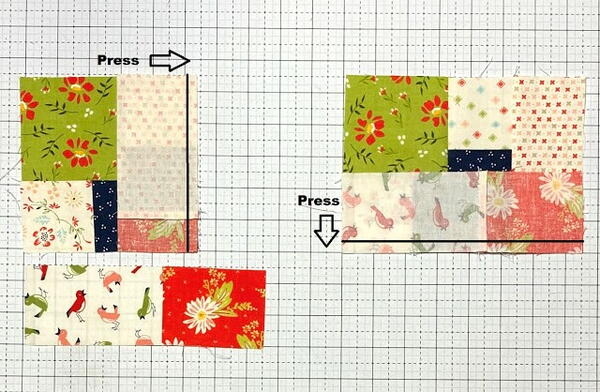
8. Now layout the Partially Pieced Block and the (2) 6 1/2" Low Volume Strip Sets as shown.
9. Place the shorter 6 1/2" Low Volume Strip Set onto the Partially Pieced Block with right sides together. Sew a 1/4" seam along the edge. Press outwards. Then, place the longer 6 1/2" Low Volume Strip Set onto the Partially Pieced Block with right sides together. Sew a 1/4" seam along the edge. Press outwards.

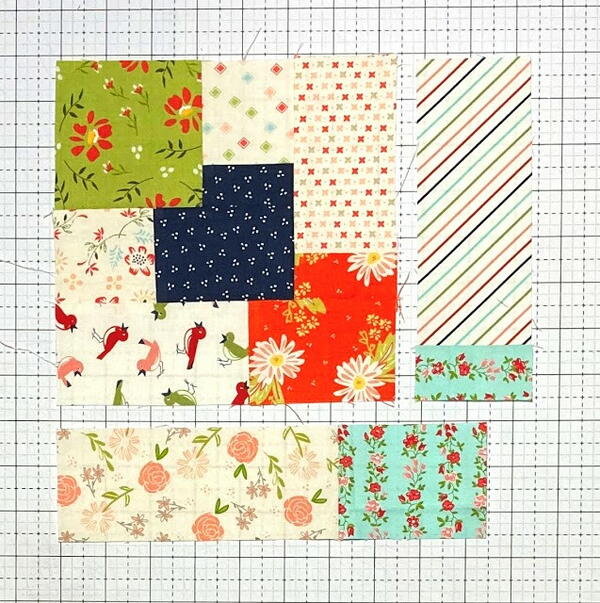
10. Finally layout the Partially Pieced Block and the (2) 8 1/2" Low Volume Strip Sets as shown.
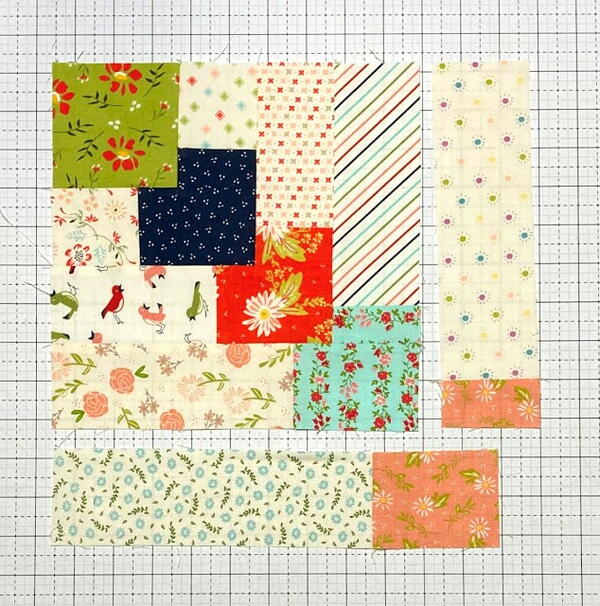
11. Place the shorter 8 1/2" Low Volume Strip Set onto the Partially Pieced Block with right sides together. Sew a 1/4" seam along the edge. Press outwards. Then, place the longer 8 1/2" Low Volume Strip Set onto the Partially Pieced Block with right sides together. Sew a 1/4" seam along the edge. Press outwards.

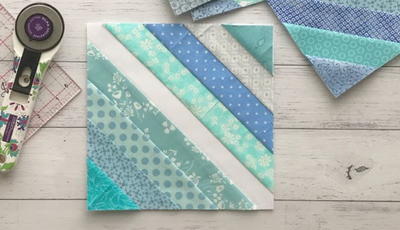
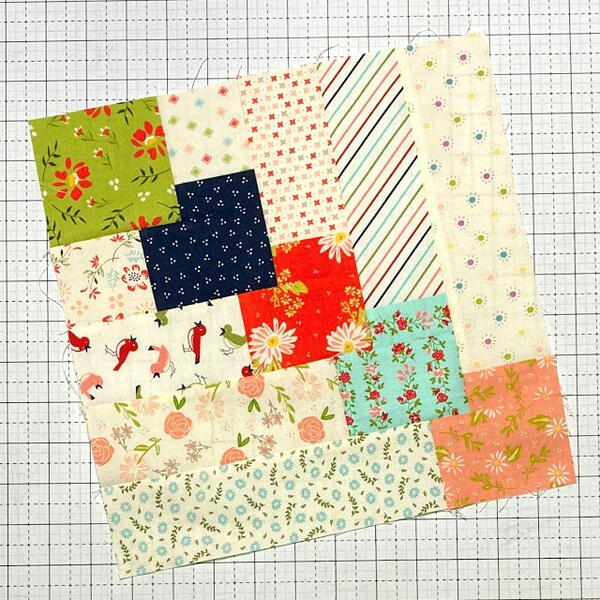
Finished Block
Well done! Your Stacked Squares pattern is complete!
Share your thoughts in the comments section below and add a picture of your version.
Notes from designer Melissa Corry:
And just like that, you have a 10 1/2" x 10 1/2" unfinished Stacked Squares block! Wasn't that just so fun? Now just make as many blocks as you want in your quilt, because trust me, you can't stop at just one!
NOTE: When you layout your quilt, be sure to rotate your blocks as shown altering the placement of the original 3 1/2" square so it "stacks" and creates your chain. Once it is all laid out, sew your blocks into rows and then your rows into a quilt top.
Then it is time to Baste It, Quilt It, and Bind It! If you are new to quilting, you can see my Finishing Your Quilt Series of video tutorials that will walk you through finishing the quilt step by step.
I hope you have enjoyed this tutorial and find it easy to follow. If you make your own Stacked Squares Blocks or Quilts I would love to see them!! You can email me a picture or add it to social media with #happyquiltingwithmc #happyquiltingwithmc
I can't wait to see your Stacked Squares Blocks and Quilts!
Thanks again FaveQuilts for having me!!!
I hope you all have a Happy Quilting Day!!
Who else LOVES this amazing pattern from Melissa? Let us know your thoughts below!
Your Recently Viewed Projects
Thanks for your comment. Don't forget to share!
vivmarek 3657581
Mar 20, 2021
I enjoyed making this block--but was dismayed to find that it measures 11 1/2" rather than 10 1/2". When I added up the cutting measurements, they do total 11 1/2". Surely I'm not the only one to notice this. An easy fix would be simply to correct the "Notes from Melissa Corey" text. It looks as though updating the cutting instructions would be way too complicated. Your thoughts? BTW, I checked the Have not made it box in order to submit my question there seems to be no place to enter my rating otherwise -)
Report Inappropriate Comment
Are you sure you would like to report this comment? It will be flagged for our moderators to take action.
Thank you for taking the time to improve the content on our site.

![Nine Patch Chain Quilt Block Pattern [For Free]](http://irepo.primecp.com/2024/02/575649/nine-patch-cahin-quilt-block_Category-CategoryPageDefault_ID-5477510.jpg?v=5477510)