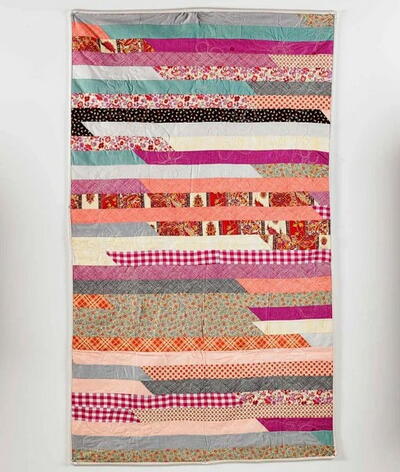
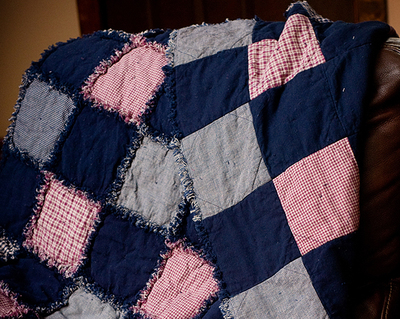
Fuss Free Rag Quilt
If you've never made a soft and cuddly rag quilt before, there's no better tutorial to guide you than that of the Fuss Free Rag Quilt. Grow confident in stitching together your squares and fraying your edges with rag quilt instructions that make everything from beginning to end very easy to understand. Rag quilting is perfect for when it's about to get chilly outside and you need a warm quilting tutorial fast, making this basic quilt pattern a go-to design for those particularly cold parts of the year.

Materials:

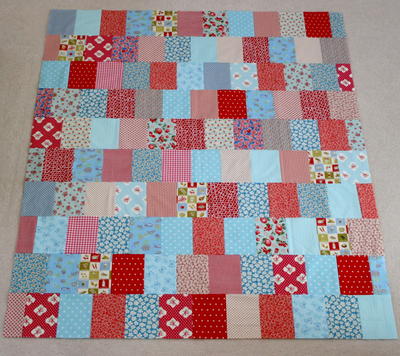
The size and number of the squares you cut depends on the finished size you desire. This is easily adjusted according to your needs. I created my quilt using the book Made From Scratch Biscuit Quilts by Annis Clapp. I started with 63 front and 63 back squares in a variety of fabrics that I cut using the Fiskars 45mm Comfort Grip Rotary Cutter, the 6.5 inch by 34.5 inch Acrylic Ruler and the 18 inch by 24 inch Cutting Mat.
Instructions:
1) Traditionally, after sandwiching batting between the squares, each block is quilted by sewing diagonally from corner to corner, creating a large X. The quilting on mine was a bit different. Using my Fiskars Desktop Rotary Trimmer I cut a square of chipboard and then cut the square diagonally from one upper corner to the opposite lower corner creating 2 triangles. These were used to trace onto my backing blocks for use as quilting lines.

2) The batting squares were centered on each backing block and then machine quilted on the lines from the previous step.

3) After layering the top square over the quilted square, I stitched around the perimeter and ended up with a large pile of these "biscuits."
4) Once completed, a tacking stitch was added to the center of each block to prevent the batting inside from shifting. The biscuits were then sewn together (back sides together) into rows.

5) Using a walking foot for sewing the blocks together is invaluable. While the feed dogs are pulling the bottom fabric over the needle plate, the top layer of a thicker project like a quilt will typically be dragged through at a slower pace. The resistance is caused by the added thickness of the project. It doesn't take long for the layers to be misaligned and begin bunching up. Using a walking foot helps because it pulls the top layer of fabric along in conjunction with the feed dogs pulling the bottom layer.

6) The rows then are sewn together and the seams pressed open as the connection of the rows is complete. Once the rows are sewn together, the binding is done. If you don't want to add a traditional binding made from strips of fabric joined together, you can do as I did and top stitch around the perimeter of the quilt.

7) The final step is to snip the seam allowances to aid in the fraying. These Easy Action Rag Quilt Snips are a breeze to use and the razor sharp blades allow you to cut through multiple layers of fabric at once. Unlike regular scissors, these Easy Action Scissors have a spring action handle that pops the scissors back open for you after making a cut. When you're making hundreds of snips 1/4 inch a part, you can imagine how much this helps your hand and wrist!

A glimpse at what the finished quilt looks like after all the snipping is done, including around the perimeter of the quilt.

The final step is to throw the quilt in the washer and dryer where the excess thread are washed away and the fraying is softened and fluffed.

Read NextEasy as Pie Stash Quilt
Your Recently Viewed Projects

Thanks for your comment. Don't forget to share!
mandolinwood 85712 54
Apr 25, 2016
Do you sew the front side of the squares together?
Editor AllFreeCroc het
Apr 27, 2016
Hello! The tutorial does not specify. Please contact the customer service for this pattern at http://www2.fiskars.com/Support/Customer-Service. You can also post your question on our Facebook page to ask other quilters: http://www.facebook.com/FaveQuilts - Editor of FaveQuilts
Tammy
Nov 23, 2016
Yes, for a rag quilt, you do sew the fronts together so that the seam is on the top of the quilt. It is completely opposite of a traditional quilt, but I find it is so much easier and for children they are absolutely wonderful. The wonderful thing about this specific rag quilt....if it rips, you can repair it with an iron on patch. My grandsons has a few of those already...but it actually makes it look better!
Report Inappropriate Comment
Are you sure you would like to report this comment? It will be flagged for our moderators to take action.
Thank you for taking the time to improve the content on our site.