Baby Toys Applique Wall Hanging

Baby Toys Applique Wall Hanging
Quilt the Baby Toys Applique Wall Hanging as a baby decoration for nurseries or baby door decorations. This quilt wall banner is great for both baby girls and baby boys. This is also a good project for quilters decorating a church nursery or daycare center.
Project TypeMake a Project
Quilt Size8.5 inches wide x 29 inches long
Time to CompleteWeekend project
Primary TechniquePieced & Appliqued

MATERIALS:
- Light blue fabric—1⁄4 yard or fat quarter
- Yellow fabric—1⁄4 yard
- Orange fabric—3⁄8 yard (binding and letters)
- Appliqué fabrics—scraps or fat quarters
- Fusible Web—1⁄2 yard
- Backing—1⁄3 yard
- Batting—11" x 32"
- Accuquilt die cutting machine
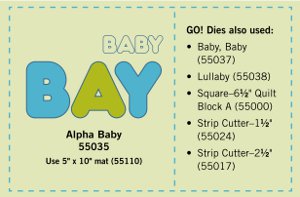
- Accuquilt Alpha Baby dies (#55035)
- Accuquilt 5" x 10" cutting mat (#55110)
- Accuquilt Baby, Baby dies (#55037)
- Accuquilt Lullaby dies (#55038)
- Accuquilt Square–6-1⁄2" Quilt Block A (#55000)
- Accuquilt Strip Cutter–1-1⁄2" (#55024)
- Accuquilt Strip Cutter–2-1⁄2" (#55017)
- Coordinating thread
INSTRUCTIONS:
Light Blue Fabric:
- Cut 4—6-1⁄2" squares
Yellow Fabric:
- Cut 3—1-1⁄2" strips across the width of fabric (WOF) for sashing
Orange Fabric:
- Cut 2—2-1⁄2" strips across the WOF for binding
- Cut 2—“B” letters with fusible web backing}
- Cut 1—“A” letter with fusible web backing
- Cut 1—“Y” letter with fusible web backing
Appliqué Fabrics—with fusible web backing and following
diagram for color choices:
- Cut 1—rattle handle, ball and accent stripe
- Cut 1—bear, bow, nose, eyes, ears and paw accent pieces
- Cut 1—sheep facing right, leg, ear and head
- Cut 1—duck facing right, wing, bill and eye
Sewing:
- Remove paper backings from appliqué shapes.
- Following diagram, position appliqué shapes on each light blue 6-1⁄2" square. Remember to allow for seam allowances. Fuse in place following manufacturer’s directions.
- Machine appliqué edges of shapes with matching thread and a narrow zigzag or narrow satin stitch.
- Cut one yellow 1-1⁄2" strip into three 1-1⁄2" x 6-1⁄2" rectangles.
- Pin and sew yellow rectangles between blocks. Press seams toward yellow rectangles.
- Pin and sew yellow 1-1⁄2" strips to sides first, then top and bottom of wall hanging center. Press seams toward yellow strips.
Quilting and Finishing:
- Layer batting between wall hanging top and backing.
- Pin or baste layers together.
- Model was machine quilted with outline quilting around appliqué shapes and in the ditch around light blue squares.
- Add binding, mitering corners, adding a hanging sleeve, if desired, before hand stitching binding to back of wall hanging.

Read NextCute as a Button Quilt