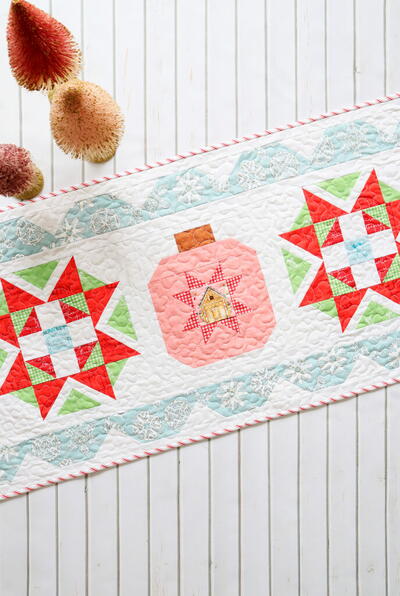
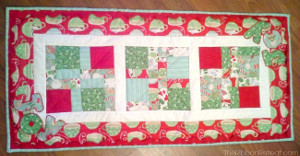
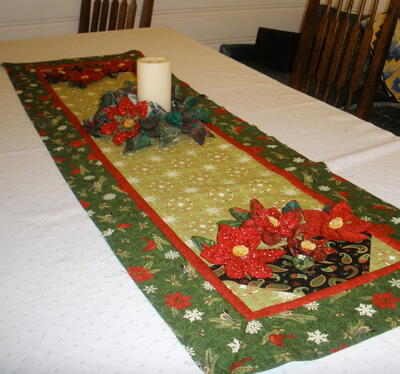
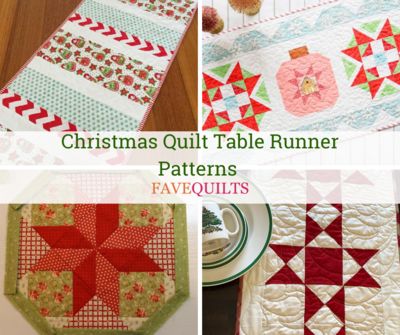
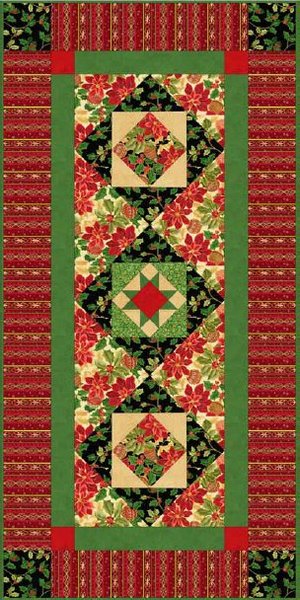
Holiday Classics Table Runner
Beautiful, festive fabric deserve to be shown off in the most elegant fashion, which is why you should use them to make a Holiday Classics Table Runner this Christmas. This quilted table runner pattern combines two classic quilt block designs to create a symmetrical and whimsical design that's sure to bring class and holiday cheer to your dining room table or front room. A Christmas table runner like this looks just as good as anything in stores, and it'll cost you much less.

Finished Size: 50" x 25"
Cutting
WOF = Width of fabric.
Note: Use 1/4" seam allowances throughout.
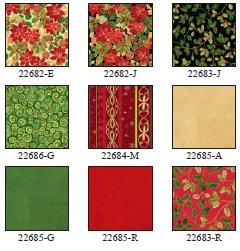
22682-J Large Poinsettia on Black
-
(1) 6 1/2" x WOF strip, from that cut:
(6) 7" squares, cut diagonally once to yield (12) triangles. -
(1) 4 1/2" x WOF strip, sub-cut to:
(4) 4 1/2" squares.
22686-G Green Swirl
- (1) 5 1/4" squares, cut diagonally once to yield (4) trianges.
22684-M Red Stripe
-
(3) 4 1/2" x WOF strips, sub-cut to:
(2) 4 1/2" x 42 3/4" rectangles.
(2) 4 1/2" x 17 1/4" rectangles.
22685-A Cream
-
(1) 5 1/4" x WOF strip, sub-cut to:
(4) 5 1/4" squares, cut diagonally once to yield (8) triangles. -
(1) 2" x WOF strips, sub-cut to:
(4) 2" x 3 1/2" rectangles.
(4) 2" squares.
22685-G Green (includes Binding)
-
(3) 2 1/2" x WOF strips, sub-cut to:
(2) 2 1/2" x 38 1/4" rectangles.
(2) 2 1/2" x 13 1/4" rectangles. -
(1) 2" x WOF strip, sub-cut to:
(8) 2" squares. - (4) 2 1/2" x WOF strips for binding.
22685-R Red
-
(1) 3 1/2" x WOF strip, from that cut:
(1) 3 1/2" square.
(4) 2 1/2" squares
22683-R Holly on Red for Backing Fabric
Block 1 - Make (2)
-
Center and sew a cream triangle to the top and bottom of a 6 1/2" Large Poinsettia on Black print square. Press toward the triangle. Next, sew cream triangles to each side of the Large Poinsettia on Black print square, and press toward the cream triangle. Repeat for both 6 1/2" Large Poinsettia on Black print squares.
-
Sew a Holly on black triangle to the top and bottom of the previous unit, and press towards the triangles. Next, sew a Holly on black triangle to the sides of the square.

Block 2 - Make (1)
-
Make Flying Geese units: Lay a 2" Green square on a 2" x 3 1/2" Cream rectangle right sides together. Sew from the upper right corner ot the bottom left corner.
Repeat for all 4 Cream rectangles.
Leaving a 1/4" seam allowance, cut away the excess triangle on the bottom right and press the green triangle out. Press seam allowances toward the green.
Repeat the step with the 2" Green square on the other side of the Cream rectangle, this time sewing from teh upper left corner to the bottom right corner. Again, cut away excess and press the seam allowance toward the green. Make (4) Flying Geese units.
-
Using the Flying Geese units, the Cream Squares, and the 3 1/2" Red Square, make a star unit by sewing parts together in three rows of three.

-
Center and sew a Green Swirl triangle to the top and bottom of the Star block. Press toward the triangle.
Next, sew a Green Swirl triangles to each side of the star block.
-
Sew a Holly on Black triangle to the top and bottom of the previous unit. Next, sew a Holly on Black triangle to the sides of the square.

- Refer to the picture: Turn the blocks on point and sew in three rows with the Large Poinsettia on Cream setting triangles. Add the Small Poinsettia on Cream triangles to the corners.
Borders
-
Sew the (2) 2 1/2" x 38 3/4" Green fabric rectangles to the long sides of the table runner. Press seams toward the borders. Sew a 2 1/2" Red square to each short end of the (2) Green 2 1/2" x 13 1/4" rectangles. Press toward the Green fabric. Sew these to the short ends of the table runner, matching seams at the cornerstones.
-
Sew the (2) 4 1/2" x 42 3/4" Red Stripe rectangles to the long sides of the quilt. Press seams towards the borders.
Sew a 4 1/2" Holly on Black square to each short end of the (2) Red Stripe 3 1/2" x 17 1/4" rectangles. Press toward the Red Stripe fabric. Sew these to the top and bottom, matching seams at the cornerstones.
Note: Refer to the photo on front for border order.
Sandwich, quilt, and bind your table runner using your favorite methods. Use the 2 1/2" Green print strips for the binding.
Your Recently Viewed Projects

Thanks for your comment. Don't forget to share!
jdlovelace 9319441
Aug 24, 2018
Your first direction says to cut WOF a 6 1/2 strip but then cut that into 7 " squares. You can't make a 7" square out of a 6 1/2 " strip. Did you mean 7" wide strip?
Melen
Nov 21, 2016
If you could please add the missing cutting instructions I would appreciate it also, I just bought all my material and am now stuck !
bbnett
Nov 15, 2016
The cutting instructions for the poinsettia on cream and the holly on black fabric are missing. It would be great if you could add these.
Member 2839534
Jun 05, 2015
I absolutely LOVE this runner for more than just the holiday design, however, the cuts and fabric don't match us with the design. Its appears to be missing some fabric cuts and other cuts are not aligned with the fabric design. Think this one must have gotten mixed up when posting online. I am trying my best to figure it out as I so want to make this beautiful runner. Hoping someone can figure it out and post an update.
Report Inappropriate Comment
Are you sure you would like to report this comment? It will be flagged for our moderators to take action.
Thank you for taking the time to improve the content on our site.