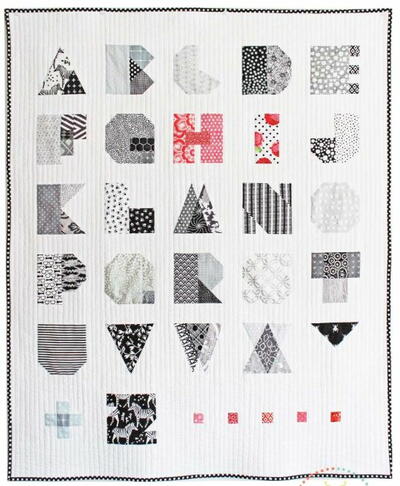
The ABC's Quilt Pattern

This whimsical quilt pattern brings the joy of learning to life with every stitch! Perfect for little ones and educators alike, this charming design features the ABCs intricately woven into a delightful patchwork motif. Each letter becomes a vibrant piece of the puzzle, inviting young minds to explore the world of language and literacy in a playful and tactile way. Whether used as a cozy blanket for story time or hung as a colorful wall hanging in a classroom or child's bedroom, this quilt pattern is sure to spark curiosity and imagination. Stitch by stitch, watch as the alphabet comes alive in a beautiful tapestry of knowledge and creativity.
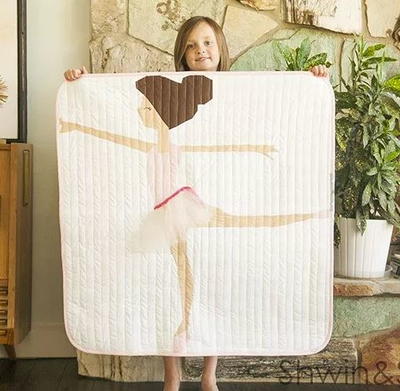
Completed Quilt: 40” x 48”
Materials List
-
JANOME SUPPLIES REQUIRED
- 44" x 52" quilt batting
- Rotary cutter
- Cutting mat
- Acrylic ruler
- Thread
- Scissors
- Pins
- Pencil
-
FABRIC AND NOTIONS REQUIRED
- Co-ordinating fabric scraps (minimum of 6" x 6")
- 60 different prints
- 5 pieces of contrasting fabric (6" x 6") for letters "H" and "I" and for the small squares at the bottom right of the quilt
- Ground fabric: 1 yard
- Backing fabric: 1 1/2 yards
- Binding fabric: 1/2 yard
INSTRUCTIONS:
Cutting Instructions:
-
Ground fabric:
A - 22 pieces - 2½” x 5½”
B1 - 1 piece - 1½” x 4½”
B2 - 4 pieces - 1½” x 3”
B3 - 1 piece 1½” x 2½”
B4 - 1 piece - 4½” x 21½”
B5 - 1 piece - 2½” x 21½”
C - 1 piece - 2½” x 40½”
D - 3 pieces - 2½” x 33½”
E - 2 pieces - 3½” x 40½”
F - 2 pieces - 4½” x 40”
Use the remainder ground fabric for piecing the letters. -
Binding fabric: Cut 5 strips 2½” x WOF (width of fabric) Contrasting fabric: G - Cut 5 squares 1½” x 1½”
Quilt Top Construction:
** All seam allowances are 1/4”.
Download the paper piecing pattern pdf for letters here: http://www.kayajoydesigns.com/back-to-school-quilt-for-janome/
-
For each letter, piece with paper piecing technique. Numbers on individual pieces indicate order in which to piece.
-
Choose fabrics that are lighter or darker in value as per Diagram 1 to achieve depth and variety. All blocks should measure 5½” square when completed (includes seam allowance).
-
Following Diagram 1, add ground fabric sashing in the following order:
- Sew pieces “A” between letter blocks. Sew pieces B1, four B2 & B3 between small squares “G”.
- Sew B4 and B5 to top and bottom of strip with small squares.
- Sew “C” between 1st and 2nd column of letters, pinning first.
- Sew three “D” to last three columns of letters, pinning first.
- Sew block of last three strips of letters to block of small squares.
- Sew this to block of first two strips of letters, pinning first.
- Add “E” to both sides, then “F” to top and bottom.

Assembling Quilt
-
Layer backing, batting and quilt top. Baste or pin.
-
Quilt as desired. I used straight line quilting ½” apart on all ground fabric, framing letters.
-
Square up quilt. Join binding strips together and bind in your preferred fashion.
Read NextCheater Rag Quilt Tutorial