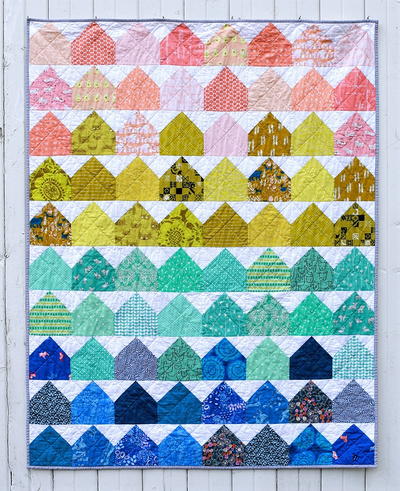
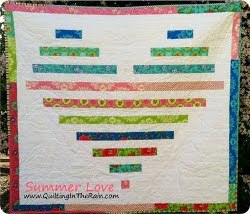
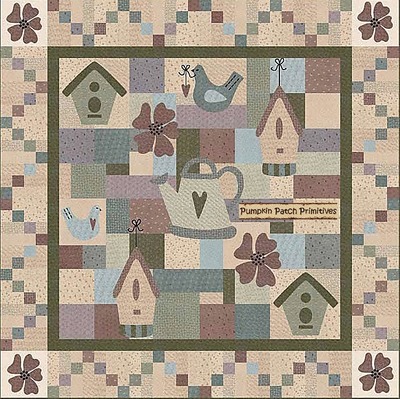
Summer Garden Quilt

This is one of the most summery downloadable applique quilt patterns! The Summer Garden Quilt features cheerful birdhouse, watering can, flower, and bird appliques against a simple piecework background. An Irish chain quilt pattern adds interest to the wide patchwork border of the quilt. Set the mood in your home during the warmer seasons with one of the most well-loved quilts with summer theme patterns there is. Combine your love for patchwork quilt patterns, applique quilt patterns, and more for a truly professional look. You will love learning how to applique and more with this stunning idea.
Project TypeMake a Project
Quilt Size68 inches wide x 68 inches long
Time to CompleteA month or more
Primary TechniquePieced & Appliqued

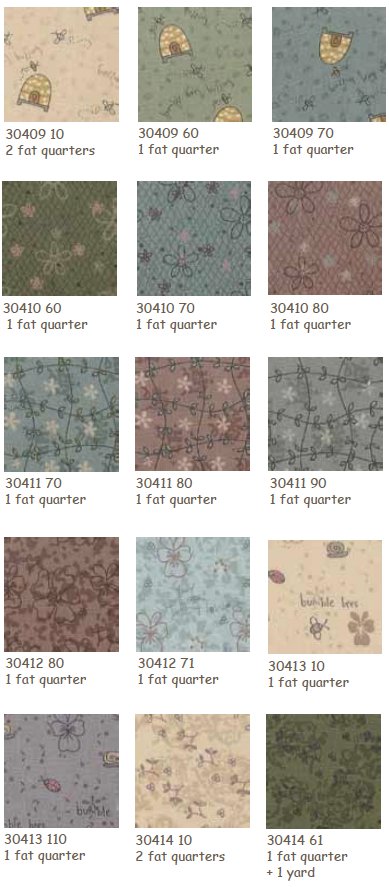
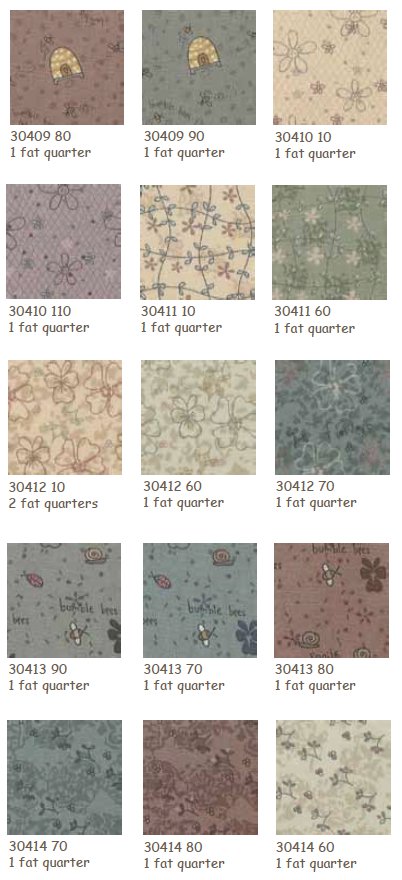
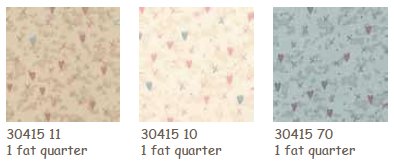
Note: This pattern was designed using fabrics from the Secret Garden collection by Lynette Anderson Designs for Lecien.
MATERIALS AND FABRIC REQUIREMENTS:
- Template plastic
- Templates
- All supplies for your chosen method of appliqué
Note: appliqué templates do not include seam allowances and are not reversed. - Scrap of black fabric for birds’ eyes and beaks
- (4) yards of 1/4” wide black ribbon for bows and bird tails
- (90) 1/4” - 3/8” black buttons, beads or other embellishment for flower centers
- 4-1/2 yards cream bee hive print (30409-10) for quilt backing
- 76” x 76” piece of batting
- Usual sewing and rotary cutting supplies
INSTRUCTIONS:
Cutting Instructions:
Note: All strips are cut across the width of the fabric from selvage edge to selvage edge. Reserve all uncut yardage for appliqués.
- From the (6) darker blue fat quarters:
Set (1) fat quarter aside for the bird appliqués.
- From the remaining (5) fat quarters, cut a total of:
(3) 6-1/2” x 6-1/2” squares
(1) 4-1/2” x 6-1/2” piece
(2) 4-1/2” x 4-1/2” squares
(32) 2 -1/2” x 2-1/2” squares for the outer border
- From the (2) lighter blue fat quarters, cut a total of:
(3) 6-1/2” x 6-1/2” squares
(2) 4-1/2” x 6-1/2” pieces
(1) 4-1/2” x 4-1/2” square
(1) 2-1/2” x 4-1/2” piece
- From the (6) brown fat quarters:
Set aside (3) fat quarters for the flower, birdhouse, and heart appliqués.
- From the remaining (3) fat quarters, cut a total of:
(1) 8-1/2” x 8-1/2” square
(4) 6-1/2” x 6-1/2” squares
(1) 6-1/2” x 12-1/2” piece
(1) 4-1/2” x 8-1/2” piece
(1) 4-1/2” x 4-1/2” square
(24) 2-1/2” x 2-1/2” squares for the outer border
- From the (3) gray fat quarters:
Set aside (1) fat quarter for the watering can appliqué.
- From the remaining (2) fat quarters, cut a total of:
(2) 6-1/2” x 6-1/2” squares
(1) 4-1/2” x 8-1/2” piece
(2) 4-1/2” x 4-1/2” squares
(16) 2-1/2” x 2-1/2” squares for the outer border
- From the (2) purple fat quarters cut a total of:
(2) 6-1/2” x 6-1/2” squares
(1) 4-1/2” x 12-1/2” piece
(4) 4-1/2” x 8-1/2” pieces
(1) 2-1/2” x 6-1/2” piece
(16) 2-1/2” x 2-1/2” squares for the outer border
- From the (2) lightest green fat quarters:
Set aside (1) fat quarter for the watering can appliqué.
From the second fat quarter, cut:
(2) 6-1/2” x 6-1/2” squares
(2) 4-1/2” x 6-1/2” pieces
- From the (2) medium green fat quarters:
From (1) fat quarter, cut:
(8) 2-1/2” x 2-1/2” squares for the outer border
From the second fat quarter, cut:
(1) 8-1/2” x 8-1/2” square
(1) 6-1/2” x 6-1/2” square
(1) 4-1/2” x 12-1/2” piece
(2) 4-1/2” x 4-1/2” squares
(8) 2-1/2” x 2-1/2” squares for the outer border
- From the (2) darkest green fat quarters:
Set aside (1) fat quarter for the birdhouse appliqués.
From the second fat quarter, cut:
(2) 6-1/2” x 6-1/2” squares
(1) 4-1/2” x 12-1/2” piece
(1) 2-1/2” x 6-1/2” piece
(2) 2-1/2” x 4-1/2” pieces
- From the darkest green yardage, cut:
(6) 2-1/2” strips for the inner border
(7) 2-1/4” strips for the binding.
- From the (1) lightest cream fat quarter, cut:
(4) 8-1/2” x 8-1/2” squares for the outer border
- From the (10) cream fat quarters:
Set aside (1) fat quarter for the birdhouse appliqués
From the remaining (9) fat quarters, for the quilt blocks, cut a total of:
(2) 8-1/2” x 8-1/2” squares
(13) 6-1/2” x 6-1/2” squares
(1) 6-1/2” x 8-1/2” piece
(2) 4-1/2” x 12-1/2” pieces
(2) 4-1/2” x 4-1/2” squares
(1) 2-1/2” x 4-1/2” piece
- For the outer border cut a total of:
(40) 2-1/2” x 6-1/2” pieces
(64) 2-1/2” x 4-1/2” pieces
(64) 2-1/2” x 2-1/2” squares
Sewing Instructions:
Note: All seams are sewn using 1/4” seam allowance with right sides held together and raw edges even. Please refer to the quilt pictured on the cover for specific fabric placement.
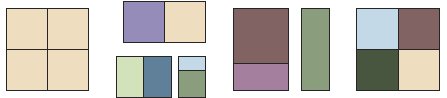
- Layout the patches listed below as shown in the Row 1 Assembly Diagram:
(6) 6-1/2” cream squares, (4) 6-1/2” colored squares, (1) 8-1/2” colored square, (1) 4-1/2” x 12-1/2” colored piece, (1) 4-1/2” x 8-1/2” colored piece, (2) 4-1/2” x 6-1/2” colored pieces, (1) 4-1/2” colored square and (1) 2-1/2” x 4-1/2” colored piece.
Stitch the units together as shown to complete Row 1.
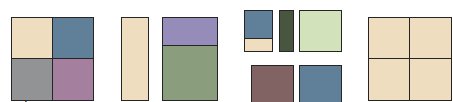
- Layout the patches listed below as shown in the Row 2 Assembly Diagram:
(6) 6-1/2” colored squares, (1) 6-1/2” cream square, (1) 4-1/2” x 12-1/2” colored piece, (1) 2-1/2” x 6-1/2” colored piece, (1) 4-1/2” x 12-1/2” cream piece, (4) 4-1/2” x 8-1/2” colored pieces, (3) 4-1/2” colored squares, (2) 4-1/2” cream squares, and (1) 2-1/2” x 4-1/2” colored piece.
Stitch the units together as shown to complete Row 2.

- Layout the patches listed below as shown in the Row 3 Assembly Diagram below:
(2) 8-1/2” cream squares, (3) 6-1/2” colored squares, (1) 6-1/2” cream square, (1) 6-1/2” x 12-1/2” colored piece, (1) 6-1/2” x 8-1/2” cream piece, (1) 4-1/2” x 12-1/2” colored piece, (1) 4-1/2” x 8-1/2” colored piece, (3) 4-1/2” colored squares, (2) 4-1/2” x 6-1/2” colored pieces, and (1) 2-1/2” x 4-1/2” colored piece.
Stitch the units together as shown to complete Row 3.

- Layout the patches listed below as shown in the Row 4 Assembly Diagram below:
(1) 8-1/2” colored square, (6) 6-1/2” colored squares,
(5) 6-1/2” cream squares, (1) 4-1/2” x 12-1/2” cream piece, (1) 4-1/2” x 8-1/2” colored piece, (1) 4-1/2” colored square, (1) 2-1/2” x 6-1/2” colored piece, and (1) 2-1/2” x 4-1/2” cream piece.
Stitch the units together as shown to complete Row 4.
- Stitch the four rows of patches together to complete the quilt center.
Applique Instructions:
- Using the paper patterns and template plastic, make templates for each shape.
- Prepare the number of motifs listed on each paper pattern as required for your chosen method of appliqué. Please note that the templates are not reversed and do not have seam allowances.
- Using the quilt pictured as a guide to placement, appliqué the motifs to the quilt top using your favorite method. Repeat this procedure to appliqué (1) small flower motif to each 8-1/2” lightest cream square for the outer border.
Finishing Instructions:
- Trim the selvages from the 2-1/2” darkest green inner border strips and sew the strips together end to end to make a long 2-1/2” strip. From this long strip, cut (2) 52-1/2” and (2) 48-1/2” lengths. Stitch the shorter lengths to the left and right sides of the quilt top. Sew the longer lengths to the top and bottom.
- Sew a 2-1/2” colored square to one end of a 2-1/2” x 6-1/2” cream piece. Repeat to make a total of (40) units.
- Sew a 2-1/2” cream square and a 2-1/2” x 4-1/2” matching cream piece to opposite sides of a 2-1/2” colored square. Repeat to make a total of (64) units.
- Using the quilt pictured on the cover as a guide, assemble (10) units from step 2 and (16) units from step 3 into (1) pieced outer border unit. Repeat to make a total of (4) units. Sew pieced border units to the left and right sides of the quilt top, noting orientation. Stitch an 8-1/2” lightest cream square to each end of both remaining pieced border units and sew these borders to the top and bottom to complete the quilt top.
- Layer the finished quilt top with batting and backing and quilt as desired.
- Bind the finished quilt using the 2-1/4” darkest green strips.
Find more applique quilt patterns in 29 How to Applique Videos & Free Applique Designs.
Don't miss the rest of the 17 Best Free Applique Quilt Patterns!
Why You'll Love This Quilt
Are you looking for a fun and summery quilting project to work on? Look no further than the Summer Garden Quilt! Here are the top 3 reasons why you should consider making this beautiful quilt project:
1. Cheerful and whimsical design: The Summer Garden Quilt features adorable birdhouse, watering can, flower, and bird appliques that will instantly bring a smile to your face. These charming motifs are perfect for adding a touch of whimsy and cheer to any room in your home. The combination of these cute appliques against a simple piecework background creates a stunning visual impact that is sure to brighten up your space.
2. Irish chain quilt pattern: The wide patchwork border of the Summer Garden Quilt features an Irish chain quilt pattern, adding a touch of elegance and sophistication to the overall design. This classic quilt pattern adds interest and complexity to the quilt, making it a truly professional-looking piece that you will be proud to show off to your friends and family.
3. Perfect for summer decor: As the name suggests, the Summer Garden Quilt is the perfect addition to your home decor during the warmer seasons. The vibrant colors and playful motifs of this quilt project will help set the mood for summer, bringing a touch of the outdoors indoors. Whether you display it on your bed, couch, or wall, the Summer Garden Quilt is sure to add a touch of summer magic to your home.
So why wait? Dive into this fun and creative quilting project today and enjoy the process of learning how to applique and more while creating a stunning quilt that you will cherish for years to come.
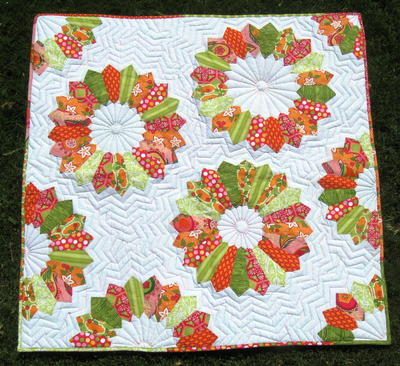
Read NextDouble Dresden Delight Quilt
Your Recently Viewed Projects
Thanks for your comment. Don't forget to share!
Sandi C
May 24, 2017
What a cute summer pattern! I love the combination of piecing and applique. I would probably use fusible applique as my method. I think it would make this project move along quickly. I like the colors chosen for the project as well. It's adorable for summer. I also appreciate the time frame of a month or so because I think quilting and sewing projects always take longer than we think they will!
Report Inappropriate Comment
Are you sure you would like to report this comment? It will be flagged for our moderators to take action.
Thank you for taking the time to improve the content on our site.