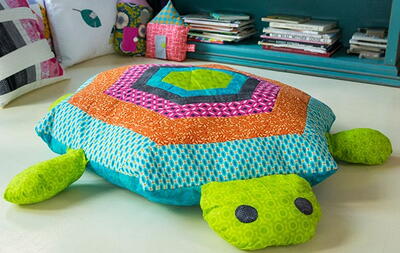
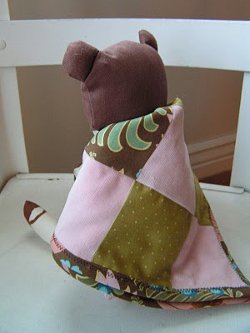
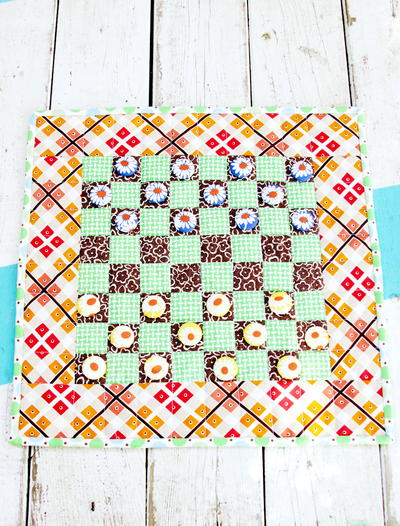
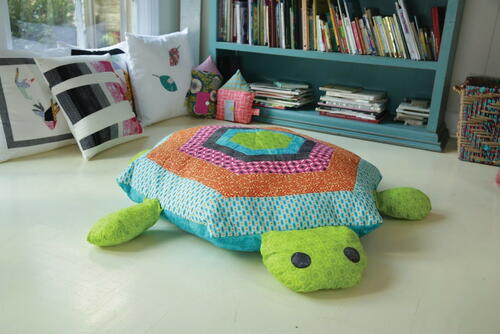
Cuddles the Hexi Turtle

Hexagonal cuts aren't reserved just for quilts! Elevate your child's play area with a stylish and comfortable statement piece – the Turtle Play Mat. Clear and user-friendly instructions guide you through piecing the hexagonal top, skillfully appliqueing the adorable turtle face, and seamlessly stitching it all together. This project promises not only an enjoyable crafting experience but also a timeless delight for the children in your life. Let the joy of creating radiate as you fashion this whimsical Turtle Play Mat, ensuring it becomes a cherished item bringing joy to youngsters for years to come.
Time: 4 - 6 hours

Project TypeMake a Project
Materials List
-
Janome Supplies Required:
- Skyline S9
- 1/4” Seam foot O
- Dual Feed foot AD
- Open Toe Satin Stitch foot F2
- Zipper foot E
- Quilting Bar
-
Fabric/Notions Required:
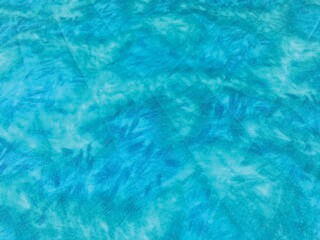
- 1 1/4 yds. for center of turtle, head and feet
- 1/8 yd. for 1st inner color
- 1/8 yd. for 2nd color and eyes
- 1/4 yd. for 3rd color
- 1/3 yd. for 4th color
- 2/3 yd. for 5th color
- 1 1/4 yds. backing
- All-purpose sewing thread
- 1/8 yd. fusible webbing for eyes
- 22” Invisible zipper
- 2 1/2 yds. fusible fleece
- 3 - 32oz. bags polyfil
- Attached templates
- Paper scissors
- Chalk pen
- Rotary cutter/mat/ruler
- Safety or straight pins
INSTRUCTIONS
Cutting Instructions:
-
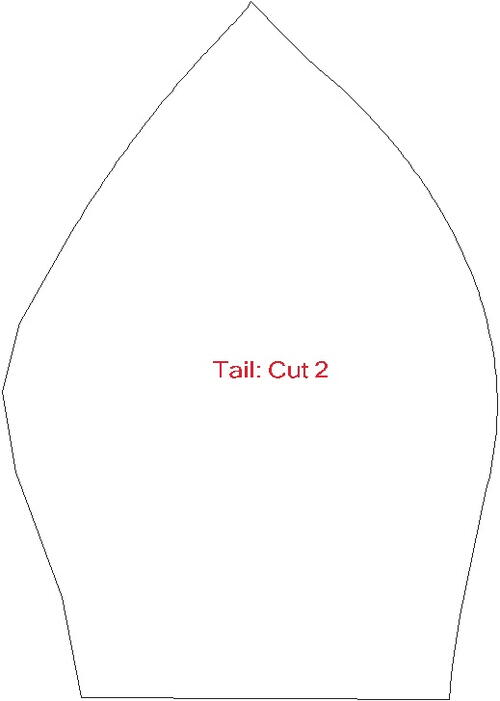
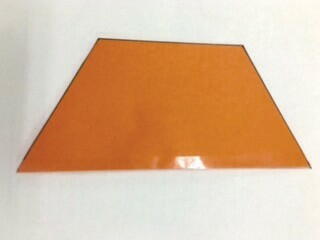
Cut out the attached templates.
-
Using the newly cut patterns, place on fabric and cut out shapes. Follow templates guidelines for fold placement and number of each piece to be cut.
-
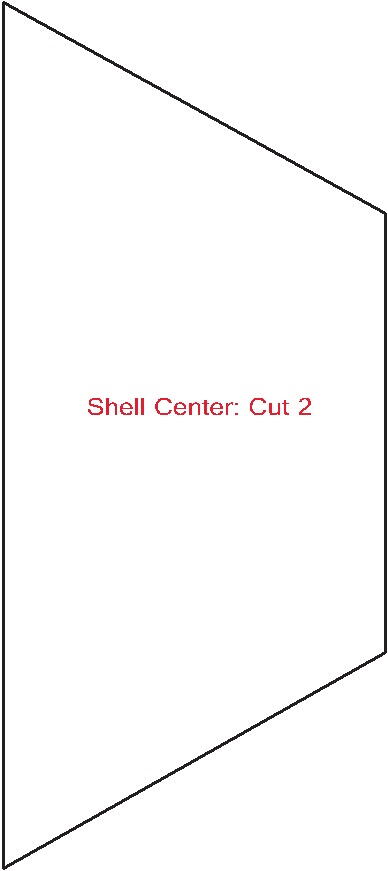
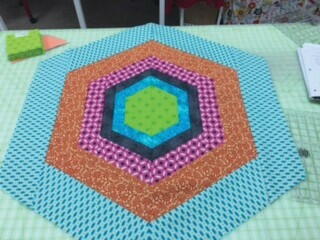
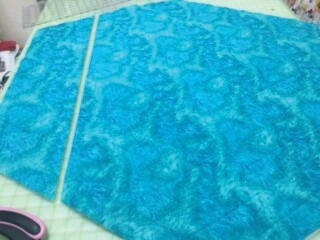
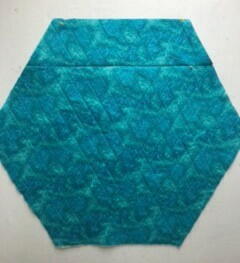
For turtle shell cut the following:
- 1st and 2nd color 2 inch strips (2 strips each)
- 3rd color 3 inch strips (3 strips)
- 4th color 4 inch strips (3 strips)|
- 5th color 5 inch strips (4 strips)
Sewing Instructions:
-
Attach 1/4” Seam foot O. Thread machine with coordinating sewing thread in top and bobbin.
-
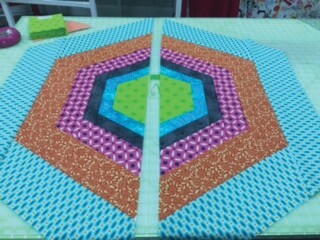
Start by sewing the first color strip to the two shorts sides of the center hexi fabric and then the outside.
-
Repeat the above step with the remaining strips in the correct order, building both halves of the hexagon as you go.
-
Sew the two halves of the turtle shell together.
-
Place the pieced turtle shell on top of the backing fabric and using a straight edge ruler and chalk pen, trace the outside edges of shell onto the backing. Cut out backing.
-
Repeat the above steps to trace and cut the bottom (belly) of the turtle and backing fabric.
-
Iron the fusible fleece to the backside of the turtle shell and the turtle bottom.
-
Layer the pieced turtle shell with the backing fabric. Pin in place.
-
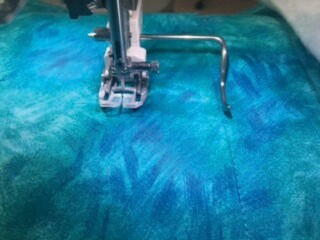
Attach Dual Feed foot AD.
-
Select Sewing Applications > Quilting> Straight Stitch. The machine will automatically length the stitch to 3.0.
-
Using the Stitch in the Ditch method, sew the turtle shell.
-
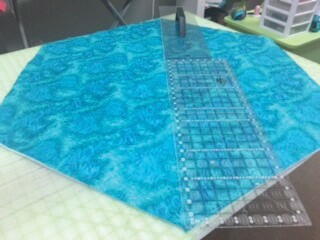
Layer the bottom fabric with the backing fabric.
-
Using a straight edge ruler and chalk pen, draw a diagonal line from the top left corner to the bottom right corner.
-
Sew a straight line on the chalk line.
-
Attach the Quilting Bar to the Dual feed foot and place it at the 2” mark on the sewing bed.
-
Line up the bar with the last line you just quilted and sew the next line.
-
Continue until you have quilted all the way across the fabric, on both sides of the original chalk marking.
-
Repeat steps 14, 17 and 18 in order to sew in the opposite direction to create cross hatch quilting.
-
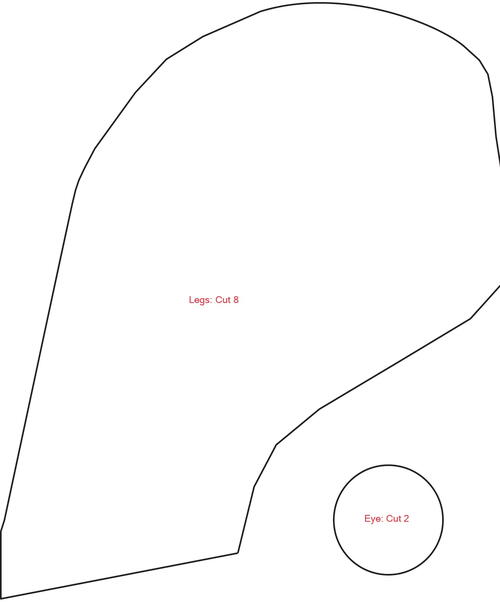
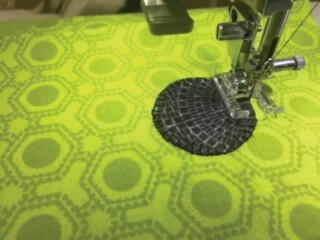
Fuse fabric for the eyes to a piece of fusible webbing. Place the eye template pattern on the fabric and cut out both eyes.
-
Remove the paper backing of the fusible web and fuse the eyes to the turtle head.
-
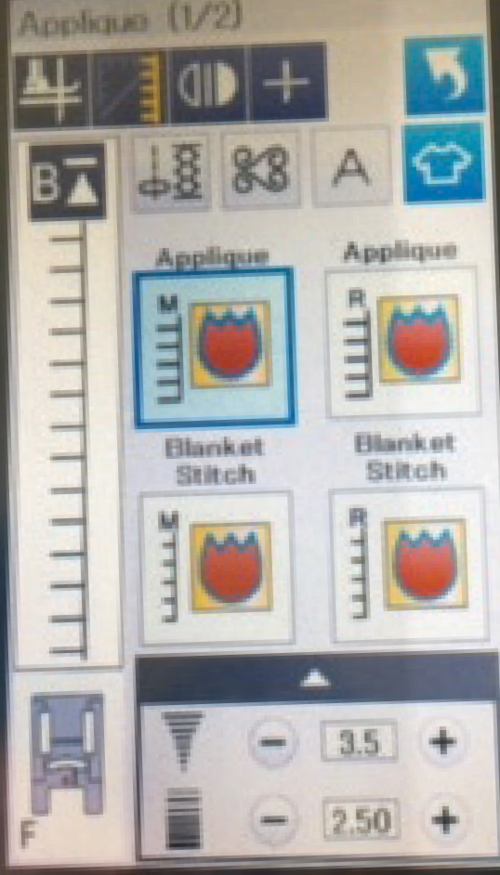
Attach Open Toe Satin Stitch foot F2.
-
Select Sewing Applications > Applique. Select Applique M.
-
With Auto Foot Lift activated, slowly sew around eye fabric, appliquéing them in place.
-
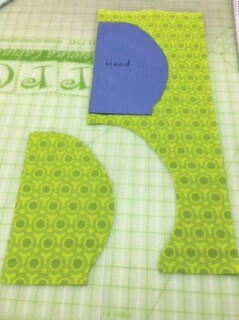
Select two of each foot fabric and place right sides together.
-
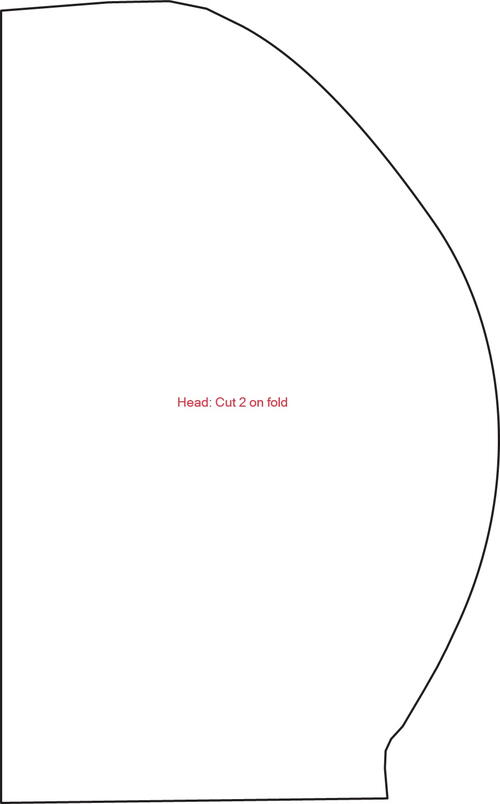
Attach 1/4” Seam foot O. Using a 1/4” seam, sew around all sides leaving the straight part open. Repeat for remaining three feet and head.
-
Stuff the head and feet and enclose the opening.
-
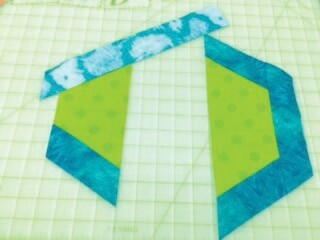
Refer to the attached image to see how to pin the head and feet to the right side of the shell.
-
On the turtle belly fabric, use a straight edge ruler and measure 7” down from the top. Using a rotary cutter, cut a straight line.
-
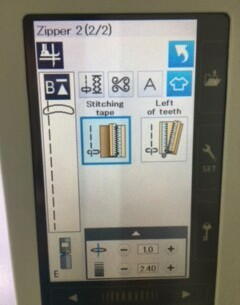
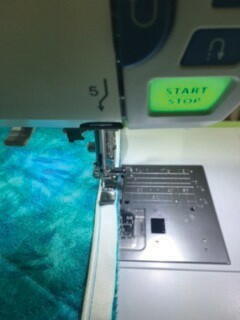
Select Sewing Applications > Zipper > Invisible Zipper.
-
Attach Zipper foot E. Sew the zipper in place on the newly cut lines of the turtle bottom.
-
Open the zipper all the way and pin right side of the bottom to the right side of the turtle shell with all turtle body parts in between, facing inward.
-
Attach Dual Feed foot AD.
-
Sew a 1/2” seam all the way around the entire shell.
-
Pull the turtle through the open zipper.
-
Stuff Cuddles the Hexi-Turtle and enjoy!
-
Your project is finished! If you love this tutorial, be sure to check out Janome.com for even more inspiration.

Read NextLittle Angel Softie