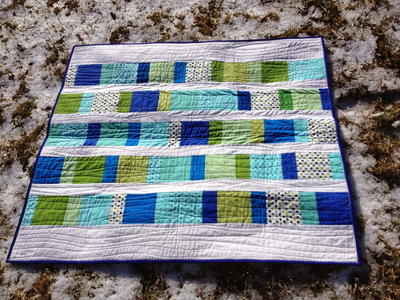
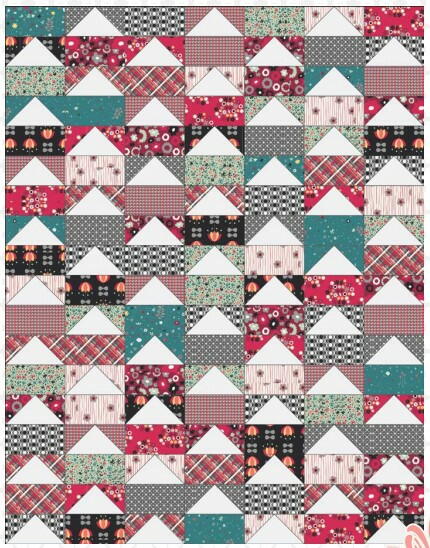
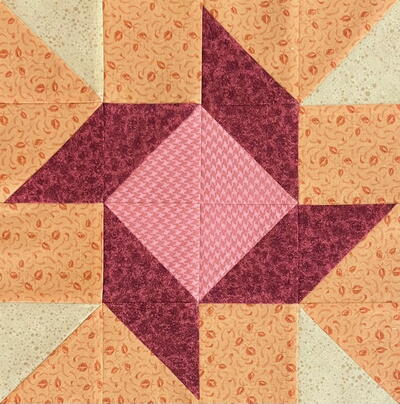
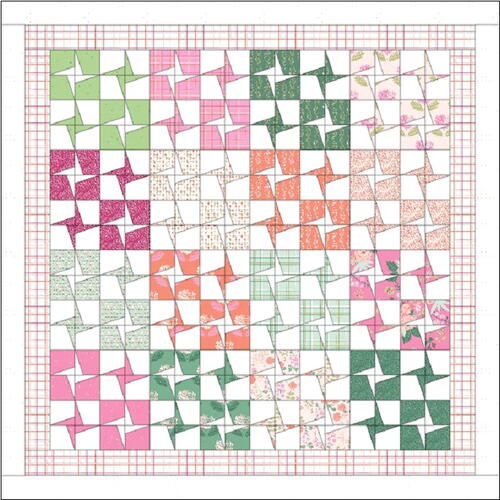
Lillian Pinwheel Quilt Pattern

Indulge in the beauty of simplicity with our stunning quilt pattern, The Lillian Pinwheel Quilt, where repeating squares weave together to form a whimsical and enchanting design. Whether you're a seasoned quilter or just starting out on your quilting journey, this beginner quilting pattern offers endless possibilities for customization and personalization. Let your imagination run wild as you play with different arrangements and combinations, watching as each square contributes to the overall magic of the pinwheel quilt design. Perfect for adding a touch of elegance and warmth to any space, this throw quilt pattern is sure to become a beloved heirloom cherished for generations to come.
Finished Quilt Size: 60 1/2 inches x 60 1/2 inches
Finished Block Size: 12 inches x 12 inches

Materials List
-
Materials:
Yardage is based on 42” -wide fabric. Fat quarters are 18” x 21”. Fat eighths are 9” x 21”.
- 16 assorted fat eighths
- 1 3/4 yards of white background fabric 3/4 yard of border fabric
- 5/8 yard of binding fabric
- 4 yards of fabric for backing fabric 68” x 68” piece of batting
-
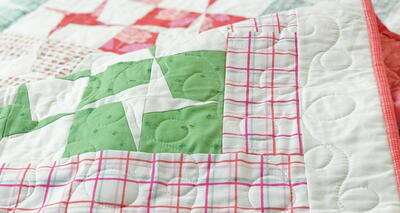
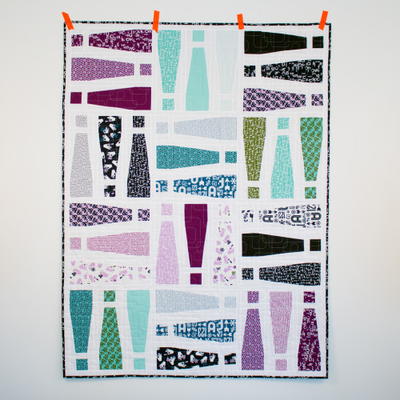
The Cover Quilt:
To make the cover quilt, I used the following:
- 1 fat quarter bundle of Ne Dan by Citrus and Mint Designs for Riley Blake Designs
- 1 3/4 yards of Confetti Cottons Le Crème (SKU C120-LECREME)
- 3/4 yard Ne Dan Cream Plaid (SKU C9857-CREAM)
- 5/8 yard Texture in Rouge (SKU C610-ROUGE)
- 4 yards Riley Blake Blossom in Salmon (SKU C715-SALMON)
- The Warm Company Warm & Plush batting
INSTRUCTIONS
Cutting:
- From EACH of 16- fat eighths, cut:
- 2 strips, 3 1/2” x 21”, crosscut into 8 template A shapes and 8 template B shapes
- From the white background fabric, cut:
- 11 strips, 3 1/2” x 21”, crosscut into 128 template A shapes
- 6 strips, 3 1/2” x 21”, crosscut into 128 template B shapes
- 6 strips, 3 1/2” x 42”
- From the border fabric, cut:
- 6 strips, 3 1/2” x 42”
- From the binding fabric, cut:
- 7 strips, 2 1/2” x 42”
Making the Blocks:
Use a 1/4” seam allowance.
-
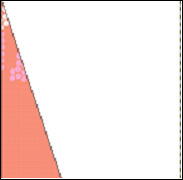
Using the white ‘B’ template cut pieces and the print ‘A’ cut pieces, sew a print unit as shown below. Each print unit should measure 3 1/2” x 3 1/2”, including the seam allowances. Repeat these steps to make a total of 16 sets of 8 identical print units, for a total of 128 print units.
-
Using the print ‘B’ template cut pieces and the white ‘A’ cut pieces, sew a white unit as shown below. Each white unit should measure 3 1/2” x 3 1/2”, including the seam allowances. Repeat these steps to make a total of 16 sets of 8 identical white units, for a total of 128 white units.
-
Using 4 print units made in step 1, arrange the units as shown below and assemble 1 print square. The print square should measure 6 1/2” x 6 1/2”, including the seam allowances. Repeat these steps to make a total of 32 print squares.
-
Using 4 white units made in step 2, arrange the units as shown below and assemble 1 white square. The white square should measure 6 1/2” x 6 1/2”, including the seam allowances. Repeat these steps to make a total of 32 white squares.
-
Using two identical print squares from step 3 and two identical white squares from step 4, arrange the squares as shown below and assemble 1 block. Repeat the steps to make a total of 16 blocks. Each block should measure 12 1/2” x 12 1/2”, including the seam allowances.


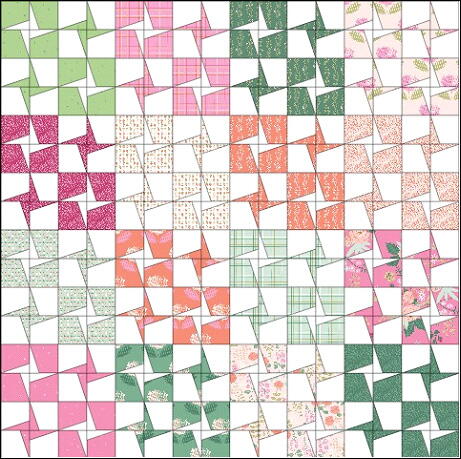
Assembling the Quilt Top:
-
Join four blocks to make a block row, as shown below. Press. The row should measure 12 1/2” x 48 1/2”, including the seam allowances. Repeat to make a total of four block rows.
-
Join the block rows, to make the quilt center. The quilt center should measure 48 1/2” x 48 1/2”, including the seam allowances.
-
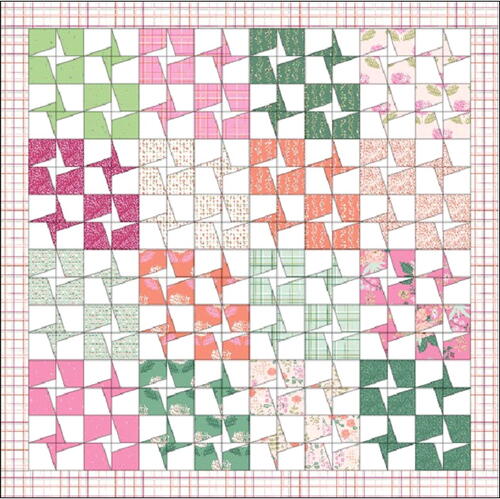
For the inner border, cut one 3 1/2” x 42” strip in half to yield 2- 3 1/2” x 21” strips. Piece 1- 3 1/2” x 21” strip to 1- 3 1/2” x 42” strip, end to end to yield a short pieced strip. Repeat three more times to yield a total of four short pieced strips. Trim two short pieced strips to measure 3 1/2” x 48 1/2”. Sew these strips to the sides of the quilt top. Trim the remaining two short pieced strips to measure 3 1/2” x 54 1/2”. Sew these strips to the top and bottom edges of the quilt top. Press. The quilt top should now measure 54 1/2” x 54 1/2”, including the seam allowances.
-
For the outer border, cut one 3 1/2” x 42” strip in half to yield 2- 3 1/2” x 21” strips. Piece 1- 3 1/2” x 21” strip to 1- 3 1/2” x 42” strip, end to end to yield a short pieced strip. Repeat three more times to yield a total of four short pieced strips. Trim two short pieced strips to measure 3 1/2” x 54 1/2”. Sew these strips to the sides of the quilt top. Trim the remaining two short pieced strips to measure 3 1/2” x 60 1/2”. Sew these strips to the top and bottom edges of the quilt top. Press. The quilt top should now measure 60 1/2” x 60 1/2”, including the seam allowances.

Finishing the Quilt:
-
Prepare the quilt backing so it is about 3” larger in all directions than the quilt top.
-
Layer the quilt top, batting, and backing. Baste the layers together.
-
Hand or machine quilt as desired.
-
Using the 2 1/2” wide strips cut from the binding fabric, make the binding and attach it to the
quilt. -
Your project is finished! If you love this tutorial, be sure to check out Janome.com for even more inspiration.