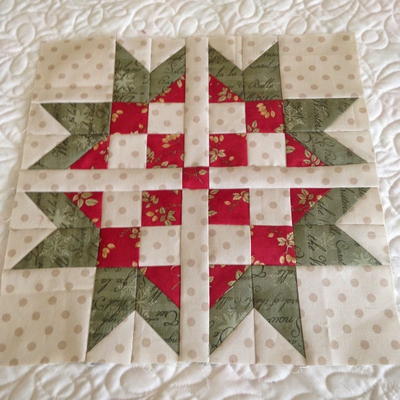
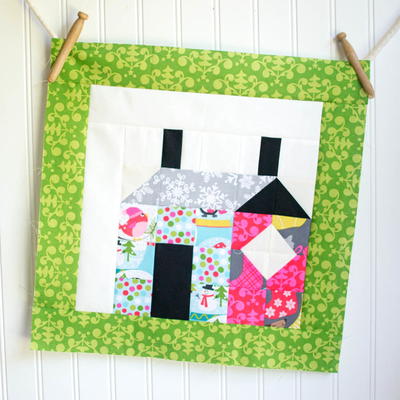
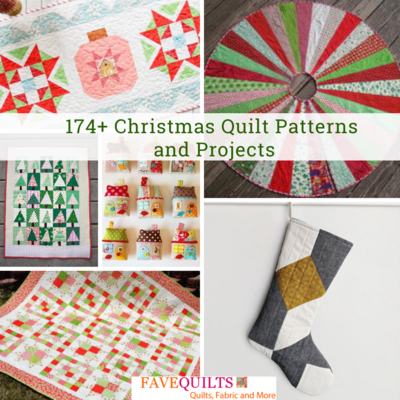
Christmas Wishes Applique Quilt

The Christmas Wishes Applique Quilt couldn't be more adorable! This cheerful quilt comes with star, heart, house, and reindeer applique patterns for the center panel and borders. Dress up the outer border with Christmas quilt fabric. The wonderful thing about this rustic wallhanging is that it will work with all of your Christmas decorations. It's understated yet warm. The brown tones in this DIY wallhanging will make your guests feel right at home for the holidays. Make this wallhanging as a gift for one of your buddies. She will definitely love it.
Project TypeMake a Project
Quilt Size78 inches wide x 84 inches long
Time to CompleteA week or two
Primary TechniquePieced & Appliqued

MATERIALS:
Note: This quilt pattern was designed using fabrics by Lynette Anderson Designs from Lecien. Fabrics are coded in materials list.
- 3/8 yd. 30244-11 Cream Santas
- 1/2 yd. 30244-30 Pink Santas
- 2 yds. 30244-80 Brown Santas
- 1/2 yd. 30244-90 Taupe Santas
- 3/8 yd. 30245-11 Cream Mushrooms
- 1/2 yd. 30245-30 Pink Mushrooms
- 1/2 yd. 30245-80 Brown Mushrooms
- 3/8 yd. 30246-10 Cream Dot
- 1-1/8 yds. 30246-30 Red Dot
- 1/4 yd. 30246-80 Brown Dot
- 1/2 yd. 30246-90 Taupe Dot
- 1/2 yd. 30247-80 Brown Stacked Hearts
- 1/2 yd. 30247-90 Taupe Stacked Hearts
- 3/8 yd. 30248-11 Cream Hearts
- 1-1/8 yds. 30248-30 Red Hearts
- 1/2 yd. 30248-80 Brown Hearts
- 1/2 yd. 30248-90 Taupe Hearts
- 3/8 yd.30249-10 Cream Snowakes
- 3/4 yd. 30249-30 Red Snowakes
- 1/2 yd. 30249-80 Brown Snowakes
- 5/8 yd. 30249-90 Taupe Snowakes
- 1-1/8 yds. 30250-10 Cream Stars
- 1/2 yd. 30250-30 Red Stars
- 1/2 yd. 30250-80 Brown Stars
- 1/2 yd. 30250-90 Taupe Stars
- Applique Templates
- Template plastic
- All supplies for your chosen method of appliqué; note that appliqué templates do not include seam allowances.
- Black embroidery oss
- Scrap of black fabric or 1/8" wide fusible black bias strip for reindeer legs
- Small black button for house door handle
INSTRUCTIONS:
Cutting Instructions:
Note: All strips are cut across the width of the fabric from selvage edge to selvage edge. Reserve all uncut yardage for appliqués.
- From EACH of the cream santas, cream mushrroms, cream hearts, and cream snowakes, cut:
- (1) 8 ½" strip. Recut into (2) 8 ½" x 8 ½" squares.
- (1) 8 ½" strip. Recut into (2) 8 ½" x 8 ½" squares.
- From the cream dot, cut:
- (1) 8 ½" strip. Recut into (2) 8 ½" x 8 ½" squares and (1) 8 ½" x 10 ½" piece.
- (1) 8 ½" strip. Recut into (2) 8 ½" x 8 ½" squares and (1) 8 ½" x 10 ½" piece.
- From the cream stars, cut:
- (1) 36 ½" strip. Recut into (1) 30 ½" wide x 36 ½" high panel for the appliqué background. From the unused portion of this strip, cut: (2) 8 ½" x 8 ½" squares, (4) 2 ½" x 4 ½" pieces, (1) 2 ½" x 2 ½" square and (1) 2" x 2" square.
- (1) 36 ½" strip. Recut into (1) 30 ½" wide x 36 ½" high panel for the appliqué background. From the unused portion of this strip, cut: (2) 8 ½" x 8 ½" squares, (4) 2 ½" x 4 ½" pieces, (1) 2 ½" x 2 ½" square and (1) 2" x 2" square.
- From EACH of the pink santas, pink mushrooms, and red stars, cut:
- (2) 2 ½" strips. Recut into (32) 2 ½" x 2 ½" squares.
- (2) 2 ½" strips. Recut into (32) 2 ½" x 2 ½" squares.
- From the red dot, cut:
- (2) 2 ½" strips. Recut into (32) 2 ½" x 2 ½" squares.
- (9) 2 ¼" strips for the binding.
- (1) 1" strip. Recut into (4) 1" x 4 ½" and (4) 1" x 2 ½" pieces.
- (2) 2 ½" strips. Recut into (32) 2 ½" x 2 ½" squares.
- From the red hearts, cut:
- (9) 2 ½" strips. Set aside (7) strips for the inner border. Recut (2) strips into (32) 2 ½" x 2 ½" squares.
- (9) 2 ½" strips. Set aside (7) strips for the inner border. Recut (2) strips into (32) 2 ½" x 2 ½" squares.
- From the red snowakes, cut:
- (1) 8 ½" strip. Recut into (4) 8 ½" x 8 ½" squares.
- (2) 2 ½" strips. Recut into (32) 2 ½" x 2 ½" squares.
- (1) 8 ½" strip. Recut into (4) 8 ½" x 8 ½" squares.
- From the brown santas, cut:
- (7) 8 ½" strips for the outer border.
- (1) 2 ½" strip. Recut into (16) 2 ½" x 2 ½" squares.
- (7) 8 ½" strips for the outer border.
- From EACH of the brown mushrooms, brown dot, brown stacked hearts, brown hearts, brown snowakes, and brown stars, cut:
- (1) 2 ½" strip. Recut into (16) 2 ½" x 2 ½" squares.
- (1) 2 ½" strip. Recut into (16) 2 ½" x 2 ½" squares.
- From EACH of the taupe santas, taupe dot, taupe stacked hearts, and taupe stars, cut:
- (1) 8 ½" strip. Recut into (2) 8 ½" x 8 ½" squares.
- (1) 2 ½" strip. Recut into (16) 2 ½" x 2 ½" squares.
- (1) 8 ½" strip. Recut into (2) 8 ½" x 8 ½" squares.
- From the taupe hearts, cut:
- (1) 8 ½" strip. Recut into (2) 8 ½" x 8 ½" squares and (1) 8 ½" x 10 ½" piece.
- (1) 2 ½" strip. Recut into (16) 2 ½" x 2 ½" squares.
- (1) 8 ½" strip. Recut into (2) 8 ½" x 8 ½" squares and (1) 8 ½" x 10 ½" piece.
- From the taupe snowakes, cut:
- (1) 14 ¼" strip. Recut into (1) 14" wide x 14 ¼" high piece for the house and (2) 8 ½" x 8 ½" squares.
- (1) 2 ½" strip. Recut into (16) 2 ½" x 2 ½" squares.
- (1) 14 ¼" strip. Recut into (1) 14" wide x 14 ¼" high piece for the house and (2) 8 ½" x 8 ½" squares.
Applique Instructions:
- Using the paper patterns provided and template plastic, make templates for each shape.
- Prepare the number of motifs listed on each paper pattern as required for your chosen method of appliqué. Please note that the templates are not reversed and do not have seam allowances.
Prepare the house appliqué unit.
- All retangular patches for the house, cut in the previous section or below, include 1/4" seam allowances in both directions. If your appliqué method does not require seam allowances, you will need to trim all of these patches 1/2" in both directions before using them in your project.
- Using the quilt pictured as a guide, appliqué the 2 ½" x 4 ½" cream star pieces onto the right side of the 14" x 14 ¼" taupe snowakes piece to create the "glass" for the house windows.
- Appliqué the 1" x 4 ½" and the 1" x 2 ½" red dot pieces on top of each cream star piece for the window sashing.
- Cut (4) 2 " x 4 " brown stars pieces. Cut the center of each piece and reverse appliqué one piece on top of each window to complete the window frames.
- Cut a 3 ¼" x 6" red snowakes piece for the door and appliqué this piece to the right side of the house unit using the quilt pictured on the cover as a guide to placement.
- Appliqué the 2" x 2" cream square to the right side side of the door.
- Cut a 2 " x 2 " brown stars piece and place this on top of the cream square. Using the quilt pictured as a guide, cut the brown piece and reverse appliqué to make the window sashing and framing.
- Cut a 4 ¼" x 6 ½" brown stars piece for the door frame. Place this on piece on top of the door, trim, and reverse appliqué to complete the door frame.
- Appliqué the house star to the house unit.
Prepare the roof appliqué unit.
- Using the quilt pictured on the cover as a guide, appliqué the 2 ½" x 2 ½" cream square to the right side side of the dormer triangle.
- Cut a 2 " x 2 " brown stars piece and place this on top of the cream square.
- Repeating the procedure from the door window, cut the brown piece and reverse appliqué to make the window sashing and framing.
- Using the quilt pictured on the cover as a guide to placement, appliqué the dormer triangle to the roof.
Complete the center panel.
- Again using the quilt pictured on the cover as a guide, arrange the house unit, roof unit, sky stars, reindeer body, and reindeer head on the right side of the large cream stars panel. When you are pleased with the arrangement, appliqué the house, roof, and stars to the background panel.
- Using the scrap of solid black fabric, make (4) 1/8" wide x 3 ¾" long bias strips or use 1/8" wide prepared black bias strips. Use these strips for the reindeer's legs and position them on the cream background panel.
- Appliqué the reindeer's body, head, and legs to the panel. Position and appliqué the reindeer's hooves, collar, and heart.
- Embroider the reindeer's antlers, eyes, nose and mouth to complete the center panel.
Sewing Instructions:
Note: All seams are sewn using 1/4" seam allowance with right sides held together and raw edges even.
Add the rst border
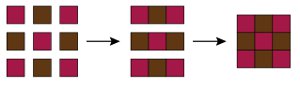
- Arrange (5) 2 ½" red squares and (4) 2 ½" brown squares into (3) rows with (3) units in each row. Stitch the squares into rows and sew the rows together to complete (1) 6 ½" x 6 ½" brown nine-patch block. Repeat to make a total of (13) blocks using the quilt pictured on the cover as a guide to fabric placement or using your own combinations of 2 ½" brown, red and pink squares.
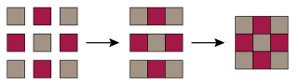
- Arrange (5) 2 ½" taupe squares and (4) 2 ½" red squares into (3) rows with (3) units in each row. Stitch the squares into rows and sew the rows together to complete (1) 6 ½" x 6 ½" taupe nine-patch block. Repeat to make a total of (13) blocks using the quilt pictured on the cover as a guide to fabric placement or using your own combinations of 2 ½" taupe, red and pink squares.
- Stitch together (3) brown and (3) taupe nine-patch blocks to make a 6 ½" x 36 ½" pieced border, alternating the brown and taupe blocks. Sew these borders to the left and right sides of the center panel making sure the ends with a taupe nine-patch are placed toward the topof the center panel.
- Stitch together (4) brown and (3) taupe nine-patch blocks to make a 6 ½" x 42 ½" pieced border, alternating the brown and taupe blocks. Sew this border to the top of the center panel.
- Stitch together (3) brown and (4) taupe nine-patch blocks to make a 6 ½" x 42 ½" pieced border, alternating the brown and taupe blocks. Sew this border to the bottom of the center panel.
Add the second border
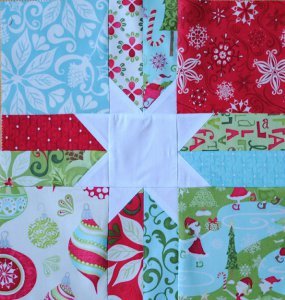
- Using the quilt pictured on the cover as a guide to fabric placement, appliqué each of the (16) red and pink block stars to the right side of an 8 ½" cream or taupe square.
- Again using the quilt pictured on the cover as a guide for fabric placement, appliqué (1) red or pink heart and (1) brown heart to the right side of an 8 ½" taupe square. Repeat to make a total of (8) squares. Repeat this procedure to appliqué (2) red or pink hearts and (1) brown heart to the right side of each 8 ½" x 10 ½" cream and taupe piece.
- Stitch together (2) taupe star and (2) cream star blocks to make an 8 ½" x 32 ½" strip, alternating the two types of units and noting the orientation of the star motifs. Stitch heart blocks to the top and bottom of this unit keeping the pattern of alternating block backgrounds and noting the orientation of the heart motifs. Repeat to make a second 8 ½" x 48 ½" border unit. Sew these border units to the left and right sides of the quilt top, noting orientation.
- Stitch together (4) cream star blocks, (2) taupe heart blocks and (1) taupe triple heart block to make an 8 ½" x 58 ½" strip, alternating the star and heart blocks and placing the triple heart block in the center of the strip. Sew this border unit to the top of the quilt top.
- Stitch together (4) taupe star blocks, (2) cream heart blocks and (1) cream triple heart block to make an 8 ½" x 58 ½" strip, alternating the star and heart blocks and placing the triple heart block in the center of the strip. Sew this border unit to the bottom of the quilt top.
Add the third border.
- Trim the selvages from the 2 ½" brown star strips and sew the strips together end to end to make a long 2 ½" strip. From this long strip, cut (2) 64 ½" and (2) 62 ½" lengths. Sew the longer pieces to the left and right sides of the quilt top. Sew the shorter pieces to the top and the bottom.
Add the fourth border.
- Trim the selvages from the 8 ½" brown santas strips and sew the strips together end to end to make a long 8 ½" strip. From this long strip, cut (2) 68 ½" and (2) 62 ½" lengths. Sew the longer pieces to the left and right sides of the quilt top.
- Appliqué (1) taupe and (1) cream heart to the right side of an 8 ½" red snowakes square. Repeat to make a total of (4) blocks using the quilt pictured on the cover as a guide to correct fabric placement in each block.
- Sew a red heart appliqué block to each end of a 62 ½" brown santas border strip, noting orientation of the heart motifs. Repeat to make a second unit. Stitch these pieced borders to the top and bottom to complete the quilt top.
Finishing:
- Layer the completed quilt top with batting and backing and quilt as desired.
- Trim the batting and backing even with the outer edge of the quilt top and bind the nished quilt using the 2 ¼" red dot strips.
- Sew the small black button to the door of the house for the door handle.
If you're looking for more Christmas quilt patterns, browse our collection of 18 Quilt Patterns for Christmas.
Read NextAll Wrapped Up Lap Quilt
Your Recently Viewed Projects
Thanks for your comment. Don't forget to share!
bogiesnana 1878486
Jul 10, 2012
This pattern is so cute, I can hardly wait to get started!! I love this site, thanks for all the hard work making it! :)
Report Inappropriate Comment
Are you sure you would like to report this comment? It will be flagged for our moderators to take action.
Thank you for taking the time to improve the content on our site.