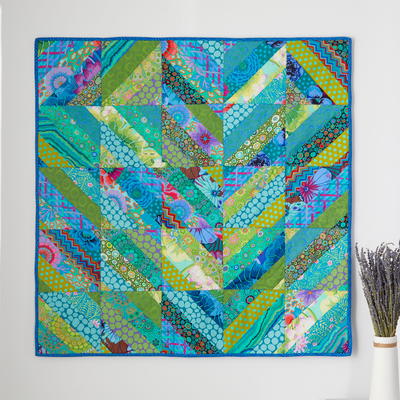
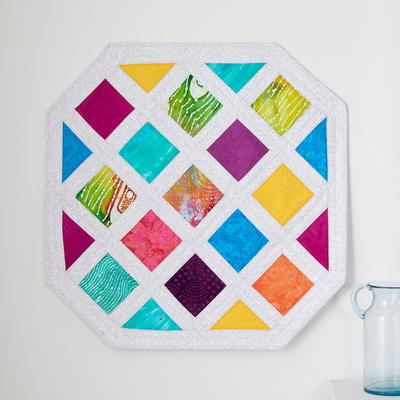
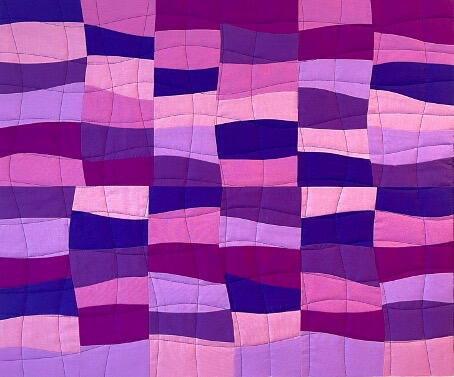
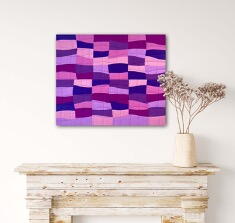
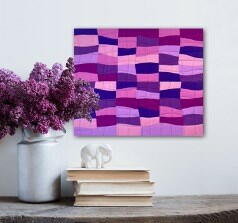
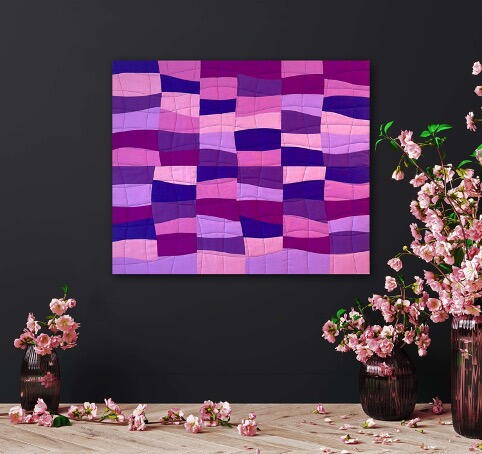
Stack and Cut Mini Quilt

You will fall in love with this pattern for a Stack and Cut Mini Quilt! Unleash your creativity with color, curves, and shapes in this exciting project! Dive into the world of artistic expression as you craft a vibrant mini quilt, perfect for enhancing any cherished corner of your home. Let your imagination run wild and infuse life into your space with a unique and colorful creation. Don't miss out on the chance to turn your home into a gallery of your own design.

Materials List
- Sewing machine
- 1/4” inch foot for sewing
- Quilting ruler
- Rotary cutter (with a new blade
- Cutting mat
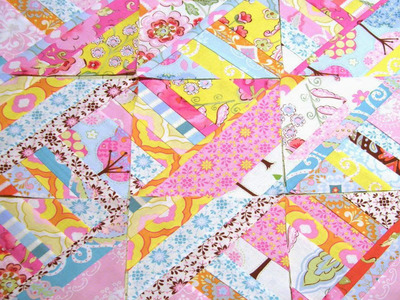
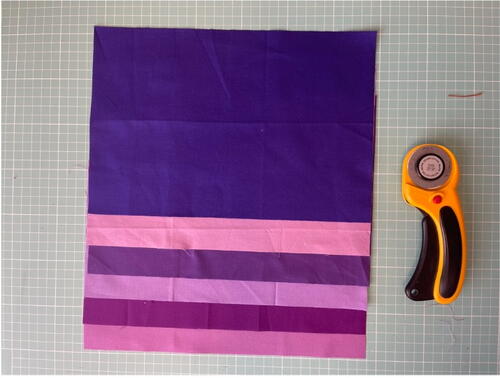
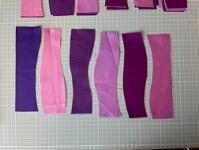
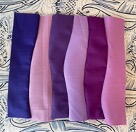
- 6 pieces of fabrics that measure 12” x 8”. For this project a good idea is to select one color and 6 different values for that color, so we will be creating a Monochromatic Quilt
- Fabric for backing and binding, batting
- Threads for piecing and quilting
- Iron & ironing board
Instructions
-
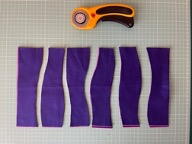
Stack your six fabric rectangles. With your rotary cutter cut 5 freehand gentle curve (it is key to use a new blade).
-
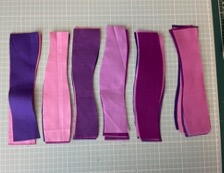
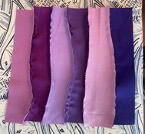
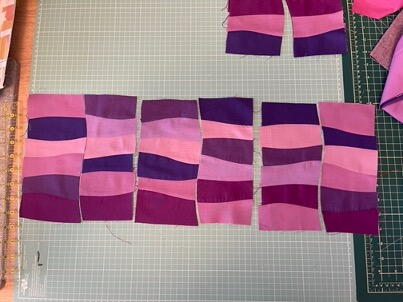
Mix the colors in each of the 6 stacks, in order to have 6 different blocks.
-
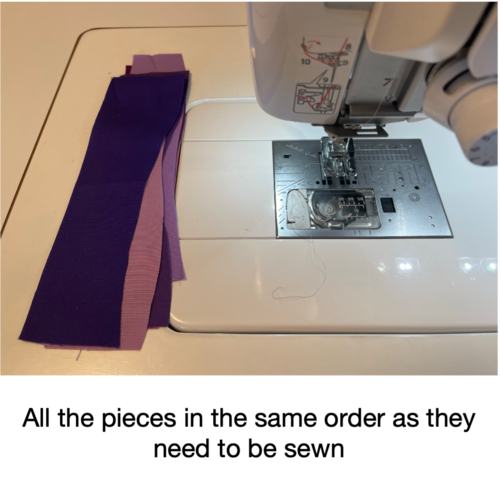
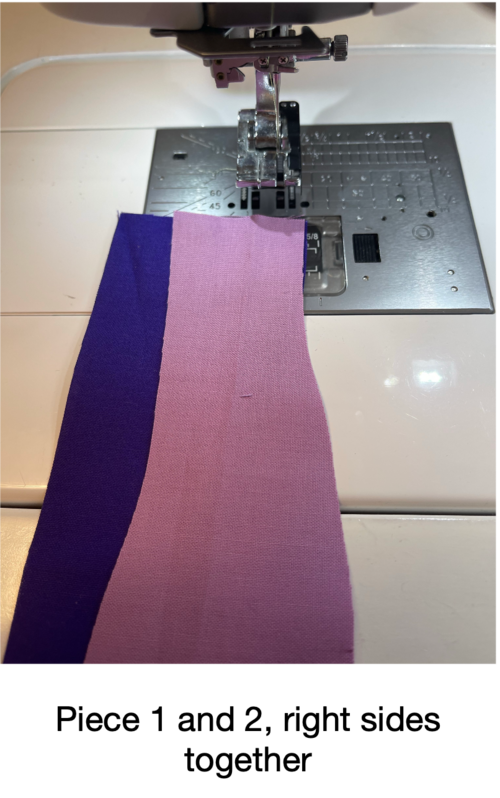
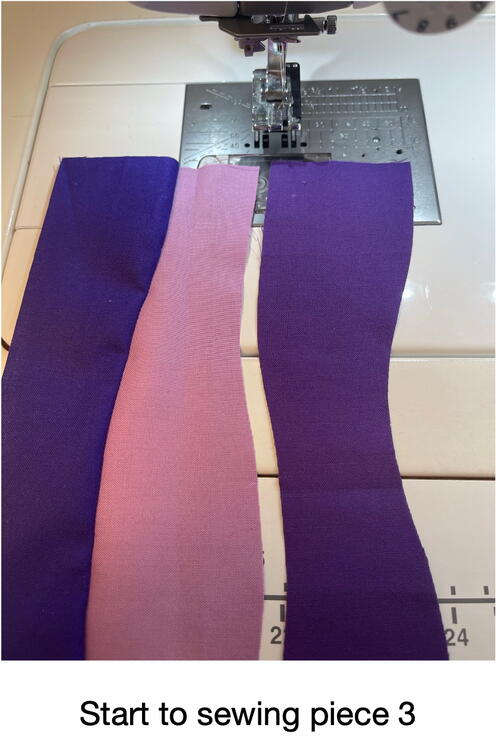
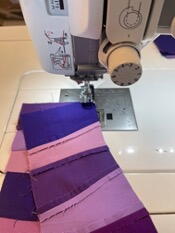
On your sewing machine, start sewing with your 1/4” foot, your first block, sewing in order each piece, always aligning the two fabrics to the edge of the foot. With your left hand handle the fabric on top and with your right hand the fabric on bottom, don’t stretch the fabrics.
-
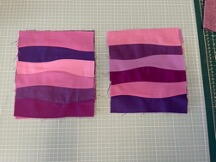
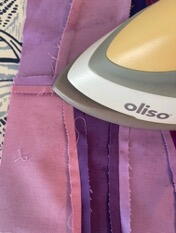
Once you sew the 6 curve strips of your first block, Press seams open, and repeat this process with the next block, until you finish sewing the 6 blocks.
-
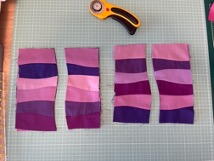
Make two stacks of block (3 blocks in each stack) and cut them with a soft curve that is perpendicular to the curves. For each stack mix and match the pieces. Sew them together , to get again 6 different blocks, press seams open.
-
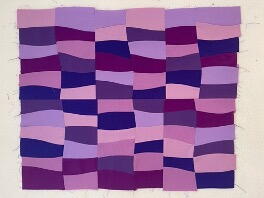
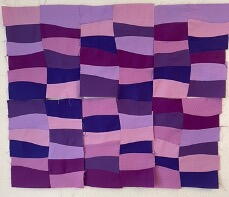
Organize your new 6 blocks on your design wall, look for a layout that you like the most! Then you are ready to sew all your blocks together.
-
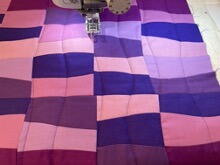
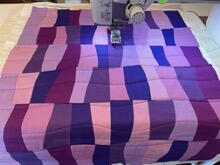
Once you sew your complete top, you can square it up, baste and quilt it.
For quilting my mini quilt I used my dual feed foot on my Janome Memory craft 6700P to quilt gentle curves in horizontal and vertical directions to create a “wavy grid”.
Once you finish, bound your mini and put it on your favorite place to add colors and and movement, ENJOY! -
Your project is finished! If you love this tutorial, be sure to check out Janome.com for even more inspiration.


Read NextL'Amore E'Bello Panel Quilt