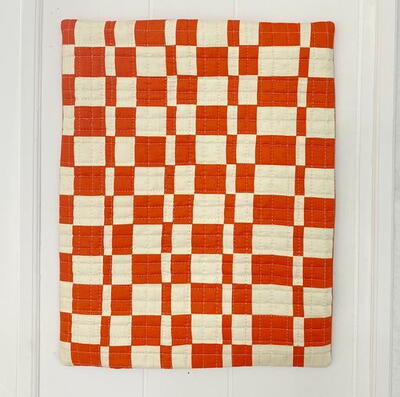
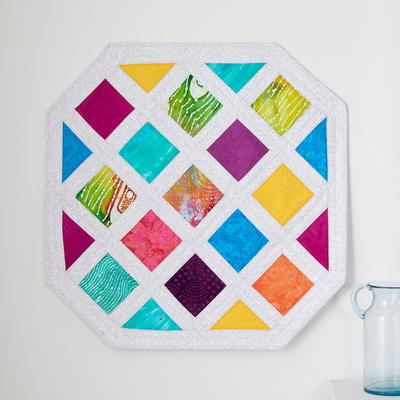
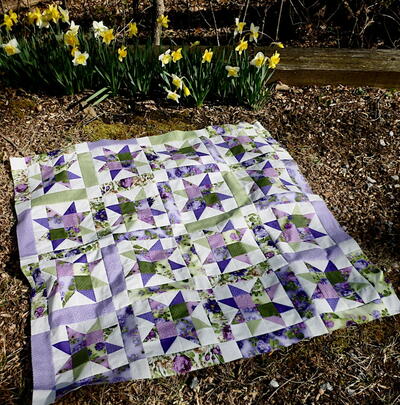
Shades of Orange Drunkard's Path Wall Quilt
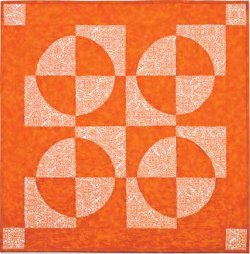
Dress up your home with some contemporary quilt wall art. This Shades of Orange Drunkard's Path Wall Quilt combines traditional drunkard's path patterns with a fresh and modern monochromatic look. Make this quilt in any color scheme to fit your decor.
Project TypeMake a Project
Quilt Size34 inches wide x 34 inches long
Time to CompleteA week or two
Primary TechniquePieced

MATERIALS:
- Fabric 1—1-1/2 yards (includes binding)
- Fabric 2—3/4 yard
- Backing fabric—1-1/4 yards
- Batting—40" x 40"
- Accuquilt Go! fabric cutter
- Accuquilt Go! strip cutter 3-/12" (55032)
- Accuquilt Go! square 3-1/2" (55006)
- Accuquilt Go! strip cutter 2-1/2" (55017)
- Accuquilt Go! drunkard's path (55034)
- Accuquilt Go! 10" x 24" mat (55113)

CUTTING DIRECTIONS:
Fabric 1:
- Cut 8—Drunkard’s Path shape sets
- Cut 4—3-1/2" x 28-1/2" border strips
- Cut 4—2-1/2" strips across width of fabric for binding
Fabric 2:
- Cut 8—Drunkard’s Path shape sets
- Cut 4—3-1/2" squares
SEWING DIRECTIONS:
- Lay a quarter circle shape right side up on a fl at surface. Position an arc shape on top, right sides together and match notches. Check that there is an even amount of quarter circle shape fabric showing at lower corner. Pin together at notch.
- Match corners A and pin. Start sewing at this point with a 1/4" seam allowance. Sew about three stitches and stop with the needle down in the fabric. Smooth curved edges with a stiletto to match raw edges and sew to center pin (at notch). Stop with needle down. Remove center pin. Match corners B. Pin. Align curved edges with stiletto and finish sewing curved seam.

- Finger press seam toward darker fabric. Press flat. (There is no need to do any clipping.)
- Make four blocks of each fabric combination.
- Layout blocks according to diagram.
- Pin and sew together in horizontal rows.
- Press seams of alternating rows in opposite directions.
- Pin and sew rows together to complete quilt center.
- Press seams toward bottom of quilt center.
- Add side borders. Press seams toward border.
- Add corner squares to ends of top and bottom borders.
- Pin and sew top and bottom borders to quilt. Press seams toward border.
QUILTING AND FINISHING:
- Layer batting between quilt top and backing.
- Pin or baste layers together.
- Machine quilt with an all-over design.
- Add binding mitering corners.
Read NextStrip Surprise Quilt