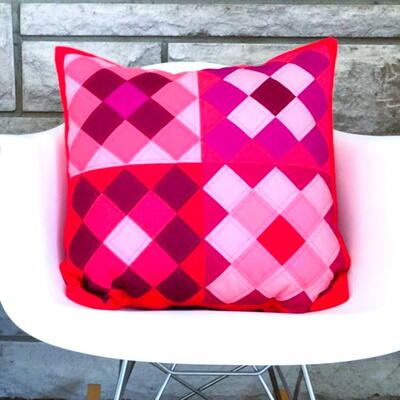
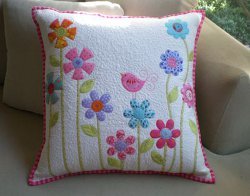
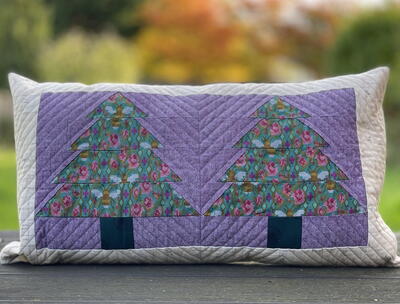
Valentine’s Day Granny Square Pillow

Adorn your space with love using a Granny Square Quilted Valentine's Day Pillow. Each square intricately weaves nostalgia and romance, creating a cozy and charming accent piece. Handcrafted with care, this unique pillow adds a touch of homemade warmth to your décor, making it a heartfelt gift or a delightful self-indulgence for Valentine's Day.
Time to CompleteIn an evening
MaterialsFabric
Primary TechniqueQuilting

HolidayValentine's Day
Project TypeMake a Project
Materials List
- NOTE: Assortment of solid fabrics cut into 2 1/2” squares. The color and number of squares used in this pillow are listed below:
- (4) 1 1/2” x 20” strips of fabric for the border. The color used is Kona Lipstick.
- (2) 15” x 20” rectangles of fabric for the envelope backing. The color used is Kona Lipstick.
- 20” x 20” piece of polyester for the batting.
- Coordinating thread
- General sewing notions (rotary blade, ruler, cutting mat, straight pins, iron)
- Janome Horizon Memory Craft 9400QCP
Quilting Instructions
Part 1:
-
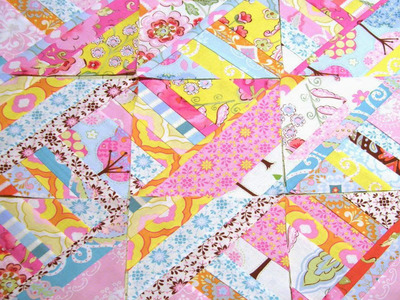
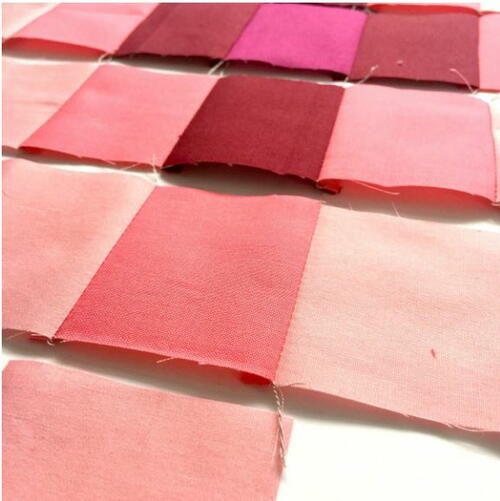
Cut 2 1/2” x 2 1/2” squares for completing each Granny Square block. Below is the color and number of squares used for this project.
- Kona Crimson 1091 (13 squares)
- Kona Cerise 1066 (9 squares)
- Kona Sangria 481 (12 squares)
- Kona Lipstick 1194 (13 squares)
- Kona Watermelon 1384 (16 squares)
- Kona Melon 1228 (4 squares)
- Kona Camellia 190 (8 squares)
- Kona Med. Pink 1225 (25 squares)
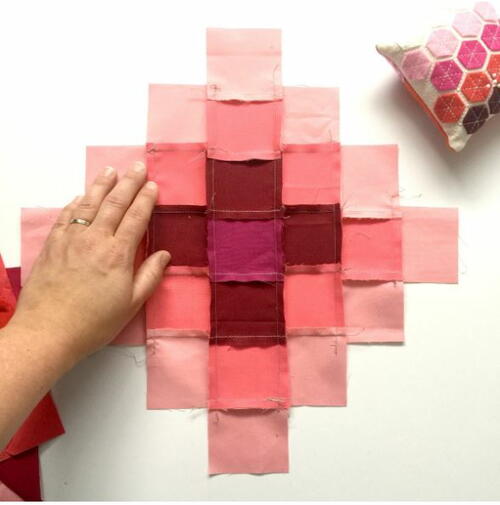
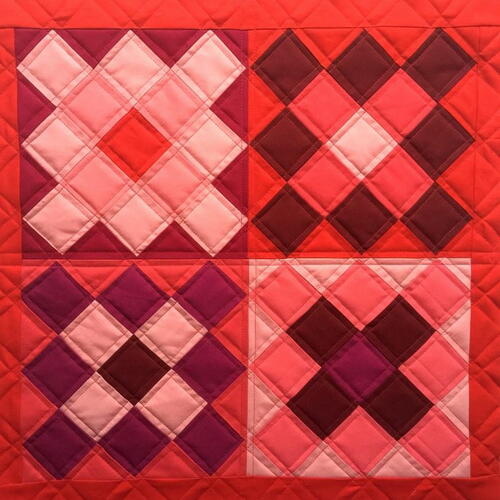
There is a total of 4 blocks in this pillow, lay out your fabric squares in the granny square layout before sewing. -
Make the corner blocks.
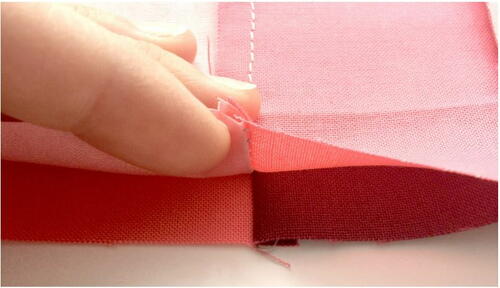
Place the 2.5x20” strips right sides together, and sew a 1/4” seam along the long side. Press the seam toward the darker fabric. -
Sew each row into a strip using a 1/4” seam allowance.
-
Press seams in one direction.
-
Place the back into formation, alternating the direction of your seams.
Part 2:
-
Nest the seams, pin in place and sew the rows together using a 1/4” seam allowance.
-
Press one half of the seams to the right and one half of the seams to the left. Flip over
and press again, right side up -
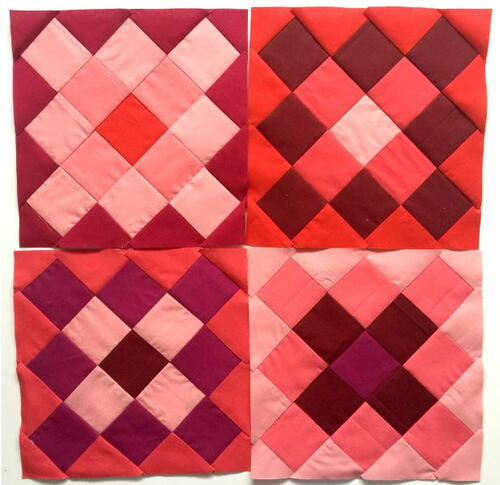
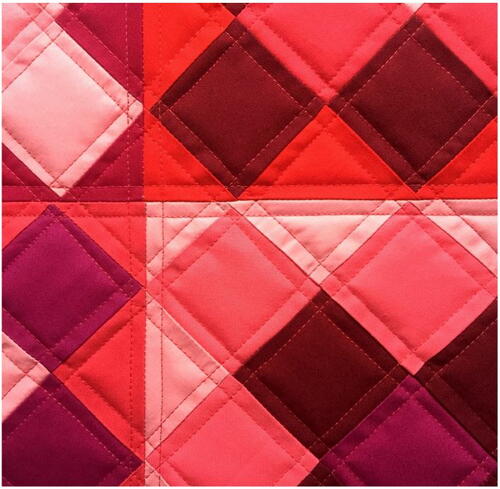
At your cutting mat, trim the edges to create your granny square. A finished size of 9”.
-
Lay your finished blocks into a 2” x 2” layout.
-
Sew together your top two blocks and bottom two blocks. Press the seams open and then sew two halves together.
Square up the pillow front consisting of 4 blocks, making sure the sides are straight.
Sew a 1 1/2” strip to both sides of the pillow front using a 1/4” seam allowance. Press open the seams and trim any extra overhang of fabric. Sew the remaining (2) 1/2” strips of fabric to the remaining two sides, press open the seams and trim. -
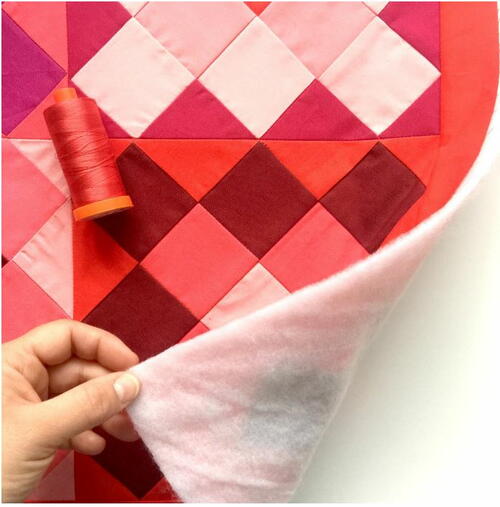
Spray baste a piece of 20” x 20” batting to the backside of your pillow front. (Polyester adds a little extra fluff and does not need to be backed in fabric when quilting the pillow front. It also holds up in the washing machine well.)
-
Quilt as desired. Nicole chose to sew along each seam using her walking foot and a 1/4” spacing.
-
For your envelope backing, you will take your (2) 15” x 20” rectangles of fabric and press along one long side 1/2”, fold and press 1/2” again. Sew along the inside fold.
Lay your pillow right side up and place your envelope backing right side down, with the folded edges toward the middle. Pin around the perimeter of the pillow to hold in place. -
At your machine, stitch around the perimeter using a 1/2” seam allowance, back stitching over the places where the envelope backing meets to reinforce strength. Add a zigzag stitch to the raw edge to finish off the pillow and prevent any loose threads from fraying.
Flip right side out and press.
Stuff with the pillow insert. Nicole prefers one that is the size of the pillow cover or a bit smaller to ensure a nice dense feel.

Read NextTwin Pines Quilted Pillow Pattern