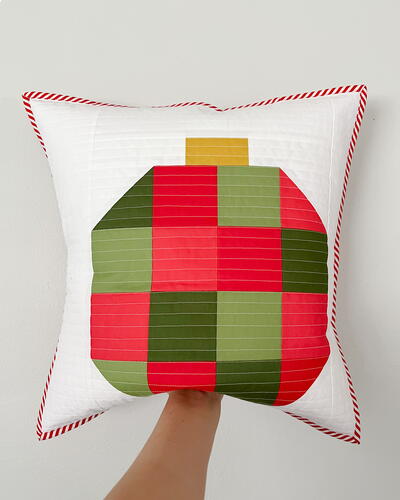
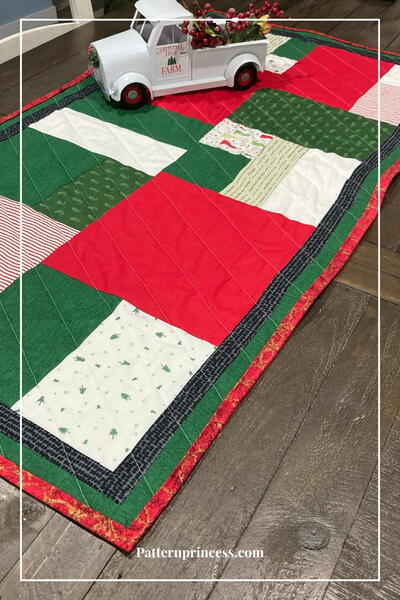
Scrappy Ornament Pillow

Engage in festive creativity with quick and budget-friendly holiday home projects like these charming pillow covers! Transform scraps into a Christmas-inspired scrappy ornament pillow, a delightful addition to your seasonal decor. OUtilize leftover solid scraps from the year's projects to add a personalized touch. While the creative process unfolded rapidly, capturing every step proved challenging amidst the project's swift completion. Embrace the joy of crafting as you infuse your space with holiday spirit and repurpose sewing room remnants!
HolidayChristmas
Materials List
- Ornaments - 4 Scraps, 31/2" x 14" each
- Background - 1 Fat Quarter
- Ornament Top - Scrap - 31/2" x 2"
- Backing - 24" x 24
- Pillow back - 1/2 yard
- Yard - 1/4 yard
SEWING INSTRUCTIONS
ORNAMENT UNIT
-
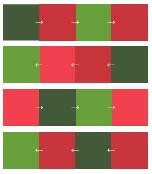
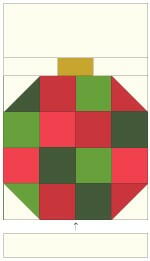
Layout the 12 O1 pieces into four rows of four pieces each.
-
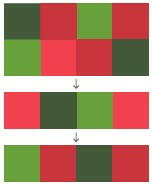
Sew together the rows from left to right, pressing the seams in the directions of the arrows.
-
Sew rows together, nesting seams as you go. Press seams open.
-
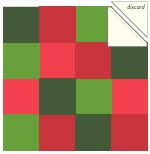
Draw a diagonal line on the wrong size of the B1 squares. Place a B1 square, right sides together, on a corner of the unit from Step 3.
-
Sew on the drawn line, then trim the corner leaving a 1/4" seam allowance. Discard cut pieces and press seam.
-
Repeat with all B1 squares on remaining corners.
-
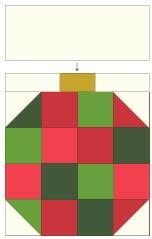
Sew a B2 piece to the O2 piece, followed by another B2 piece.
-
Sew unit from Step 7 to the top of the unit from Step 6. Ornament Unit should measure 121/2" x 14".


PILLOW TOP
-
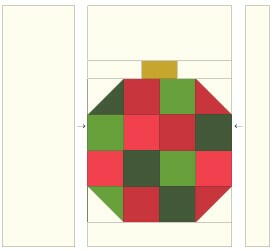
Sew B5 piece to the top of the Ornament Unit. Press seam toward B5 piece.
-
Sew B6 piece to the bottom of the Ornament Unit. Press seam toward B6 piece.
-
Sew B3 piece to the right of unit from Step 10, and a B4 piece to the left of the unit. Press seams towards B3 and B44 pieces. Your pillow top should measure 19" x 19".
FINISH THE PILLOW
-
Make a quilt sandwich by placing the backing fabric right side down, the batting on top, then the pillow top right side up.
-
Baste the layers together using your preferred method. Quilt as desired.
-
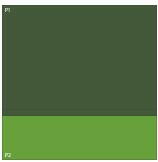
Hem one 19" side on the P1 piece by pressing the edge over to the wrong side of the panel by 1/4". Press the folded edge over another 1/4". Top stitch the hem in place by sewing 1/8" away from the folded edge of the hem.
-
Repeat Step 4 with P2 piece.
-
Overlap the two panels on the backside of the pillow cover and baste the panels in place be sewing around the perimeter of the pillow 1/8 1/4" away from the edge.
-
Sew binding strips together with diagonal seams. Trim excess, leaving a 1/4" seam allowance. Press seams.
-
Once all binding strips are sewn together, fold in half lengthwise, wrong sides together, and press.
-
Sew binding to the pillow cover, lining up the raw edges. Fold binding over and machine or hand stitch to finish.
-
Your project is finished! If you love this tutorial, be sure to check out Janome.com for even more inspiration.


BEFORE YOU START:
- WOF = Width of fabric. All pattern measurements assume fabric to be 42" wide from selvage to selvage
- Seam Allowance = 1/4"
- Press all seams open unless otherwise stated.
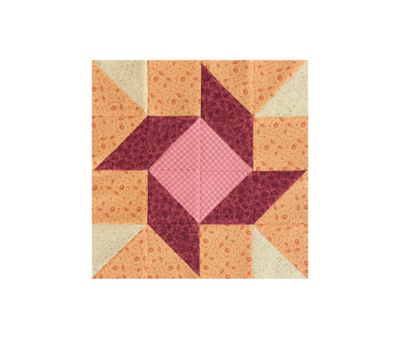
Read NextScrappy Christmas Star Block