Bug Jar Quilt Part 1

The Bug Jar Quilt is a whimsical quilt that's fun for adults and children alike! This bug jar quilt pattern is great for making summer quilts that will remind you of sunny days spent bug collecting in the backyard.
Project TypeMake a Project
Quilt Size48 inches wide x 40 inches long
Time to CompleteWeekend project
Primary TechniqueApplique

Materials:
- At least 9 different types of bug (or creepy crawly) cotton material. I made my quilt top with 9 jars, but you could add another jar per row for 12 jars if you wanted. A fat quarter of each is good.
- Grayish fabric for the jar tops (about 1/2 yard)
- 1-1/2 yards top material
- 1-1/2 yards backing material
- Crib-sized quilting batting
- 5 yards binding - I used Satin Blanket Binding
- Large safety pins, if you use regular batting
- Steam-A-Seam 2
- Quilting needles
- Thread to match or coordinate with your top fabric
- Machine quilting foot with line guide
-
Bug jar and lid pattern
Instructions:
-
Wash and dry all your fabric. I find it easier to make appliques if the fabric is ironed smooth.
-
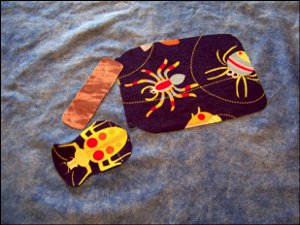
Cut nine jars from bug fabric and nine lids. I also cut a bug out of one of the fabrics to make an open jar on the bottom:
-
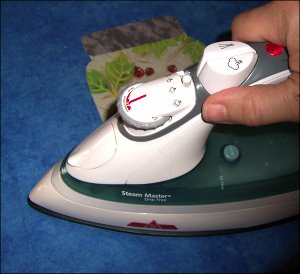
Attach one side of the Steam-A-Seam 2 to the back of the jars and lids. This leaves the sticky back side showing. It's helpful to have this side sticky when you are placing the pieces.
-
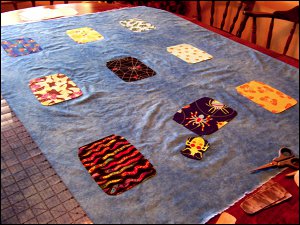
Place your jars and lids on the quilt top. My rows are 7 inches apart and the jars in each row are 5-1/2 inches apart. How far in from the edges will depend on the width of your quilt top material.

-
When you have the jars and lids placed where you want them to be, iron into place.
-
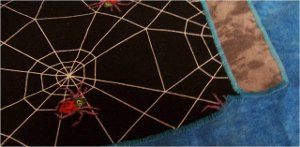
Zigzag stitch around each jar/lid. I used a .2 length and 3.5 width (make a test on scrap first). I started at the bottom of one lid, went all the way around the outside of the jar and lid until I got back to where I started and then sewed across the bottom of the lid.
- Your quilt top is finished! Move on to Bug Jar Quilt Part 2 to quilt and bind it!
This is Part 1 of the Bug Jar Quilt tutorial. Click here for Part 2.
Why You'll Love This Quilt
Hello quilting enthusiasts! Today, we want to share with you the top 3 reasons why you should consider making the Bug Jar Quilt project.
1. Whimsical and Fun Design: The Bug Jar Quilt has a unique and whimsical design that is perfect for adding a playful touch to any room. With its colorful bug jars and cute critters, this quilt is sure to bring a smile to your face every time you see it. Whether you're making it for yourself or as a gift for a child, this quilt is bound to be a hit with anyone who sees it.
2. Perfect for Summer: With its bug-themed design, the Bug Jar Quilt is an ideal project for summer. Whether you're creating a quilt to use on picnics, as a beach blanket, or simply to snuggle up with on a cool summer evening, this quilt will evoke memories of sunny days spent exploring nature and collecting bugs. It's a great way to bring a touch of summer into your home all year round.
3. Beginner-Friendly Project: If you're new to quilting or looking for a quick and easy project, the Bug Jar Quilt is a great choice. With simple shapes and easy-to-follow instructions, this quilt is perfect for quilters of all skill levels. It's a great way to practice your piecing and quilting skills while creating a fun and adorable finished product. Plus, once you've completed Part 1 of the project, you'll be ready to move on to Part 2 and finish your Bug Jar Quilt in no time.
So why wait? Grab your fabric, dust off your sewing machine, and get started on this delightful Bug Jar Quilt project today. Happy quilting!
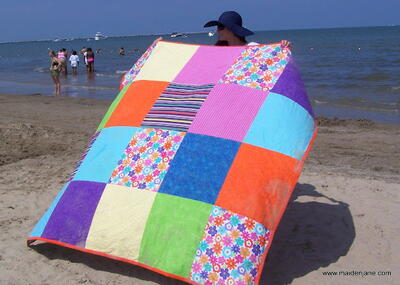
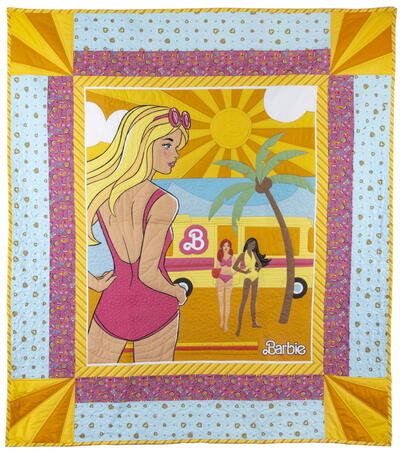
Read NextOversized Beach Quilt