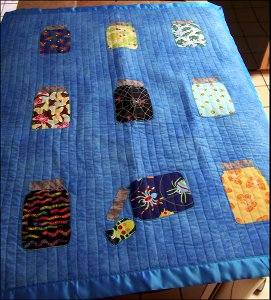
Bug Jar Quilt Part 2
This is Part 2 of the Bug Jar Quilt tutorial. This section will show you how to quilt and bind your bug jar quilt pattern. This tutorial is perfect for making children's quilts for summer bedroom sets or picnics in the park.
Project TypeMake a Project
Quilt Size40 inches wide x 48 inches long
Time to CompleteWeekend project
Primary TechniqueApplique
Materials:
- Quilt top from Bug Jar Quilt Part 1
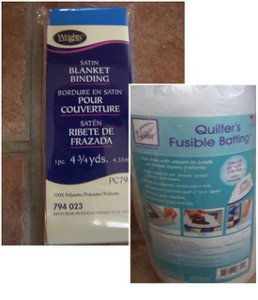
- Batting
- Quilt backing fabric
- Quilting machine needles - these are sharper and work much, much better than regular sewing machine needles when you're going through all those layers.
- Machine thread - I just use my usual thread, but thicker quilting thread is also available.
- Chalk or other removable fabric marker.
- Binding - I'm using purchased satin blanket binding.
- Large safety pins - to baste if you're using non-iron on batting
-
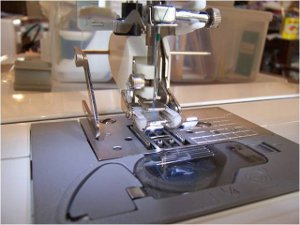
Quilting foot for your machine - this foot helps all the quilting layers move under the needle at the same rate so you don't end up with puckers. It grips the top layer as the feed dogs move the bottom layer along.
Instructions:
-
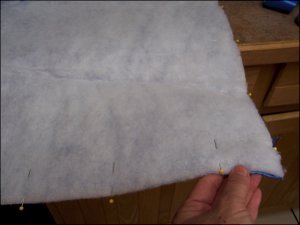
Find a large, flat spot to lay out your pieces. Lay the backing on the bottom and the batting on top. At this point, I like to pin the backing to the batting.
-
Lay the quilt top on top of the batting.
-
If you are using iron on batting, follow the instructions for ironing/fusing it. If you are using regular batting, place safety pins about every six inches apart to hold it together.
-
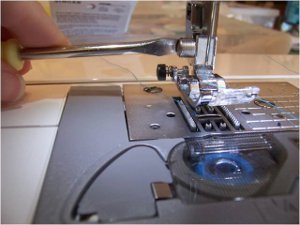
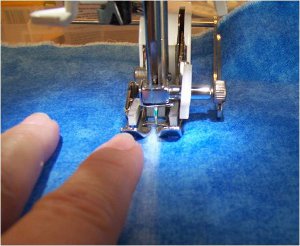
Remove the regular foot from your sewing machine. You may need to take off the regular shank to put your quilting walking foot on. Use the screwdriver that came with your accessories and take off the screw that holds the regular shank on. Put the quilting foot on. I like to have the line guide on the left since it's hard to bunch the quilt up against the machine and still use the quilting foot.
-
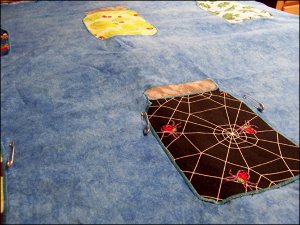
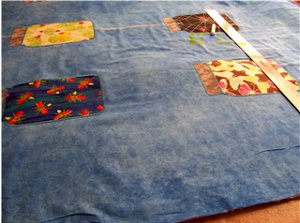
Draw a line with chalk or some other removable marking tool down the center of your quilt.
-
Sew a straight line along the line you just marked. Because you're sewing through a lot more layers than usual, it's a good idea to sew on a test piece to make sure your tension is okay.
-
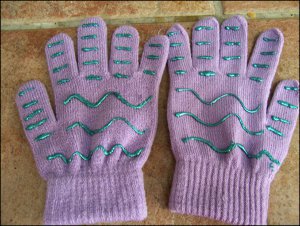
Guiding the quilt can be tough - some people use quilting gloves to help hold the fabric. You can buy them, or you can buy a cheap pair of gloves at the dollar store and use puffy paint to put "grabbing" lines along them.
-
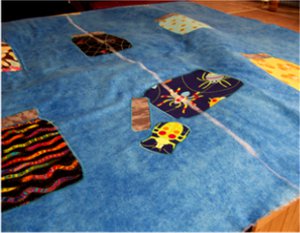
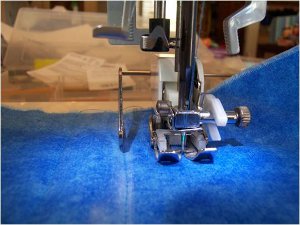
Line your guide up on the line you just quilted. Quilt your next line.
-
Continue in this way until you have quilted the first half. Turn your quilt the other way and use the line guide to quilt the other half. You'll need to keep readjusting the pins to keep from getting puckers. If you're using iron-on batting you'll most likely need to reposition it a couple of times.
-
When the entire quilt is finished, trim the edges.

-
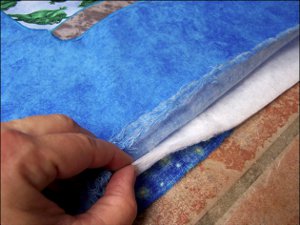
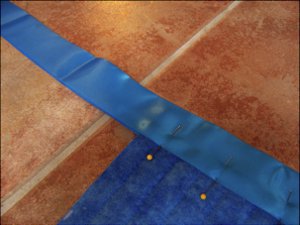
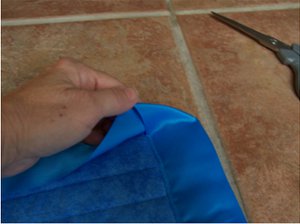
Next, attach the binding. Binding has one side that's shorter than the other. You'll want to pin the shorter side on the top of the quilt. This helps you make sure you're catching the bottom layer of binding in the sewing. First, pin binding along one side and sew it in place. Don't cut the extra off.
-
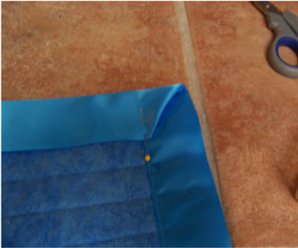
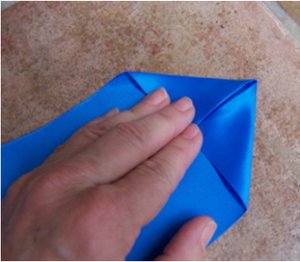
To make a mitered corner, fold the corner as shown below.
-
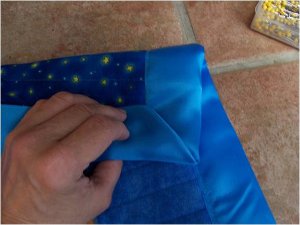
Make sure the back of the corner looks as nice as the front, pin, and sew along the next quilt edge.
-
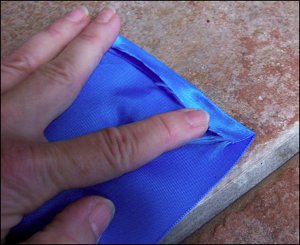
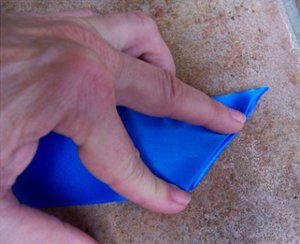
When you get to the end of the binding or the end of the quilt, turn end under about 1/4 inch.
-
Fold as shown below.
-
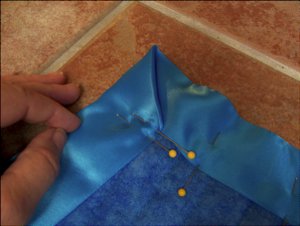
Put mitered edge over the already sewn edge and pin. Sew binding on and then hand sew the diagonal seam in a hem stitch. Depending on the length of your binding, you'll probably have to do this twice.
-
Iron and enjoy!
This is Part 2 of the Bug Jar Quilt tutorial. Click here for Part 1.
Why You'll Love This Quilt
1. It's a fun and whimsical project: The Bug Jar Quilt is a delightful and playful design that will bring a smile to anyone's face. The bug jars with their colorful and cute critters make this quilt perfect for children's bedrooms or for a picnic in the park. The design is perfect for those who love to add a touch of whimsy to their quilting projects.
2. It's a great project for beginners: This quilt project is perfect for quilters of all skill levels, but especially for beginners looking to practice their quilting techniques. The Bug Jar Quilt tutorial provides clear and easy-to-follow instructions on quilting and binding, making it a great learning experience for those who are new to quilting.
3. It's a versatile pattern: The Bug Jar Quilt pattern can be easily customized to suit your preferences. You can choose your favorite colors and fabrics to create a quilt that reflects your personal style. This pattern can also be adapted to different sizes, making it a versatile design that can be used for children's quilts, lap quilts, or even wall hangings.
Overall, the Bug Jar Quilt project is a fun, beginner-friendly, and versatile pattern that is perfect for anyone looking to add a touch of whimsy to their quilting projects. It's a great way to flex your creative muscles and create a beautiful quilt that will be loved by children and adults alike.