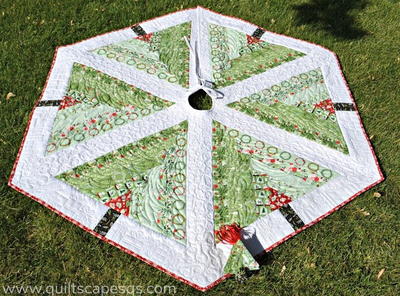
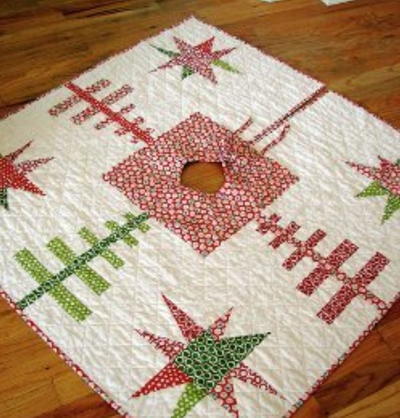
Snow Friends Tree Skirt
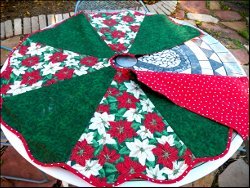
Get ready to feel all warm and fuzzy inside when you see the adorable Snow Friends Tree Skirt. Cute snowmen will be the stars of this Christmas tree skirt pattern that really draws the eye in with impressive piecework. You can use classic Christmas colors or go for a more contemporary approach that will really set your Christmas decor apart from everyone else. If you've been looking for a way to show off your quilting skills on a smaller scale, a quilted tree skirt pattern this extravagant is the perfect choice.

Finished Size: 59" Octagon


Cutting
WOF = Width of fabric.
Note: Use a ¼" seam allowance throughout unless
otherwise directed.
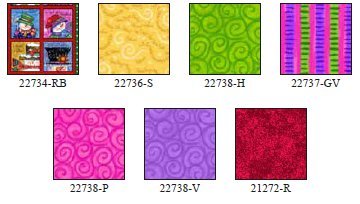
22734-RB Snow Friends panel
- Cut (8) 10" x 10" F panels, centering the panel design.
- Cut 2 of these F panels from the bottom section of the panel.
22736-S Yellow message swirl
- Cut (2) 2¾" x WOF strips. Re-cut strips into (8)2 ¾" x 10" C strips.
22738-H Green swirl tonal
- Cut 4 A2 triangles using the pattern given; cut online labeled “A1/A2 cutting line."
- Cut (8) 2¾" x WOF strips. Re-cut each strip into1 each 2 ¾" x 12" D strip and 2 ½" x 25" J strip.
22737-GV Stripe
- Cut (1) 12 ." x WOF strip. Re-cut strip into (8)5 ¼" I/IR rectangles.
-
Cut (8) 2½" x WOF strips. Trim strips to 2½" x27" K strips.
22738-P Pink swirl tonal
- Cut 4 A1 triangles using the pattern given; cut online labeled “A1/A2 cutting line."
-
Cut (3) 2¾" x WOF strips. Re-cut strips into 4each 2¾" x 8" B2 and 2¾" x 14" E2 strips.
22738-V Lavender swirl tonal
-
Cut (3) 2¾" x WOF strips. Re-cut strips into 4each 2¾" x 8" B1 and 2¾" x 14" E1 strips.
21272-R Red tonal
- Cut (4) 2" x WOF strip. Re-cut strips into (16) 2"x 10 ½" G strips.
- Cut (1) 13" x WOF strip. Re-cut strip into (16) 2"x 13" H strips.
22738-V Lavender swirl tonal
- Cut (2) 64" lengths for backing.
Making the Panel Wedges
-
Referring to Diagram 1, center and sew a B1 strip
to A1; add C, D and finally E1 to make an A1
unit. Repeat to make a total of four A1 units.

-
Repeat step 1 with A2, B2, C, D and E2 pieces to
make an A2 unit (Diagram 2).

-
Cut (4) 5¼" x 12 ." I/IR rectangles in half from
the upper left corner to the lower right corner
to make a total of 8 I triangles. Repeat with the
remaining four I/IR rectangles, cutting from the
upper right corner to the lower left corner to
make 8 IR triangles (Diagram 3).

-
Sew a G strip to opposite sides and H strips to
the top and bottom of one F panel; press seams
toward G and H strips. Trim the framed panel
to 12¼" wide x 11 ." high, centering the panel
when trimming (Diagram 4). Repeat to make a
total of eight framed panels.

-
Sew an I and IR triangle to 1 framed panel
(Diagram 5). Press seams toward I and IR.
Repeat on all framed panels.

-
Center and sew a J strip and then a K strip to the
bottom of the I/IR framed panel to complete a
panel unit (Diagram 6). Press seams toward J and
K strips.

-
Sew a panel unit to the E1 edge of each A1 unit
and to the E2 edge of each A2 unit to complete
the A1 and A2 wedge units (Diagram 7).

-
Select one A1 wedge unit. Align a long
straightedge with the edge of A1 and the edge
of I; trim excess on this side of the wedge unit
(Diagram 8). Repeat on the opposite side to
complete one A1 wedge.

-
Repeat step 8 with all wedge units to complete
a total of 4 each A1 and A2 wedges. Note: The
edges on each wedge piece are bias and are easily
stretched. Handle pieces with care.
Completing the Tree Skirt
Note: Refer to the tree skirt drawing for positioning
of units.
-
Sew an A1 wedge to an A2 wedge to make a
quarter-unit; press seam open. Repeat to make a
total of (4) quarter-units.
-
Join (2) quarter-units to make a half-unit; repeat.
Press seams open. Join the two half-units, leaving
(1) seam open to complete the tree-skirt top.
Press seam open.
-
Layer, pin and baste the tree-skirt top on a 68"square
piece of batting. Quilt as desired. Trim
batting edges even with the tree skirt top edges.
-
Remove the selvage edges from the backing
pieces. Join the pieces on the 64" edges with a ½"
seam allowance. Press seam open. Trim to make
a 64" x 64" backing piece.
-
Place the backing piece right sides together with
the quilted tree skirt top; stitch all around, leaving
a 10" opening on 1 side. Trim backing even with
center circle and outer edges of the quilted top.
-
Turn right side out through the opening. Press
edges flat. Turn the opening seam allowance to
the inside ¼" and hand- or machine-stitch the
opening closed. Press edges again.
-
Quilt in the ditch of some of the seams to attach
the backing to the quilted layers. Topstitch
around outer edges.
-
Align and stitch 3 sets of Velcro tabs to the open
side edges for closing the opening during use.
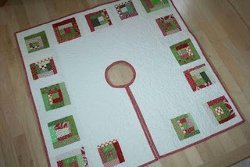
Completing As A Topper
-
Use the entire A1/A2 template when cutting
pieces.
-
Complete the wedge units and join as for tree
skirt except do not leave an open seam. There
will be no opening in the center or open side
seam.
-
Quilt the topper as for the tree skirt except do not
clip any curved seams or attach any Velcro tabs.
Note: Print template at 100 percent and with page scaling displayed at “None.”
(click image for full size)

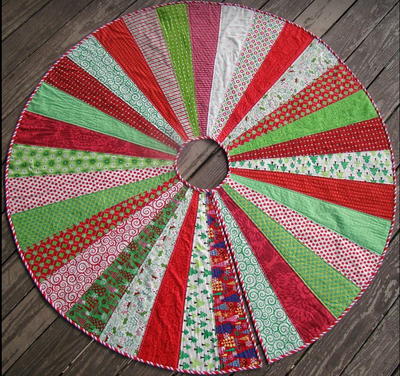
Read NextHexie Tree Skirt Pattern