How to Sew the Lazy Daisy Stitch
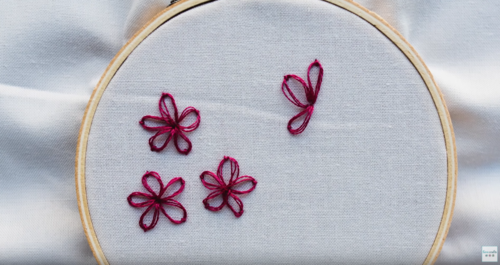
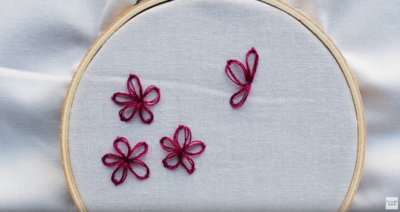
What better way to practice your embroidery skill than with this super easy lazy daisy stitch? This How to Sew the Lazy Daisy Stitch video tutorial will take you step-by-step through how to accomplish this embroidery technique. This specific stitch is the perfect way to add delicate flowers to your DIY quilts or sewing projects. Plus, you can complete this embroidery stitch within a few minutes meaning you can make a field of lazy daisy stitches in less than an hour. This is definitely a great embroidery basic stitch to have on hand!
Project TypeLearn a Technique

Materials List
- Sewing needle
- Thread
How to Sew the Lazy Daisy Stitch
Lazy Daisy Embroidery Stitch Instructions
-
Come up in the center of your daisy.
-
Put your needle back in a thread or two away fromw here you came in, and make a loop.
-
Bring your needle back up at the top of your daisy petal, stick your needle through the loop you created, and carefully pull, and tack it down.
-
Repeat for more times until you have all five petals.

